15
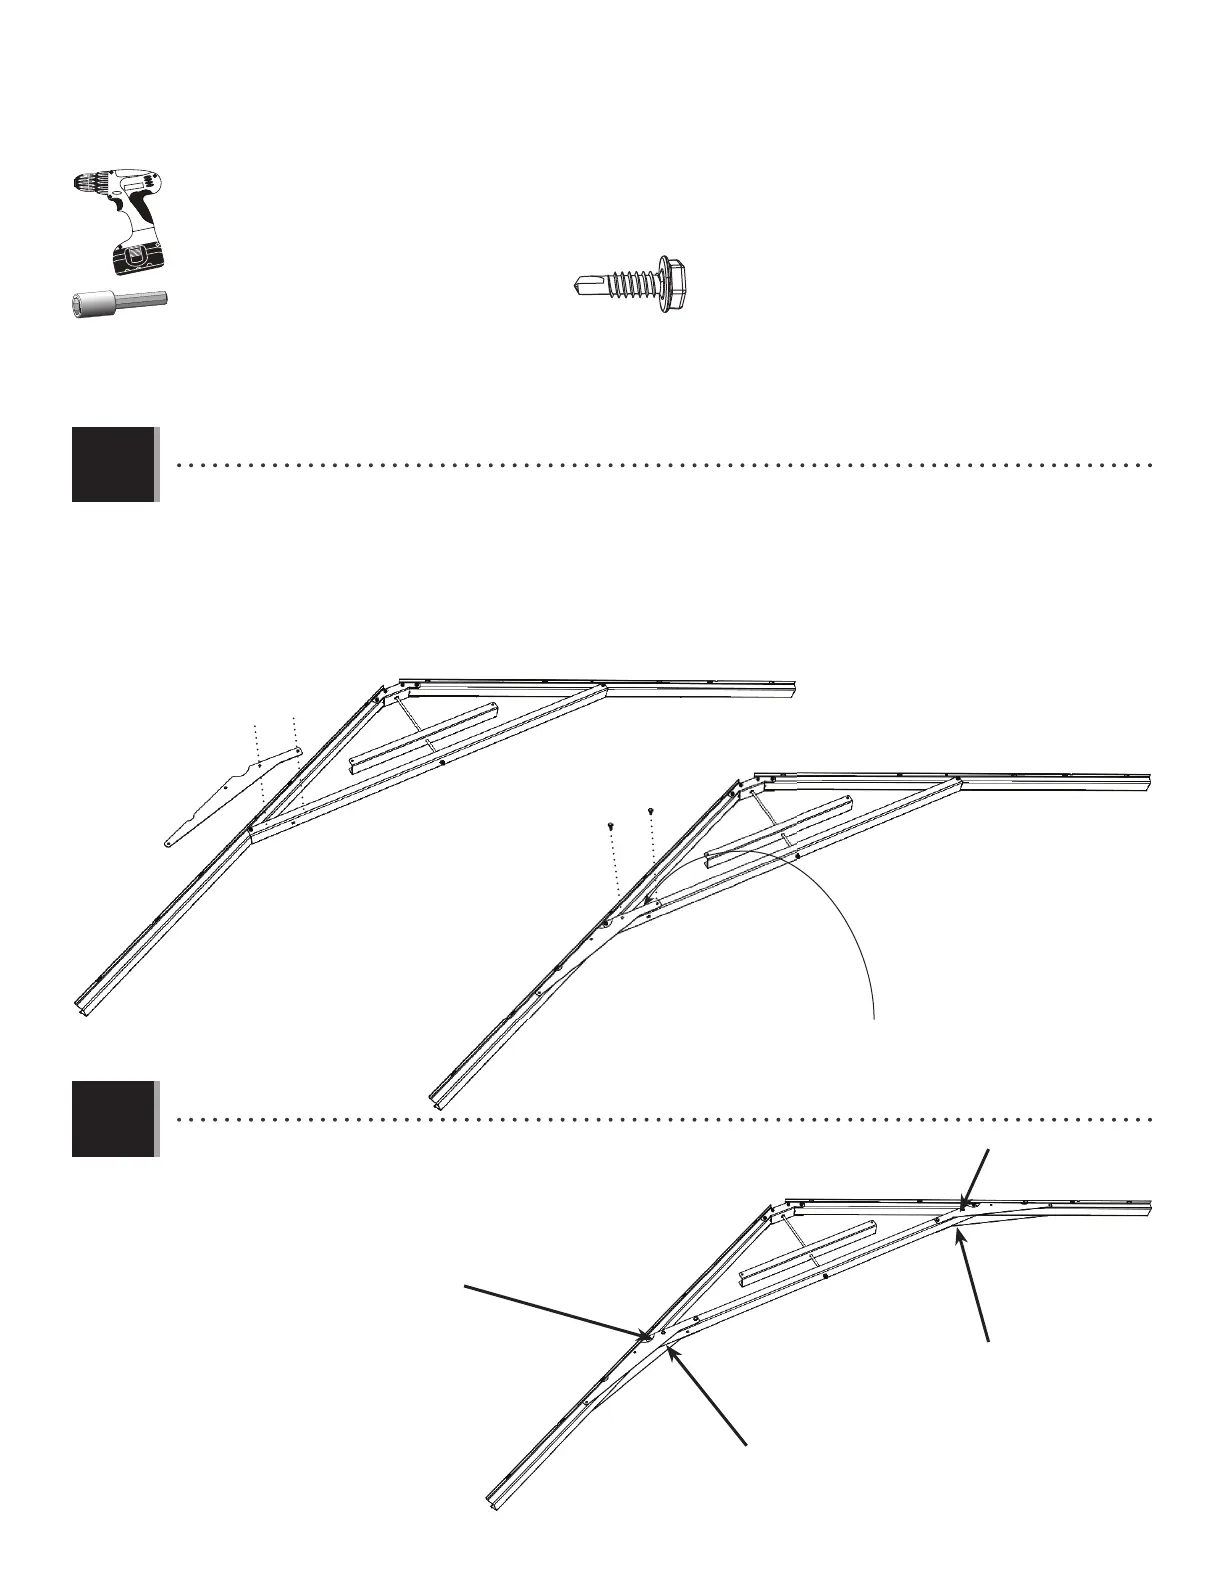
TOOLS AND HARDWARE REQUIRED / INSTRUMENTAL Y HERRAJE REQUERIDO / OUTILS ET QUINCAILLERIE REQUIS
X SECTION 2 (CONTINUED) / SECCIÓN 2 (CONTINUACIÓN) / SECTION 2 (SUITE)
2.7
2.8
• Edge of Gusset should be fl ush with edge of Brace.
• El borde de la Placa de refuerzo debe estar alineado con el borde del Soporte.
• Le bord du Gousset doit être aligné avec le bord du Support.
#1
#2
#3
#4
BRK (x8)
3/8"
(10 mm)
BQW
BQW
BQW
BQW
BQW
• Align the Gusset (BQW) with the Truss Assembly as shown. Insert only two (2) Screws (BRK) through the Gusset and
Large Truss Brace at the locations shown. You must use a drill and 3/8" (10 mm) nut driver for this step.
• Alinee la Placa de refuerzo (BQW) con el Conjunto de la cercha como se muestra. Inserte sólo dos (2) Tornillos (BRK) a
través de la Placa de refuerzo y el Soporte grande de la cercha a las ubicaciones indicadas. Es preciso usar un taladro
eléctrico y una llave de tuerca de 3/8" (10 mm) en este paso.
• Alignez le Gousset (BQW) avec le Montage de la ferme comme illustré. Insérez seulement deux (2) Vis (BRK) à travers
le Gousset et le Grand Support aux emplacements indiqués. Il faut utiliser une perceuse électrique et un tournevis à écrou
de 10 mm dans cette étape.
• Repeat the last step for all four Gussets (BQW).
• Repita el paso anterior para todos los cuatro Gussets (BQW).
• Répétez l’étape précédente pour les quatre Gussets (BQW).