25
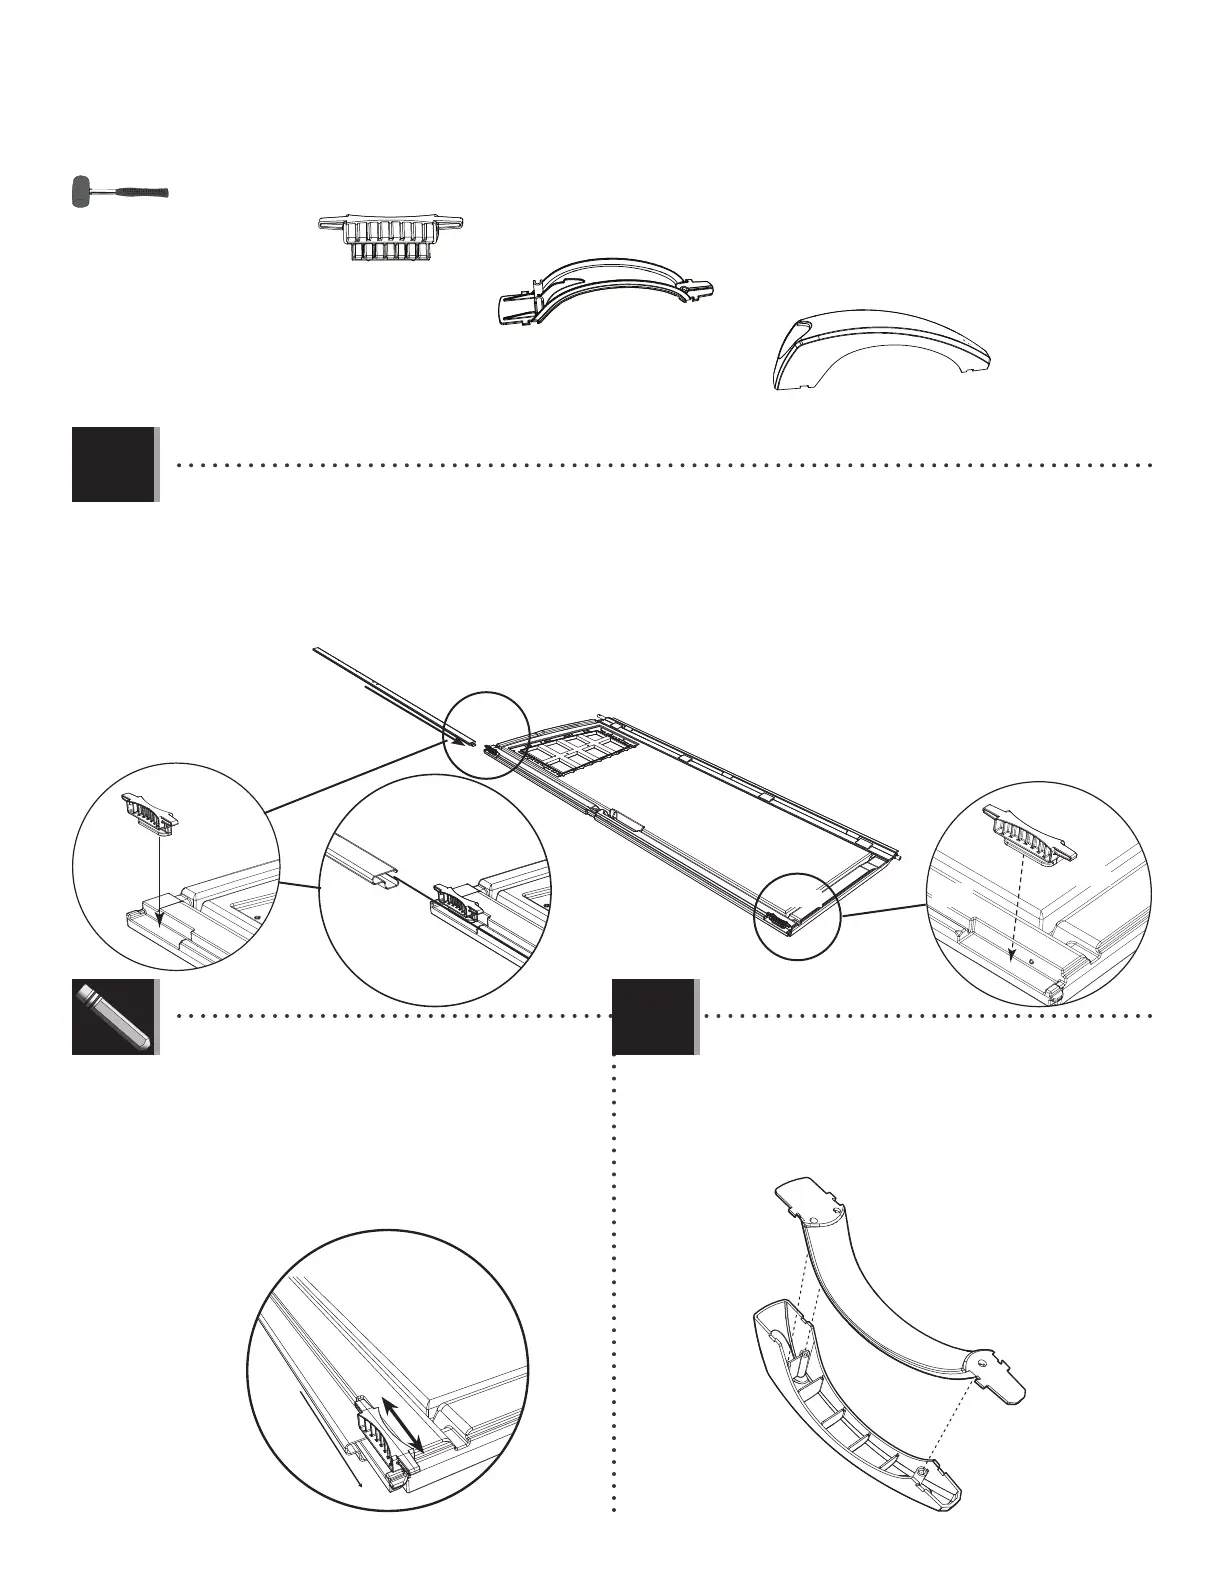
TOOLS AND PARTS REQUIRED / OUTILS ET QUINCAILLERIE REQUIS / INSTRUMENTAL Y HERRAJE REQUERIDOS
X SECTION 4 (CONTINUED) / SECTION 4 (SUITE) / SECCIÓN 4 (CONTINUACIÓN)
BLH
BLH
BLH
AHM
AHM
BDJ
AHM
AHM
• Set the Deadbolts (AHM) down into the recesses at the top and bottom of the Door. Then, slide the Door End Channel
(BLH) over the edge of the Door and the bottom of the Deadbolts as shown.
• Mettre les loquets à pêne dormant (AHM) dans les espaces vides aux parties supérieure et inférieure de la porte.
Ensuite, faire glisser le canel de la porte (BLH) sur le bord de la porte et les parties inférieures des loquets à pêne
dormant comme indiqué.
• Poner los cerrojos (AHM) en los huecos a las partes superior e inferior de la puerta. Entonces, deslizar el canal para
el borde de la puerta (BLH) sobre el borde de la puerta y las partes inferiores de los cerrojos come se muestra.
AHM
AHM (x2)
4.2
LIFETIME
©
• Note: The Deadbolts are used for locking the door. They may not move
freely at fi rst. You may need to tap them up and down a few times with a
rubber mallet to work them in.
• Remarque : Les loquets s’utilisent pour fermer la porte. Au debut, il se
peut que les loquets ne se déplaceraient librement. Il faut peut-être les
taper légèrement à l’aide d’un maillet en caoutchouc pour les desserrer.
• Nota: Se usan los cerrojos para cerrar la puerta. Al principio, pueden que
no se desplacen libremente. Puede que necesite darlos unos golpecitos
con un mazo de goma para afl ojarlos.
4.3
BYS
BYR
• Attach the two Handle Pieces (BYR & BYS) together
as indicated.
• Attacher les deux pièces de la poignée (BYR et BYS)
comme indiqué.
• Conectar las dos piezas del picaporte (BYR y BYS)
como se muestra.
BYS (x1)
BYR (x1)