40
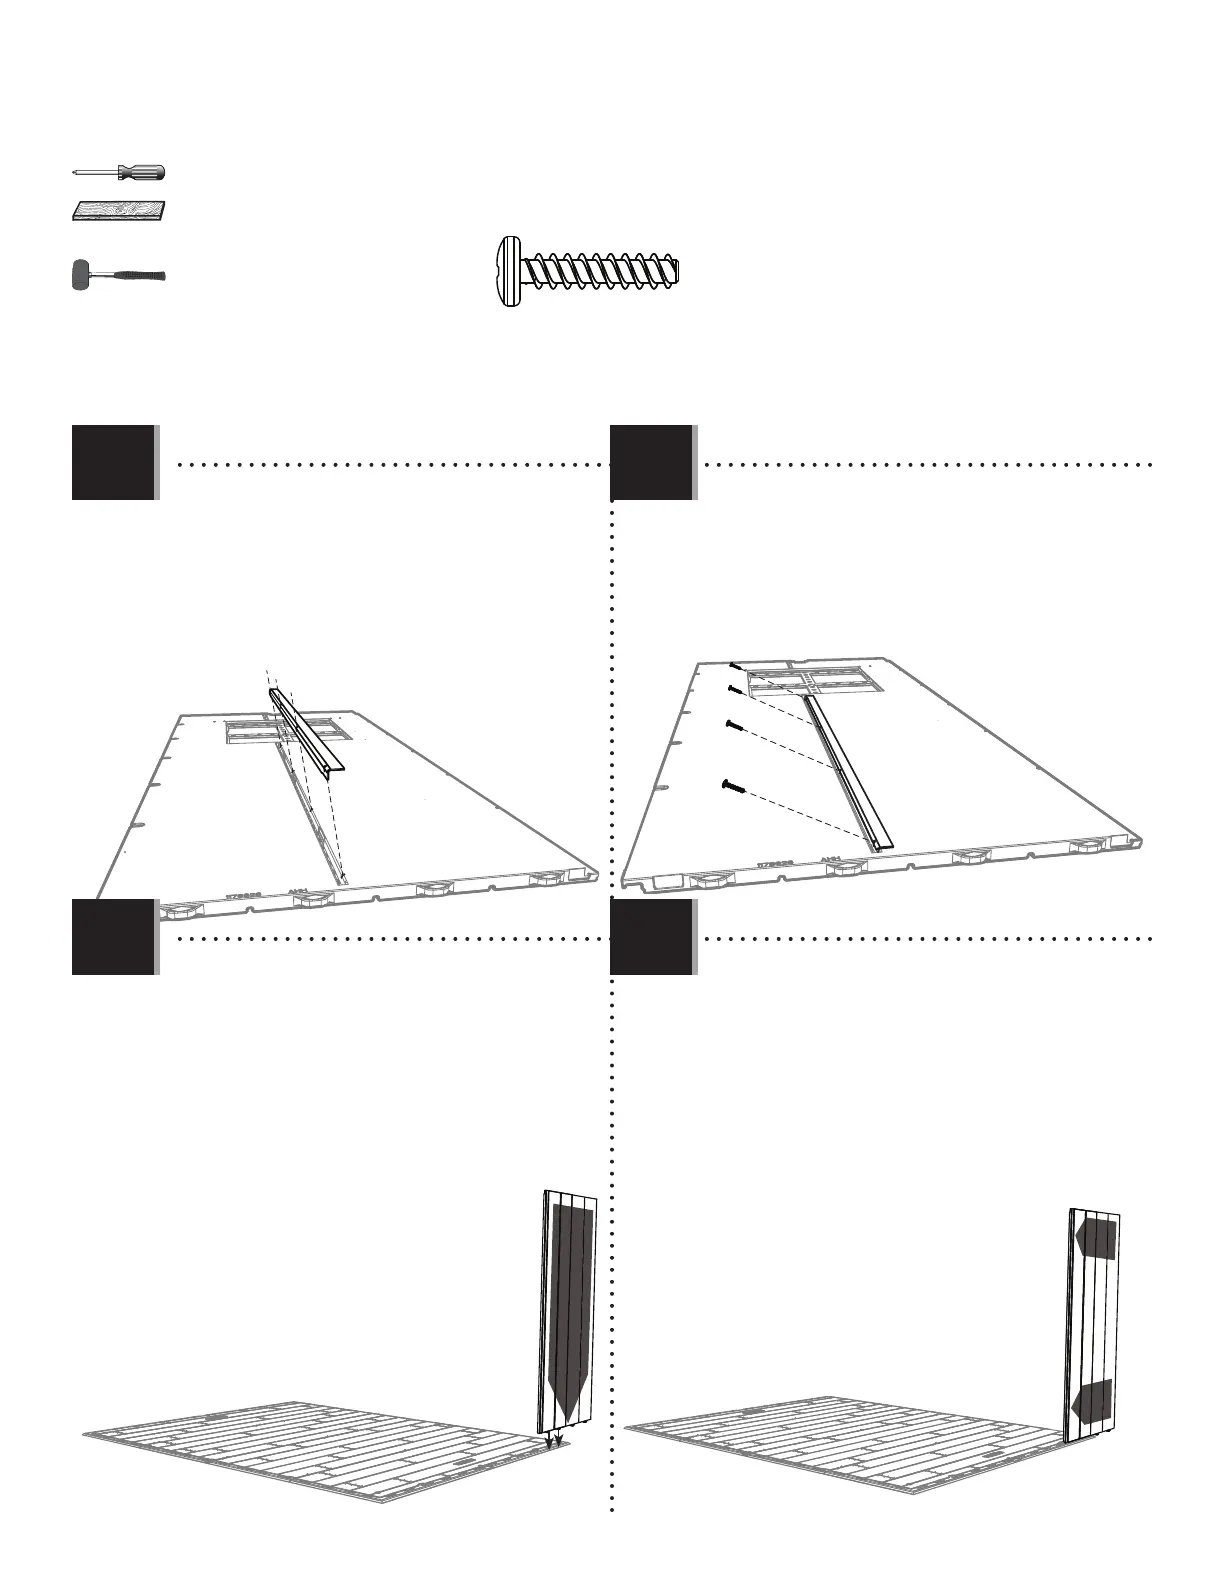
TOOLS AND HARDWARE REQUIRED / OUTILS ET QUINCAILLERIE REQUIS / INSTRUMENTAL Y HERRAJE REQUERIDOS
X SECTION 7 (CONTINUED) / SECTION 7 (SUITE) / SECCIÓN 7 (CONTINUACIÓN)
• Insert the two left-most tabs at the bottom of
the Corner Panel (AGY) into the two right-most slots
along the edge of the Floor.
• Insérez les deux languettes gauches au bord
inférieur du panneau mural angulaire (AGY) dans les
deux rainures droites le long du bord du
plancher.
• Introduzca las lengüetas al borde
inferior del panel mural angular (AGY) en las
ranuras a lo largo del borde del piso.
AIW (x1)
7.7 7.8
AGY
• Slide the Panel to the left as far as it will go.
• Faites glisser le panneau à gauche autant que
possible.
• Deslice el panel a la izquierda lo sumo posible.
7.5 7.6
ADV (x4)
ADV
FLB
AHH
• Align the holes in the Wall Support Channel (FLB)
with those in the center groove of the Window Wall
Panel (AHH).
• Alignez les trous dans le canal de support mural
(FLB) avec ceux dans la rainure centrale du panneau
mural avec fenêtre (AHH).
• Alinee los agujeros en el canal de soporte mural
(FLB) con ellos en el panel mural con ventana (AHH).
• Secure the Channel to the Panel using four (4)
Screws (ADV). Note the angle of the Screws.
• Fixez le canal au panneau en utilisant quatre (4)
vis (ADV). Notez l’angle des vis.
• Sujete el canal al panel usando cuatro (4) tornillos
(ADV). Note el ángulo de los tornillos.
ADV
ADV
ADV
4