59
TOOLS AND PARTS REQUIRED / OUTILS ET PIÈCES REQUIS / INSTRUMENTAL Y HERRAJE REQUERIDOS
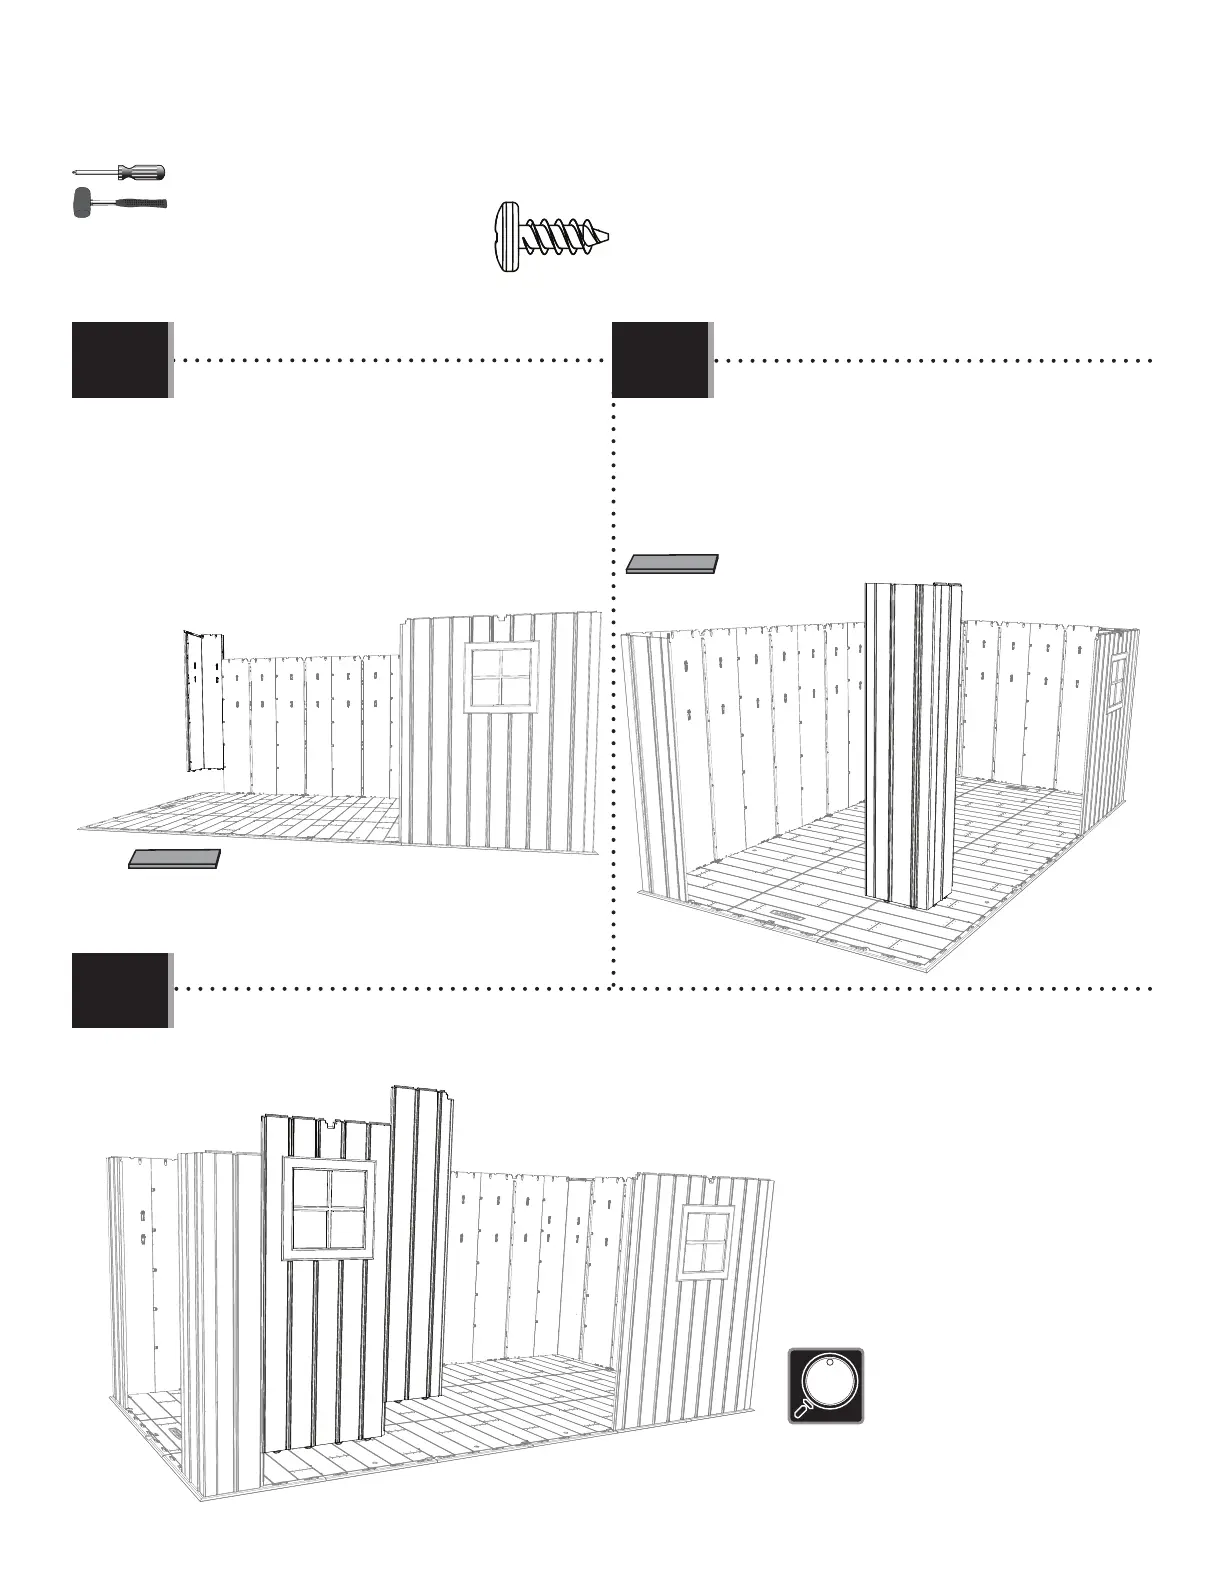
X SECTION 7 (CONTINUED) / SECTION 7 (SUITE) / SECCIÓN 7 (CONTINUACIÓN)
• Insert this corner wall panel (AGN) in the same way as
the fi rst one. Secure with fi ve (5) screws (ADZ).
• Insérez le panneau angulaire (AGN) de la même manière
que le premier panneau angulaire. Attachez-le à
l’aide de cinq (5) vis (ADZ).
• Inserte este panel angular (AGN) de la misma manera
que el primer panel angular. Sujételo con cinco
(5) tornillos (ADZ).
ADZ (x15)
AGN
AIW (x1)
7.16
7.18
7.17
AGY
AHH CKK
• Insert the next two panels (AHH, and CKK) in the order shown. Secure with fi ve (5) screws (ADZ) each.
• Insérez les deux panneaux (AHH, et CKK) dans l’ordre illustré. Attachez-les à de cinq (5) vis (ADZ) chaque un.
• Inserte los dos paneles (AHH, y CKK) en el orden ilustrado. Sujetelos con cinco (5) tornillos (ADZ) cada uno.
• For the left, front corner panel (AGY), repeat the step
you did for the right, front corner panel.
• Pour le panneau angulaire (AGY) avant gauche, répéter
les étapes réalizées pour le panneau angulaire
avant droit.
• Para el panel angular (AGY) delantero izquierdo,
repetir los pasos efectuados para el panel
angular delantero derecho.
AIW (x1)
• If the bushings are in the way, temporarily
remove them to insert the wall panel.
• Si les bagues interférent avec l’installation,
les retirer temporairement pour pouvoir
insérer le panneau mural.
• Si los casquillos interfi eren con la
instalación, retirarlos temporalmente para
poder insertar el panel mural.