25
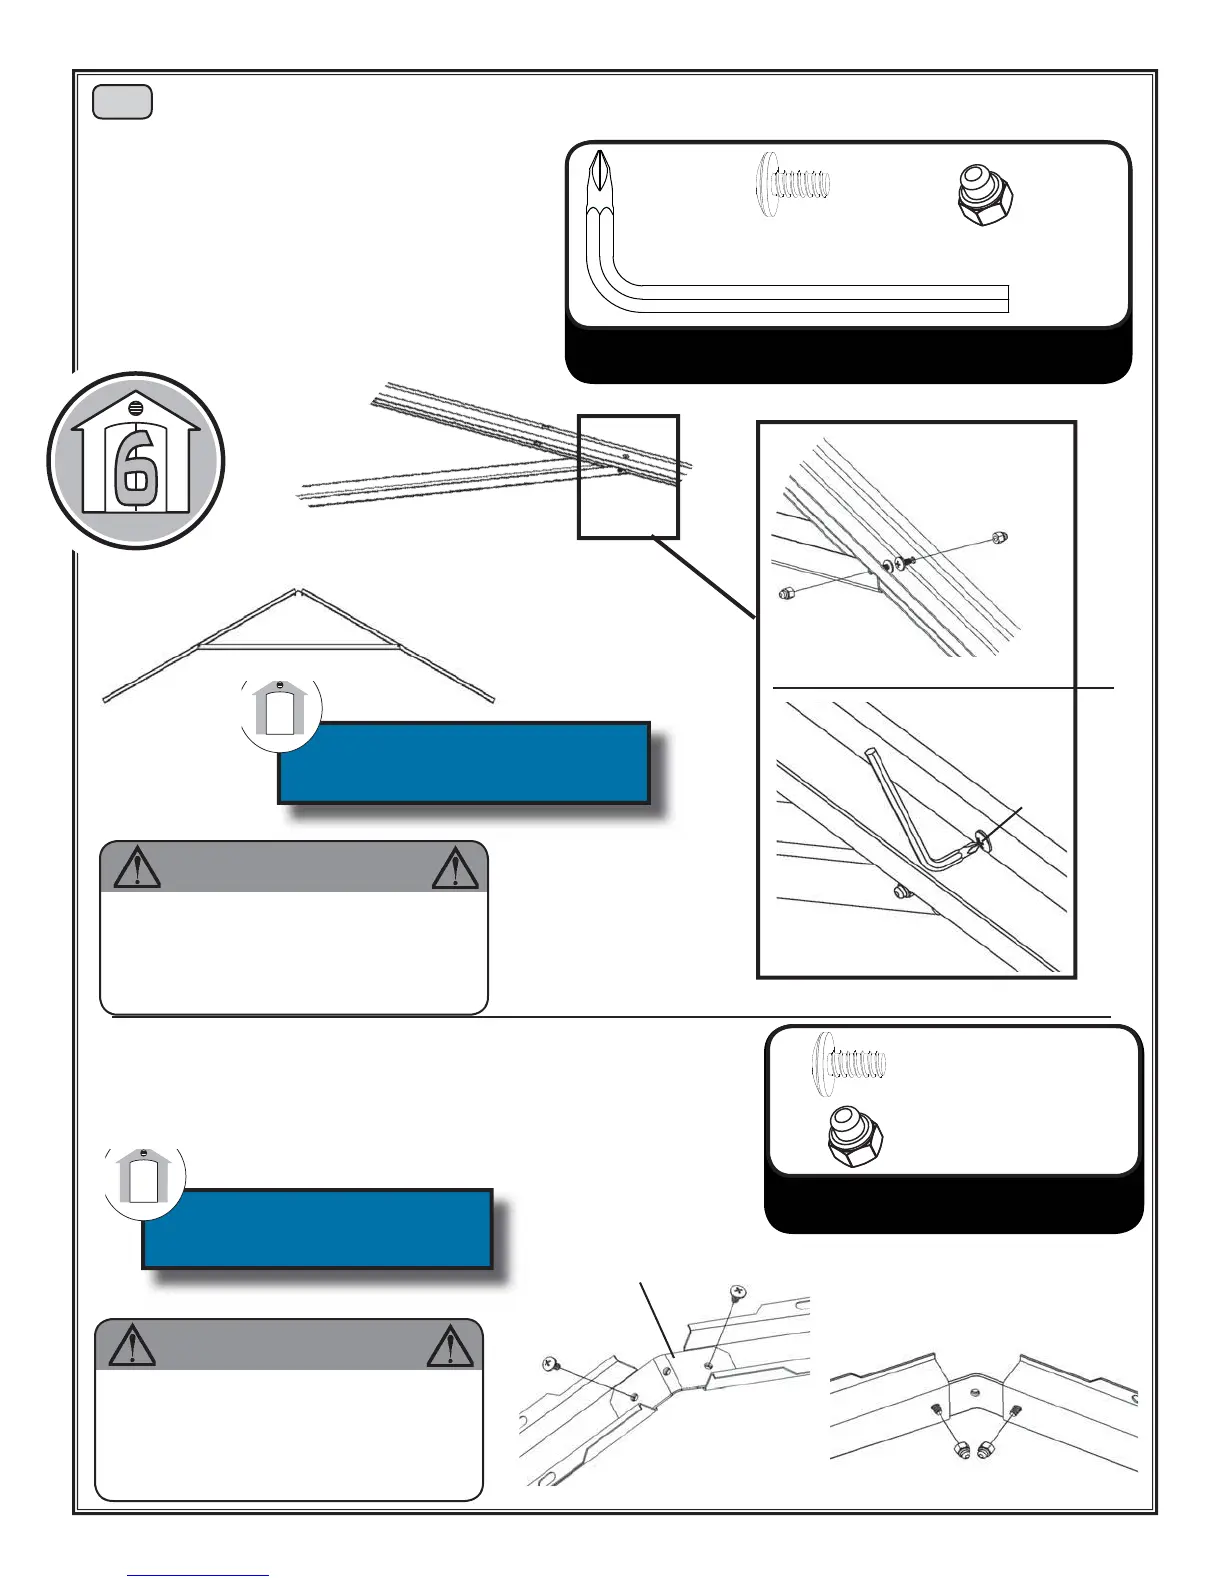
12.2: Use Truss Connector (TA) to attach Roof Truss Channels at
top. Secure with Screws (TC) and Cap Nuts (HK). Before completely
tightening, lay assembly on its side to be sure Channels and Brace are
parallel. Completely tighten all hardware.
12
12.1: Attach Brace (AB) to two Roof Truss
Channels (AC) (one on each side of Brace).
Secure Brace with Screws (TC) and Nuts (HK).
TD (1)
HK (4)
Hardware Bags:
1021658
3/8” Wrench (1)
TC (4)
Hardware Bags:
1021658
3/8 “ Wrench (1)
TC (6)
HK (6)
The nut goes
on outside of
the truss.
Use L-key (TD) to hold screw
(TC) in place while tightening
nut (HK).
Be sure that Truss Connector
is aligned with the Truss
Channels.
Assemble Truss
TC
HK
WARNING
Do not overtighten the Cap Nut. If the end
of the Bolt breaks through the plastic cap,
call our Customer Service Department.
Exposed threads on the end of the Bolt
may cause serious injuries.
TC
HK
HK
TC
TA
WARNING
Do not overtighten the Cap Nut. If the end
of the Bolt breaks through the plastic cap,
call our Customer Service Department.
Exposed threads on the end of the Bolt
may cause serious injuries.