26
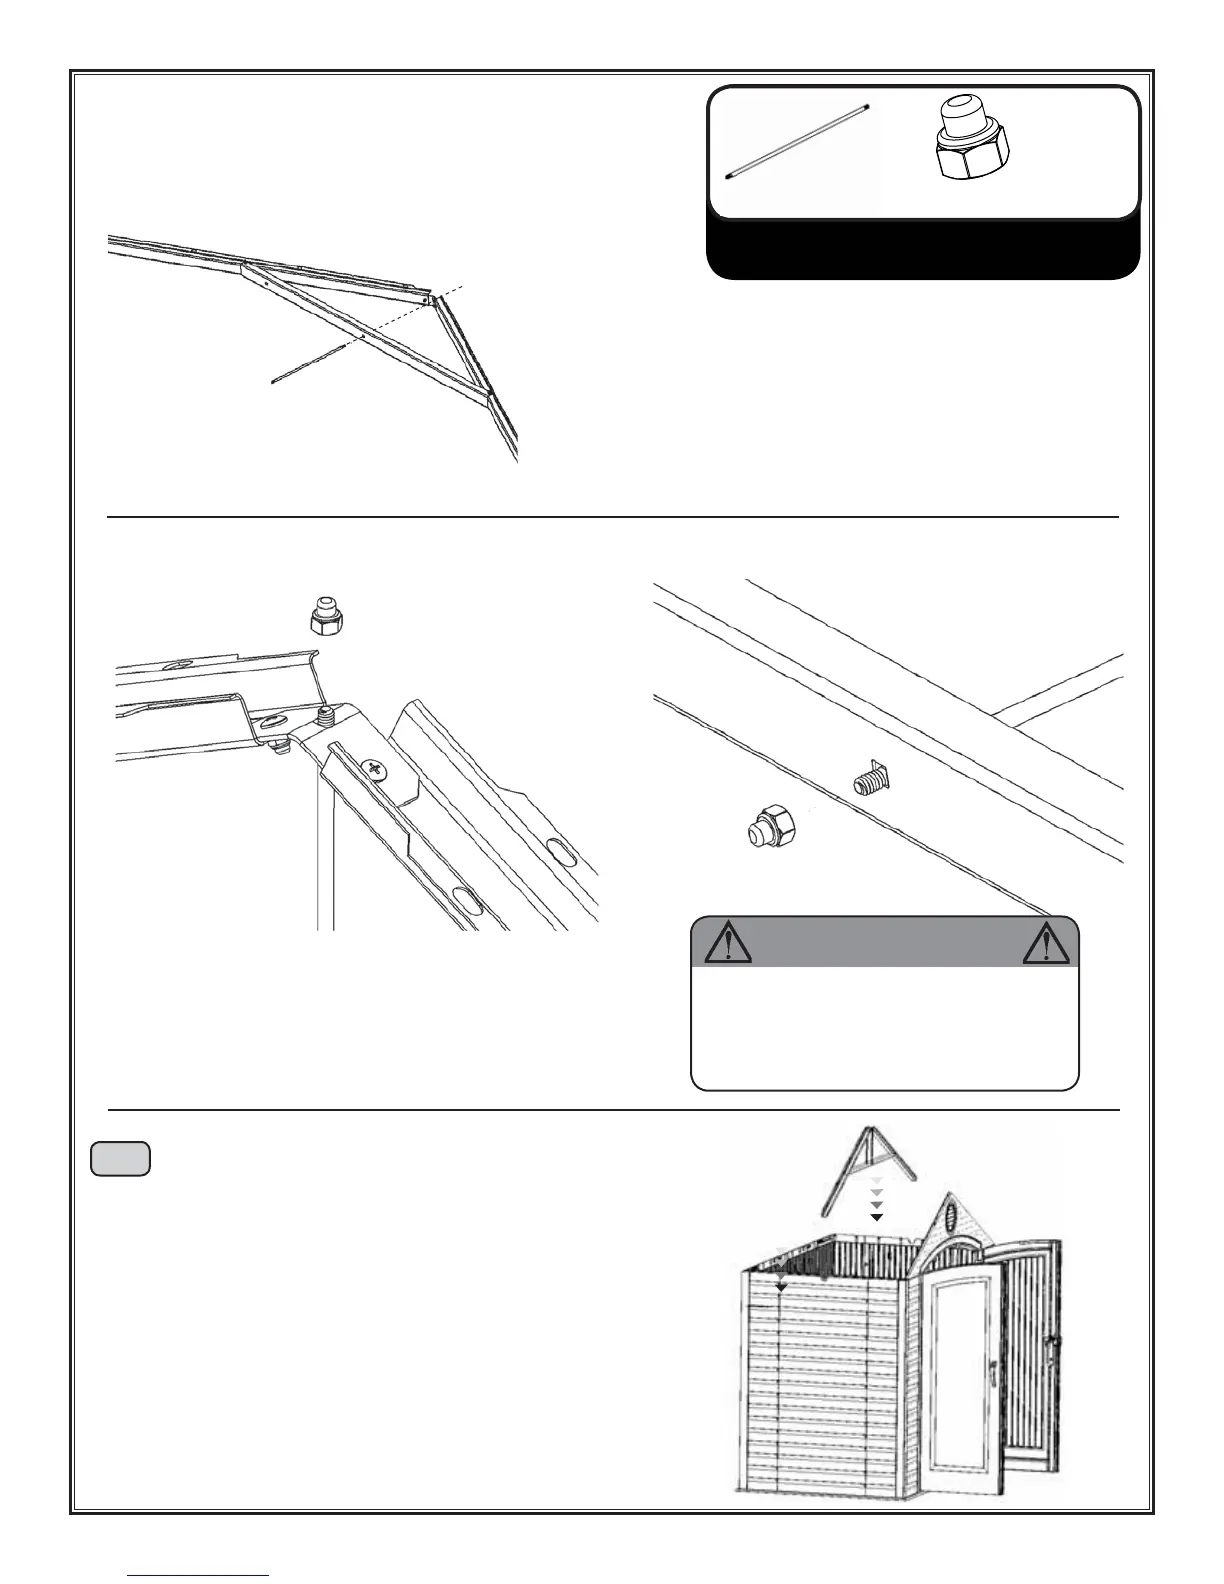
12.3: Slide a Threaded Rod (SA) through the Roof Truss Brace
and the top of the Truss Connector.
HL (2)
3/8” Wrench (1)
12.4: Secure the top and bottom of the Threaded Rod with a 1/4” Cap Nut (HL).
Repeat Steps A-D for each Truss.
SA
SA (1)
Hardware Bags:
1001882
13
13.1: Place a Truss into the fi rst set of notches behind the front Gable.
Truss & Roof Installation
HL
HL
SA
WARNING
Do not overtighten the Cap Nut. If the end
of the Bolt breaks through the plastic cap,
call our Customer Service Department.
Exposed threads on the end of the Bolt
may cause serious injuries.