27
Be sure to carefully read and follow the roof installation instructions and notes.
Following each step in the order listed will minimize potential complications during
installation.
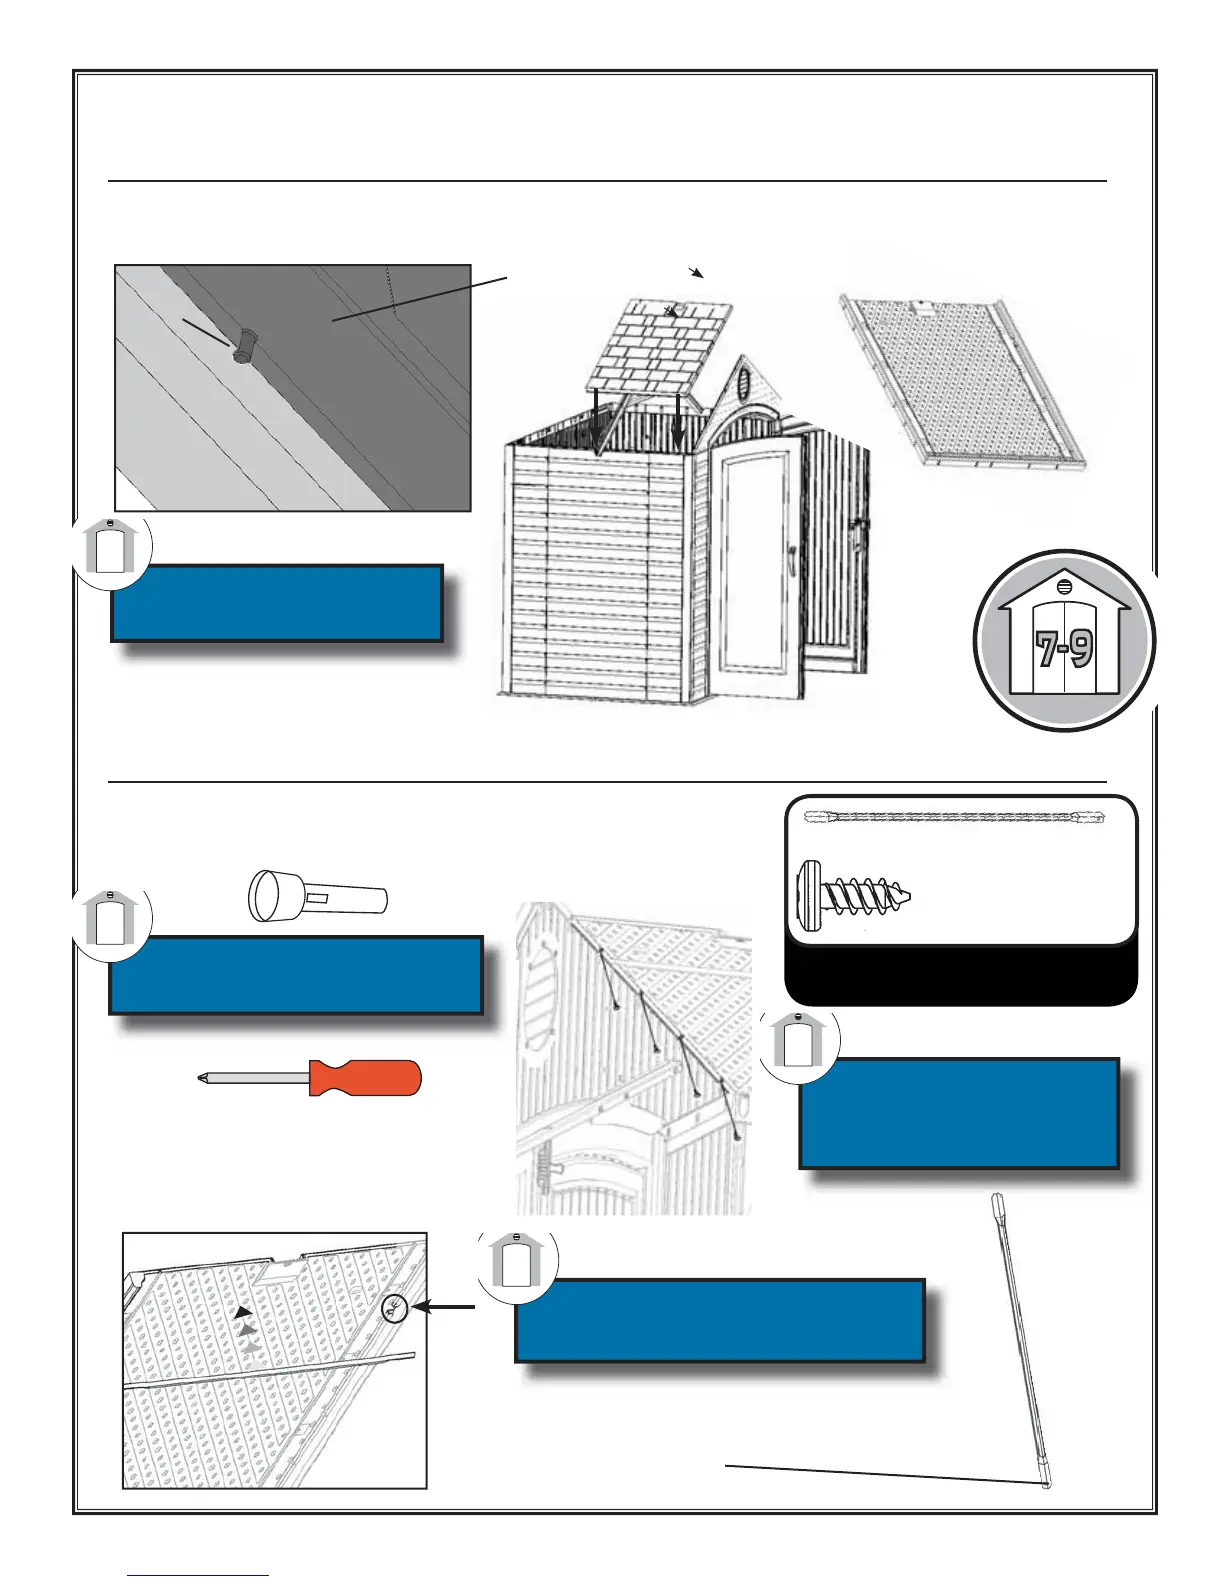
13.2: Place a Roof Panel (114) between the Truss and the Front Gable. Be sure the alignment nub in the roof
panel fi ts into notch on the truss.
Top of Roof Panel
Truss Channel
Roof Panel
Nub
Be sure the nub in the Roof
Panel fi ts into the notch in
the Truss.
13.3: Secure the Roof Panel to the Front Gable and Truss Channel with all
but the very top Screws (SS). Slide the metal Roof Support (AG) into place
between the Roof Panel and Gable/Truss. Insert top screws.
SS (7)
AG (1)
(Not actual size)
Use a fl ashlight to check that
holes line-up before inserting
screws.
The Roof Support fi ts into the
notches in the Roof Panel (as
shown).
Only use a hand
screwdriver on this step
A second person on
a ladder should apply
downward pressure while
attaching roof parts.
AG
Hardware Bags:
1001634
Drill/Screwdriver
Note: The holes in the Roof Support Strips are for
manufacturing purposes only.