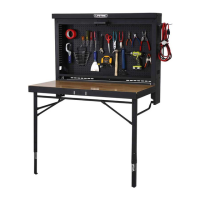
10
TOOLS AND HARDWARE REQUIRED / OUTILS ET QUINCAILLERIE REQUIS / INSTRUMENTAL Y HERRAJE REQUERIDOS
u SECTION 1 (CONTINUED) / SECTION 1 (SUITE) / SECCIÓN 1 (CONTINUACIÓN)
1.8
1.10
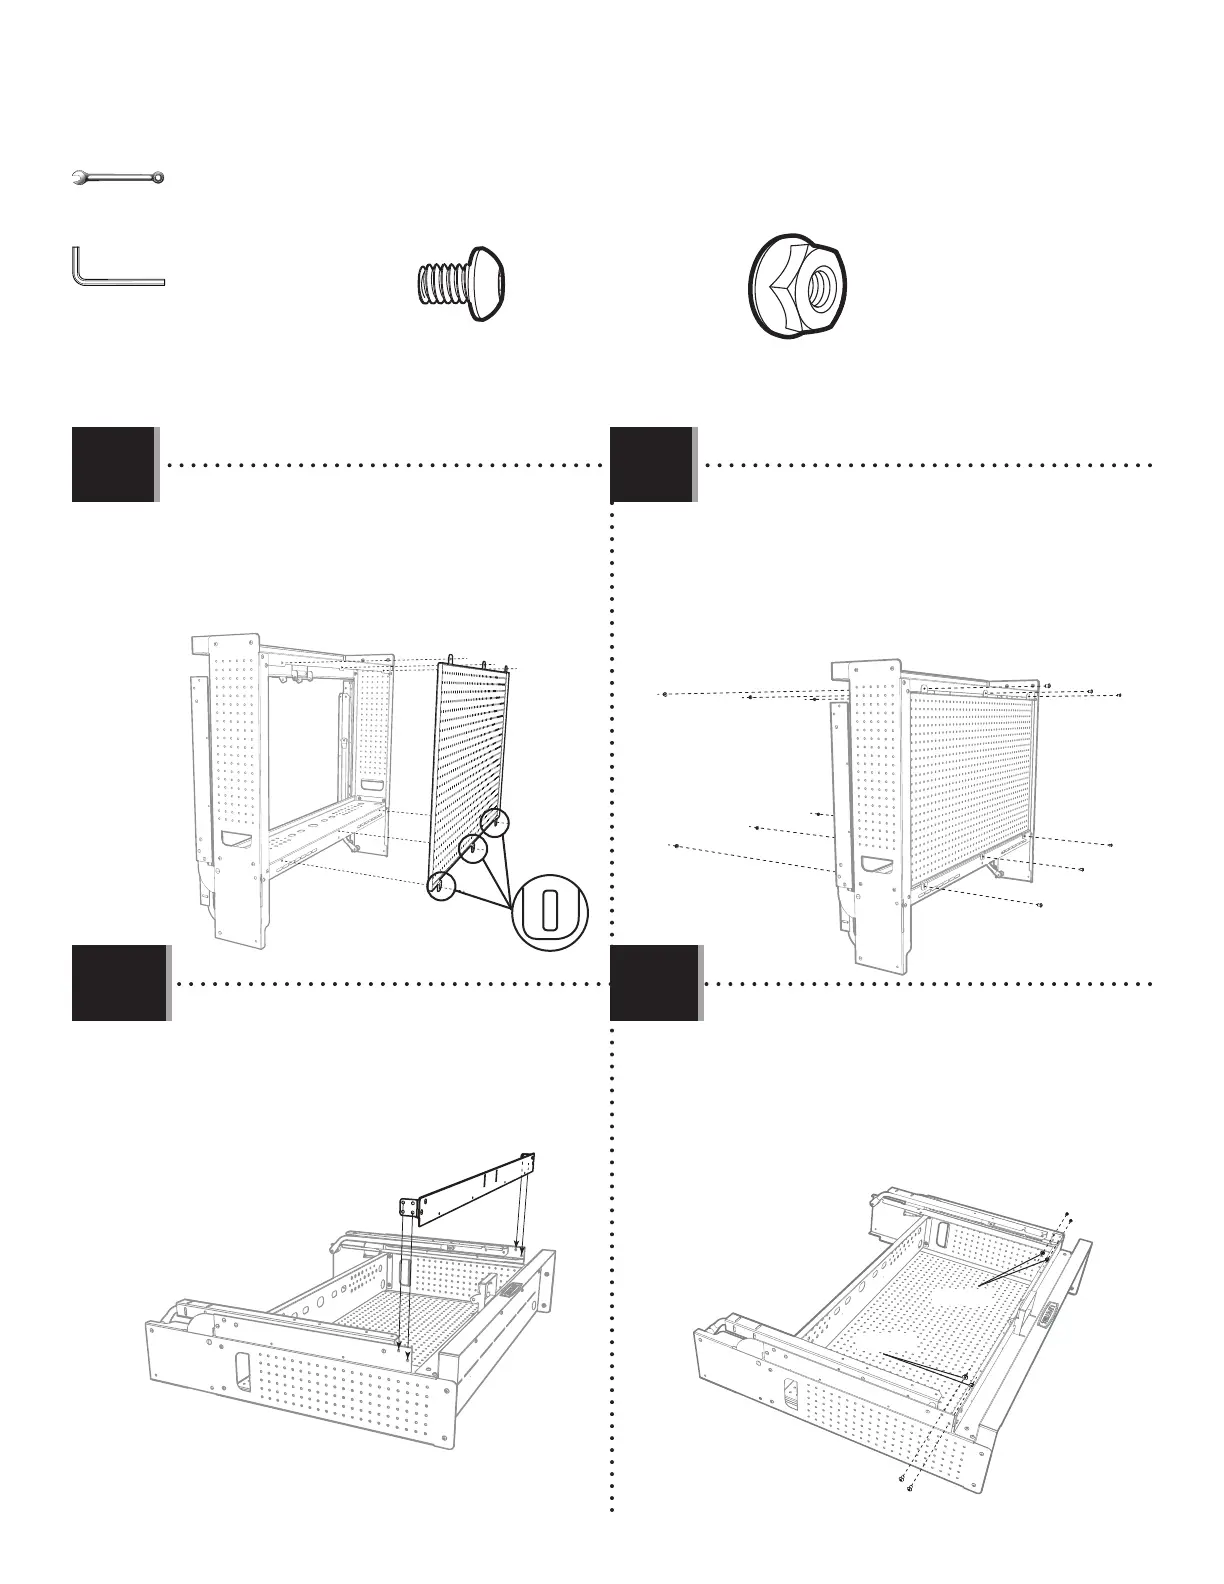
• Attach the Perforated Panel to the Assembly using the
hardware indicated. Do not completely tighten the Nuts yet.
• Attachez bien le panneau perforé à l’assemblage à
l’aide de la quincaillerie indiquée. Ne serrez les écrous qu’à
la main en ce moment.
• Sujete bien el panel perforado al ensamble usando el
herraje indicado. No apriete por completo las tuercas.
• Secure the Front Brace to the two Sides using the
hardware indicated. Do not completely tighten the Nuts yet.
• Attachez bien le support avant aux deux côtés à l’aide
de la quincaillerie indiquée. Ne serrez les écrous qu’à la
main en ce moment.
• Sujete bien el soporte delantero a los dos costados
usando el herraje indicado. No apriete por completo las
tuercas.
1.9
1.11
ENC (x10)
ENA
ENA
ENA
ENA
ENA
ENA
ENC
ENC
ENC
ENC
EMT
ENC
ENC
ENA (x10)
ENA (x2)
ENC (x2)
ENC (x2)
ENA (x2)
7/16 in/po
(11 mm)
DBD
• Align the holes in the Perforated Panel (EMR) with those at
the back of the Assembly. The oval holes are at the bottom.
• Alignez les trous dans le panneau perforé (EMR) avec ceux à
l’arrière de l’assemblage. Les trous ovales vont au fond.
• Alinee los agujeros en el panel perforado (EMR) con aquellos
al trasero del ensamble. Los agujeros ovalados van para bajo.
Oval holes / Trous ovales / Agujeros ovalados
EMR
• Align the holes in the Front Brace (EMT) with those in the
two Sides as shown.
• Alignez les trous dans le support avant (EMT) avec ceux
dans les deux côtés comme illustré.
• Alinee los agujeros en el soporte delantero (EMT) con
ellos en los dos costados como se muestra.