12
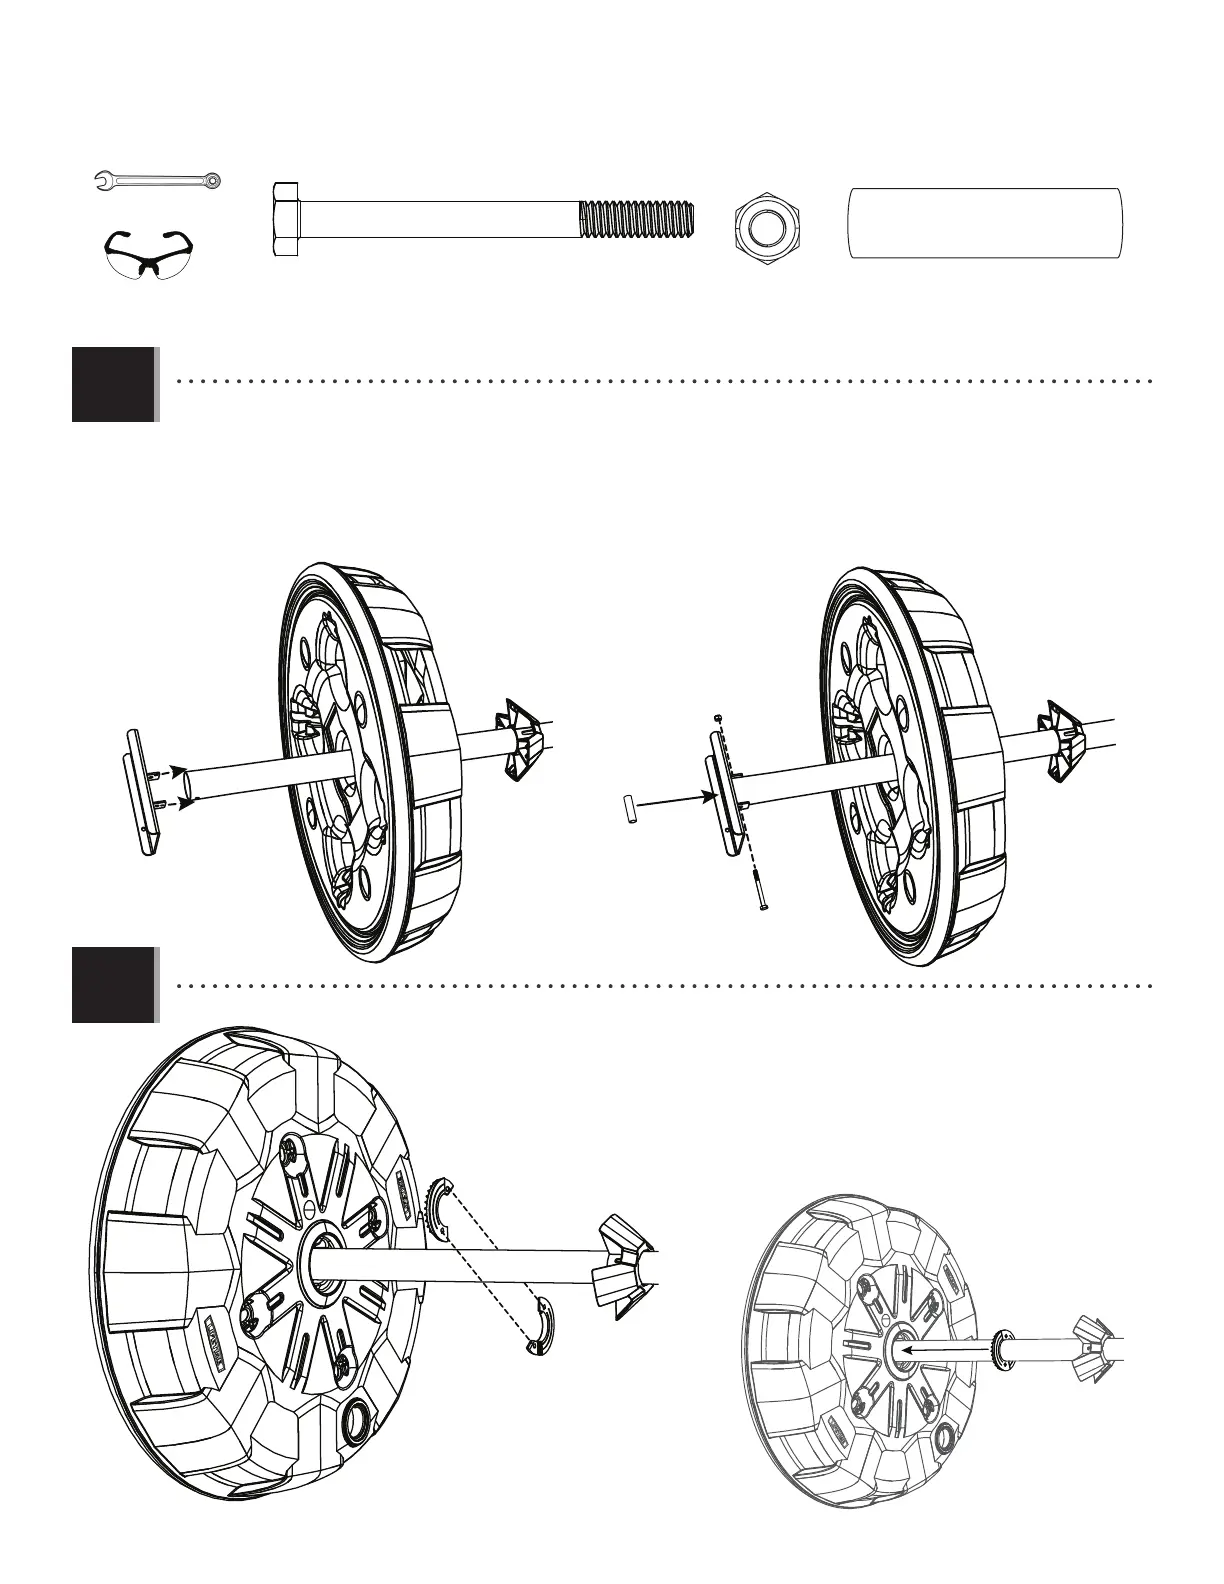
TOOLS AND HARDWARE REQUIRED / OUTILS ET QUINCAILLERIE REQUIS / HERRAMIENTAS Y HERRAJE REQUERIDOS
X SECTION 2 (CONTINUED) / SECTION 2 (SUITE) / SECCIÓN 2 (CONTINUACIÓN)
2.2
• With the holes in the tabs of the base plate (AZX) aligned with the holes in the pole assembly, secure the base plate
to the pole assembly using the hardware shown. Tighten the nut (AZP) securely.
• Après avoir aligné les trous dans la plaque de support (AZX) avec les trous dans l’ensemble du poteau, bien attacher
la plaque de support à l’ensemble du poteau à l’aide de la quincaillerie indiquée. Bien serrer l’écrou (AZP).
• Con los agujeros en las lengüetas de la placa de soporte (AZX) alineados con los agujeros en el conjunto de poste,
fi jar la placa de soporte al conjunto de poste usando los herraje requeridos como se muestra. Apretar bien la
tuerca (AZP).
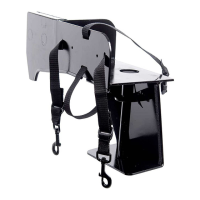
• Interlock the two halves of the split collar (AZS) around the pole assembly.
Slide the split collar assembly down to the base.
• Enclencher les deux demi-embases (AZS) autour de l’ensemble du poteau.
Faire glisser les demi-embases vers la base.
• Entrelazar las dos collares (AZS) alrededor del conjunto de poste. Deslizar los
collares contra la base.
2.3
AZS
AZS
AZX
AAS
AZP
AZU
7/16 in/po (≈12 mm) (x2)
AAS (x1)
AZU (x1)
AZP (x1)