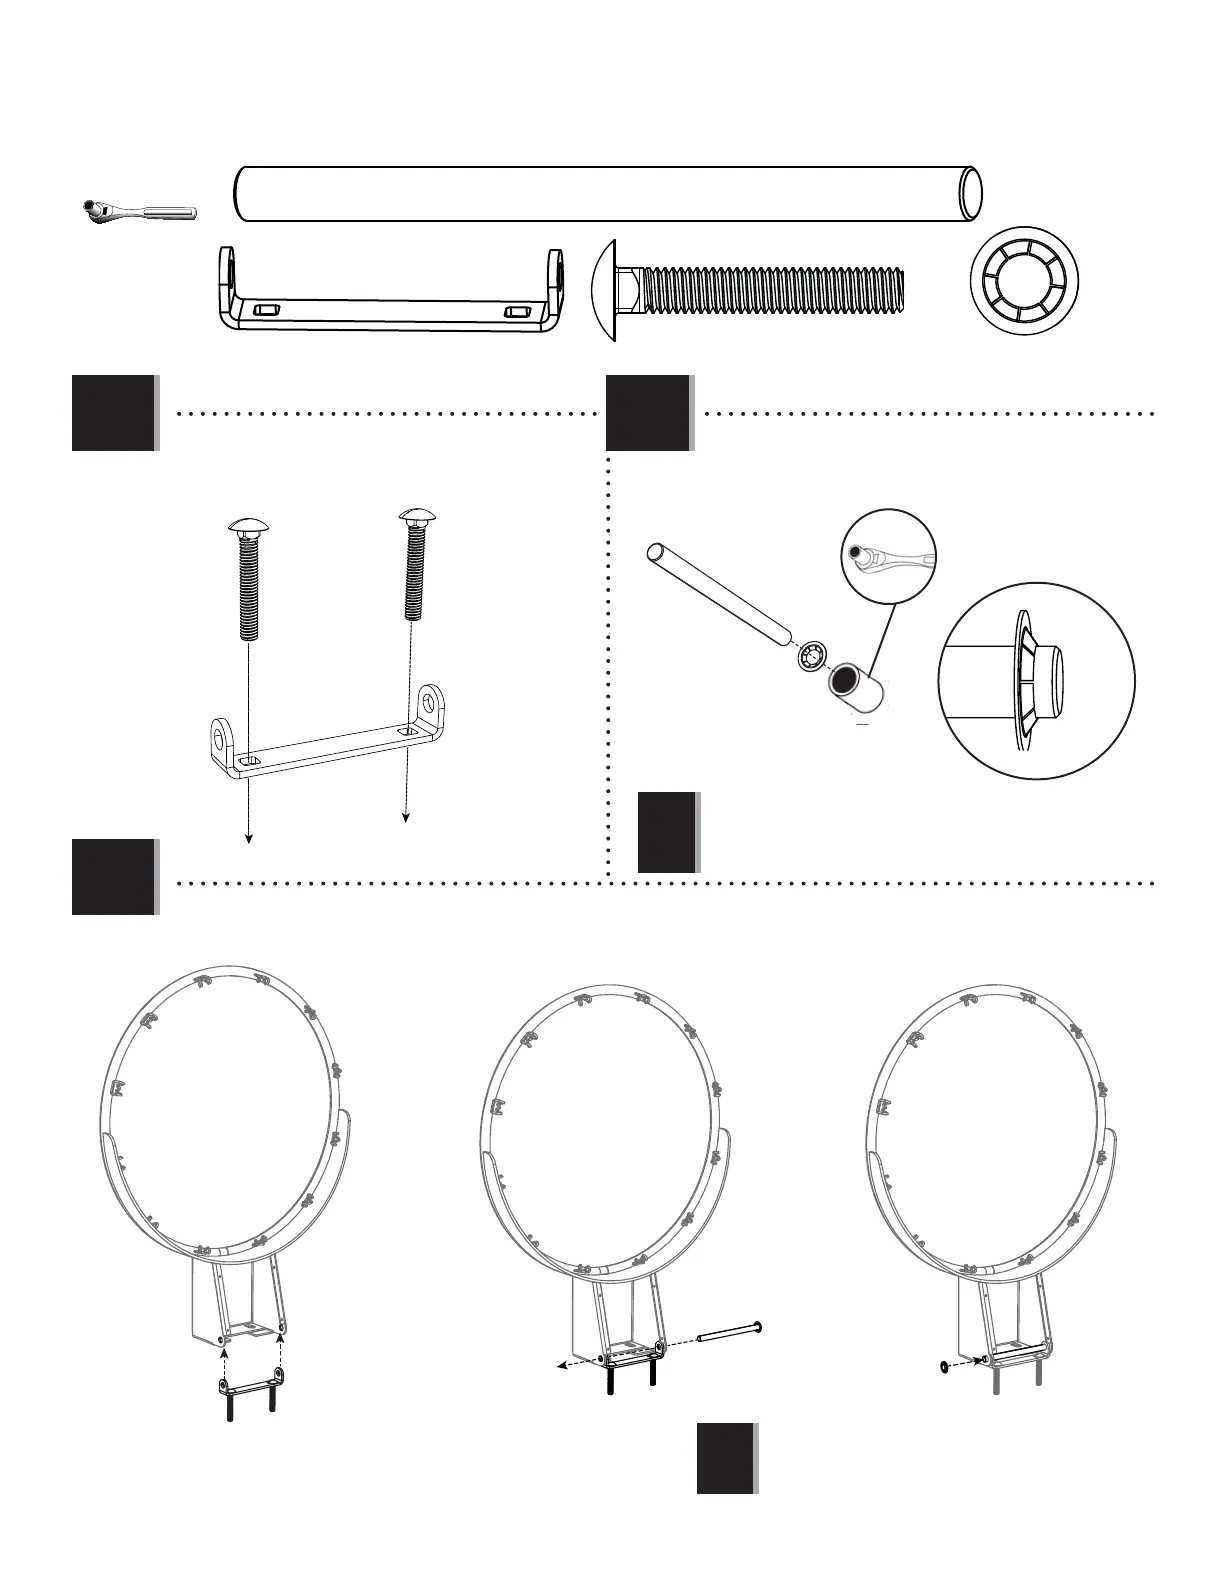
TOOLS AND HARDWARE REQUIRED
X SECTION 1 (CONTINUED)
4
1.1 1.2
1.3
• Insert the Carriage Bolts (AAR) through the
Pivot Bracket (APY) as shown.
APY
APY
ALX
AAR
AAR
AAR (x2)
APY (x1)
• Use the 1/2” socket head from the socket head
wrench to press one Push Nut (AAQ) onto one end of
the Axle (ABQ).
AAQ
AAQ
ABQ
ABQ
• The Push Nut should rest about 1/4" from the end of the Axle.
If the Push Nut slips on too far, continue sliding it to the other
end of the Axle to remove it and try again.
• The Push Nut should rest about 1/4" from the end of the Axle.
If the Push Nut slips on too far, continue sliding it to the other
end of the Axle to remove it and try again.
!
!
• Slide the end of the Axle (ABQ) through the Rim (ALX) and the Rim Pivot Bracket (APY). Press the Push Nut (AAQ) onto
the end of the Axle. Use the 1/2” socket head to secure the Push Nut if needed.
AAQ (x2)
1/2" (13 mm)
ABQ (x1)