25
3. 3 - BULB REPLACEMENT
Photo 1
Photo 3
Photo 4
Photo 5
Photo 2
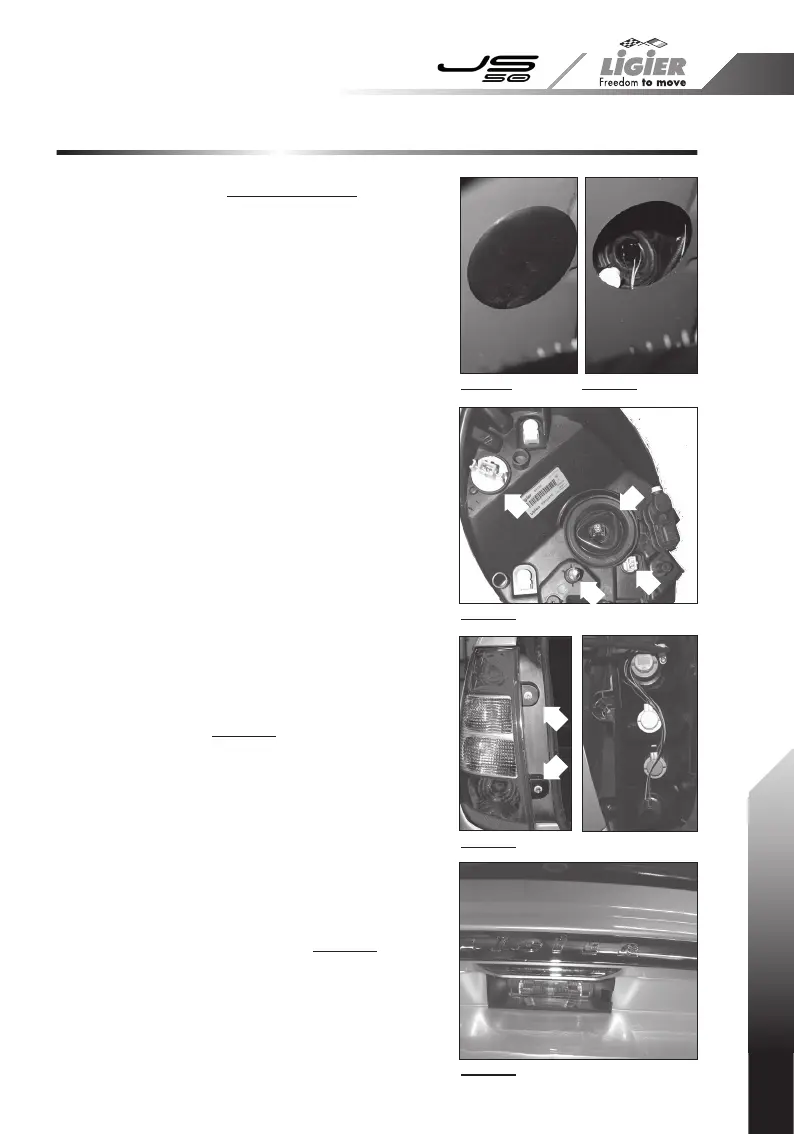
Front headlight (photos 1, 2 and 3)
For access to the bulbs, there is an opening with
a plastic cover on the top of each front wheel
arch.
Replacing the side light "1":
- Unplug the connector from the bulb holder;
- Turn the bulb holder 1/4 turn to the left and pull
gently;
- Turn the bulb 1/4 turn to the left.
Replacing the indicator "2":
- Unplug the connector from the bulb holder;
- Turn the bulb holder 1/8 turn to the left and pull
gently;
- Turn the bulb 1/4 turn to the
left.
Replacing the headlight "3":
- Unplug the connector from the bulb holder;
- Pull away the rubber covering;
- Unhook the retaining spring;
- Replace the bulb and reassemble the tting.
Thumbwheel "A" adjusts the headlight from right
to left.
The height of the headlight can also be adjusted
mechanically via the upper access opening.
Rear light unit (photo 4)
To replace the reversing, indicator, brake and fog
lights:
1.
Unscrew the 2 screws then unclip the light unit
"4".
2.
Turn the bulb holder in question to the left to
unclip it, then change the bulb and replace the
bulb holder.
3.
Fix the light unit back into position with the
screws, then clip on the protective caps.
Registration plate lamp (photo 5)
1. Using a at bladed screwdriver, remove the
transparent cover "5" by placing the end of the
screwdriver in one of the two slots on each side
of the cover and lifting gently.
2.
Change the bulb and replace the cover.
4
4
3
1
A
2
3.3 - BULB REPLACEMENT