425W
Servicio de Atención al Cliente:: lineaplus@lineaplus.eu 943 493 555
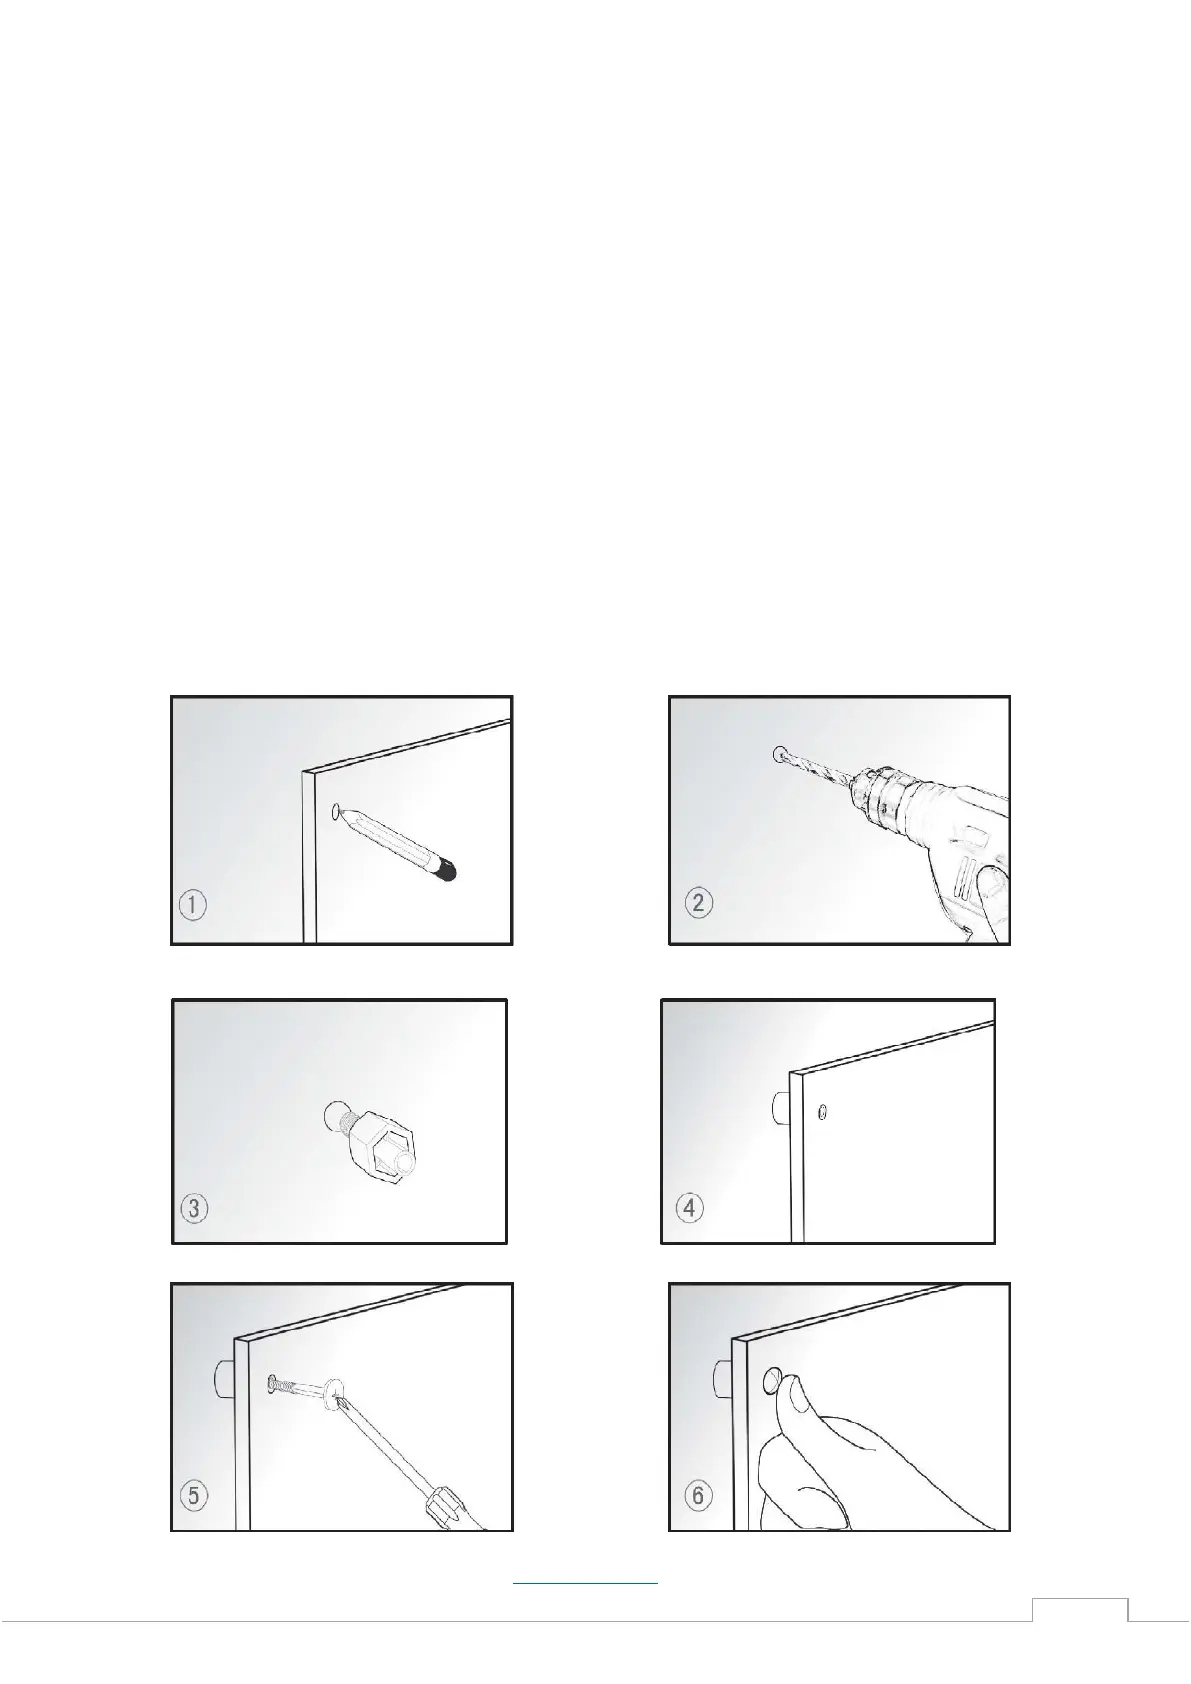
UNPACKING AND WALL MOUNTING INSTRUCTIONS
Unpack your package and find the heater together with the wall mounting accessories pack.
1 Mark the positions of the four holes to be drilled on the wall. (Better install the heater 20cm to 100cm
height from the floor to get best performance.)
2 Drill the holes with the drill bit from the accessories pack.
3 Insert the plastic rails fitting into the holes.
4 Install the panel heater onto the four rails fittings matching the four holes in the heater.
5 Screw the four fasten bolts into the plastic rails fitting.
6 Put the caps onto the fasten bolts. It is recommended to use some normal glue to stick the caps onto the
bolts steadily.
7 To know down the unit from the wall, just open the bolt caps and unscrew the bolts with a screw driver
and then take the heater down.
8 Make sure the distance between the bottom of the heater and the floor is no less than 20cm when the
heater is installed