Chapter 3
Advanced Configuration
18
Wireless-N Gigabit Router with Storage Link
Delete Click the Delete button to delete a specific
partition from the Router’s database.
After you have made your changes, click the Save Settings
button to apply your changes, or click the Cancel Changes
button to cancel your changes.
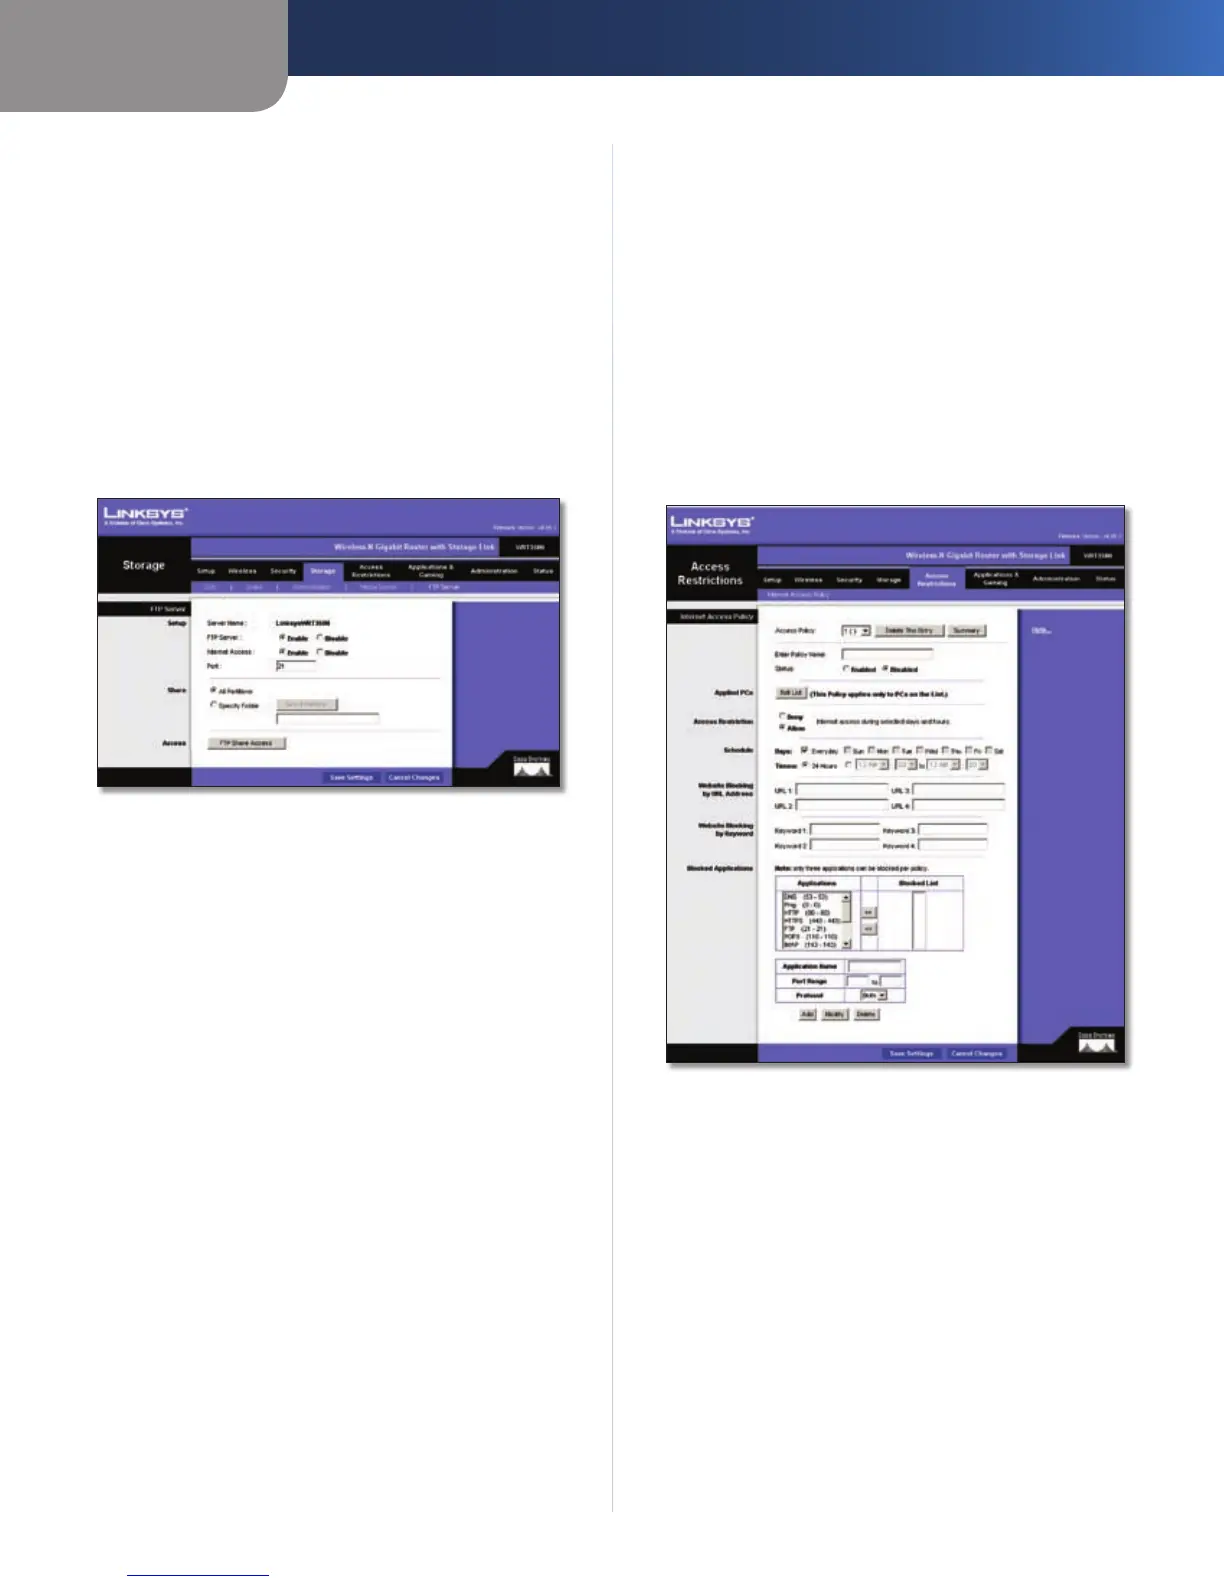
Storage > FTP Server
An external USB hard drive or USB disk must be connected
to the USB Port of the Router to use the storage feature.
The FTP Server tab creates an FTP Server that can be
accessed from the Internet or your local network.
Storage> FTP Server
Setup
Server Name The name of the router’s FTP server
is displayed here. It can be changed at Storage >
Administration.
FTP Server Select Enable to set this Router as an FTP
Server. Otherwise, select Disable to turn the service off.
An external USB hard drive or USB disk must be connected
to the USB Port to use this service.
Internet Access Select Enable to allow access of the FTP
Server from the Internet. Otherwise, select Disable to only
allow local network access.
FTP Port Enter the FTP Port number to use. The default
port is 21.
Share
Select the partition or folder to share in the FTP Server.
All Partitions Selects all partitions on the USB disk.
Specify Folder If you want to share a specific folder, click
Select Partition and locate the folder.
Access
Click FTP Share Access to grant specific rights to groups.
You can grant Read Only or Read/Write permissions.
FTP Access Select the group from the Other Group list
and click either the Read Only or Read/Write button to
move the group to the Group With Access column.
After you have made your changes, click the Save Settings
button to apply your changes, or click the Cancel Changes
button to cancel your changes. Click Close to exit this
window.
Access Restrictions > Internet Access
The Access Restrictions > Internet Access screen allows you
to deny or allow specific kinds of Internet usage and traffic,
such as Internet access, designated services, and websites
during specific days and times.
Access Restrictions > Internet Access
Internet Access
Internet Access Policy Internet Access can be managed
by a policy. Use the settings on this screen to establish an
access policy (after Save Settings is clicked). Selecting a
policy from the drop-down menu will display that policy’s
settings. To delete a policy, select that policy’s number
and click Delete. To view all the policies, click Summary.
Deny or Allow If you select Deny, the PC on the Edit
List will be denied Internet Access by the dates and times
selected. PCs not on the list will still have Internet access. If
you select Allow, the PCs on the Edit List will have Internet
access by the dates and times selected. The PCs not on the
Edit List will not have Internet access. If there is a conflict
with a policy, the lower numbered policy will have priority
over a higher numbered policy.
 Loading...