6
lippertcomponents.com 574-537-8900 Rev: 02.17 - Solera
®
Awnbrella
™
Awnbrella
®
Installation and Owner’s Manual
(For Aftermarket Applications)
Velcro
®
Stabilizers
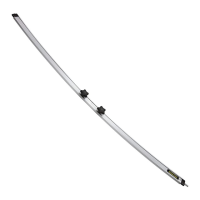
Velcro stabilizers are included as
a safety precaution to secure the
Awnbrella and prevent the arms from
shifting or falling. Adhere a black
patch of Velcro to the back of the
Awnbrella arm and a white patch to
the canopy.
1. Take the Awnbrella arms down
from the coach. On the top side of
one Awnbrella arm (side without
adjustment knobs), wipe rubbing
alcohol to remove any grease or oils
from handling on the center of the
arm where the Velcro patch will be
installed. Measure 28-1/2" from either
end of the channel and mark with a
pencil (Fig.12). This is where to install
a black patch of Velcro.
2. Center the black Velcro patch
over the mark, peel off the protective
backing and press rmly into place
(Fig.13).
3. Line up all the arms and apply all
the patches following steps 1 and 2.
4. Reposition the Awnbrella arm back
into the hanger blocks and roller
tube, then use alcohol to clean the
awning fabric directly opposite the
black Velcro patch on the back of the
Awnbrella arm. Attach a white Velcro
patch to the black Velcro patch on
the Awnbrella arm (Fig.14).
5. Remove the clear protective lm
from the back of the Velcro (Fig.15).
Carefully place the Awnbrella arm
back into position, pressing it rmly
against the awning fabric.
6. Repeat steps 2 and 4 for each
Awnbrella arm.
1
2
3
4
5
6
7
8
9
10
34
35
36
37
38
39
40
41
42
35
36
37
38
39
40
41
42
43
44
45
1
2
3
4
5
6
7
8
9
1
2
3
4
5
6
7
24
25
26
27
28
29
3
8”
8”
8”
1
2
3
4
5
6
7
8
9
10
34
35
36
37
38
39
40
41
42
35
36
37
38
39
40
41
42
43
44
45
1
2
3
4
5
6
7
8
9
1
2
3
4
5
6
7
24
25
26
27
28
29
3
8”
8”
8”
NOTE: Leave the Awnbrella arms in place for 48 hours to allow the adhesive to
set. Ideally, Velcro patches should be installed when the temperature is above
70º for the best bond. The adhesive may not bond tightly to some woven acrylic
fabrics. Use vinyl contact adhesive available at most hardware stores for a
better bond.
1
2
3
4
5
6
7
8
9
10
34
35
36
37
38
39
40
41
42
35
36
37
38
39
40
41
42
43
44
45
1
2
3
4
5
6
7
8
9
1
2
3
4
5
6
7
24
25
26
27
28
29
3
1
2
3
4
5
6
7
8
9
10
34
35
36
37
38
39
40
41
42
35
36
37
38
39
40
41
42
43
44
45
1
2
3
4
5
6
7
8
9
1
2
3
4
5
6
7
24
25
26
27
28
29
3
8”
8”
8”
Fig.12 Fig.13
Fig.14 Fig.15

 Loading...