Rev: 07.24.19 Page 5
CCD-0002686
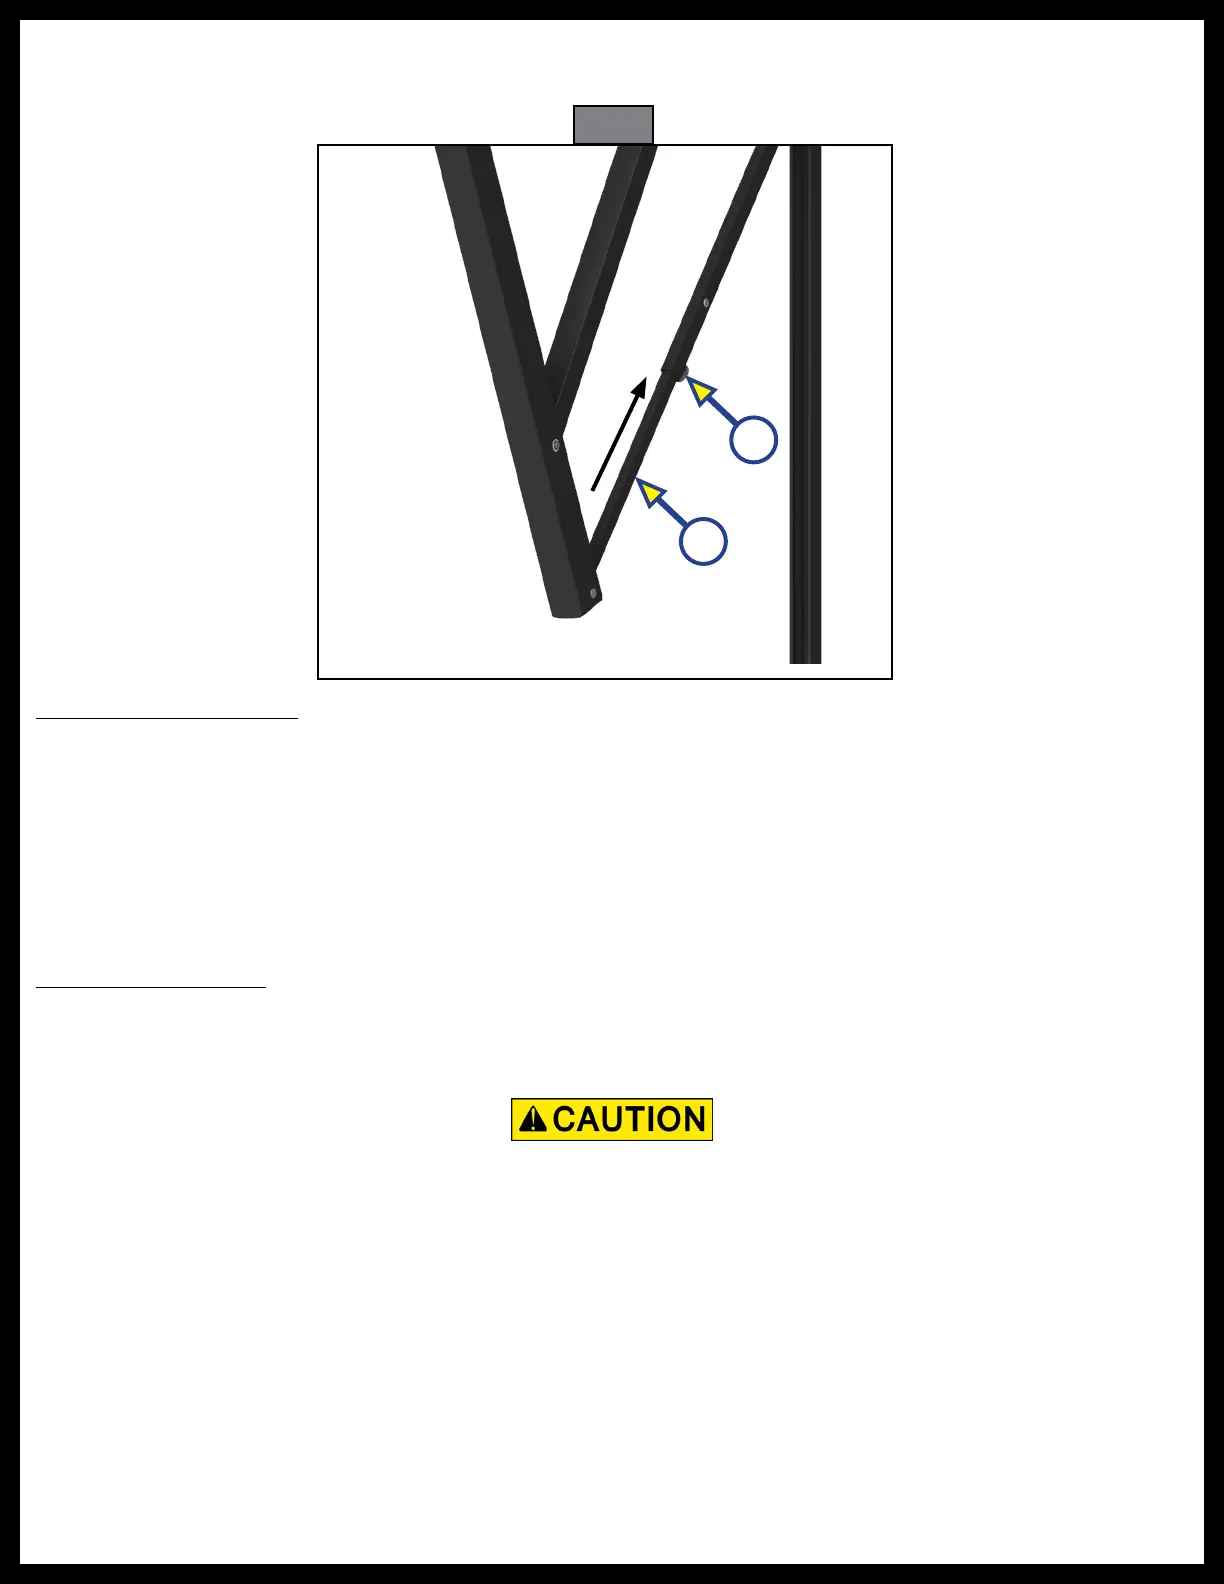
2. Slide the pitch arm (Fig. 4A) up to the desired position.
3. Tighten the knob (Fig. 4B) on the underside of the pitch arm to secure in the desired position.
A
Fig. 4
B
Retracting the Awning
NOTE: The awning must be in the flat position prior to retracting the awning.
1. If the pitch arm has been set, loosen the knobs (Fig. 4B) on the underside of the pitch arms (Fig 4A).
2. Verify the unit's battery is fully charged and connected to the electrical system.
3. Press and hold RETRACT on the switch (Fig. 1B) until the awning is retracted completely.
Troubleshooting
Resources Required
During incidents of high wind, heavy rain or extended time away from the unit, it is advisable to
retract the awning completely to prevent damage to the awning and the RV.
• Cordless or electric drill or screw gun
•
⁄
" socket
• Socket wrench (optional)