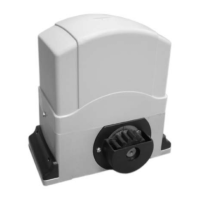
DKL400UY SLIDING GATE OPERATOR
6
Chain Brackets
Use the appropriate bolts to attach the chain bracket to the frame of the gate. If the gate is of
square frame style, use the square bolts shown.
Spring washer (Φ8)
Plain washer (
Φ8)
"L" bracket
Square bolt
Nut (M8)
Chain bolt
Master link
Nut (M6)
Spring washer (
Φ6)
Plain washer (
Φ6)
Gate
Square frame
Fig.4
If the gate is of round frame style, use the round bolts shown.
Round bolt
"L" bracket
Plain washer (
Ф8)
Spring washer (
Ф8)
Nut (M8)
Chain bolt
Master link
Nut (M6)
Spring washer (
Ф6)
Plain washer (
Ф6)
Gate
Round frame
Fig.5
Chain
Close the gate and attach a chain bolt to the piece of chain that comes with the chain box
using enclosure master links. Tighten the chain bolt to the bracket with washers and nuts.
Pull the chain through the chain wheel box to the other chain bracket at the opposite end of
the gate. Connect the other end of the chain and the chain bolt, and then tighten the chain
bolt to the chain bracket. Thread up the chain by adjusting the chain bolt. Cut the chain to
length if necessary. Make sure that the chain is perfectly aligned with the chain holes on the
chain box. Tighten the chain by tightening the chain bolts at either end. See illustration
below.
Master link
Chain bolt
Chain
Fig.6