11
4.2. Ausbau Display
Führen Sie zunächst alle Schritte wie in Punkt 4.1 beschrieben durch.
Legen Sie im Anschluss das Gerät mit der Displayäche nach unten und achten Sie auf eine saubere und weiche
Unterlage, um Schäden am Display zu verhindern.
Zum Ausbau des Chassisträgers muss im Vorfeld das Signal-Board entfernt werden. Siehe Punkt 3.2.
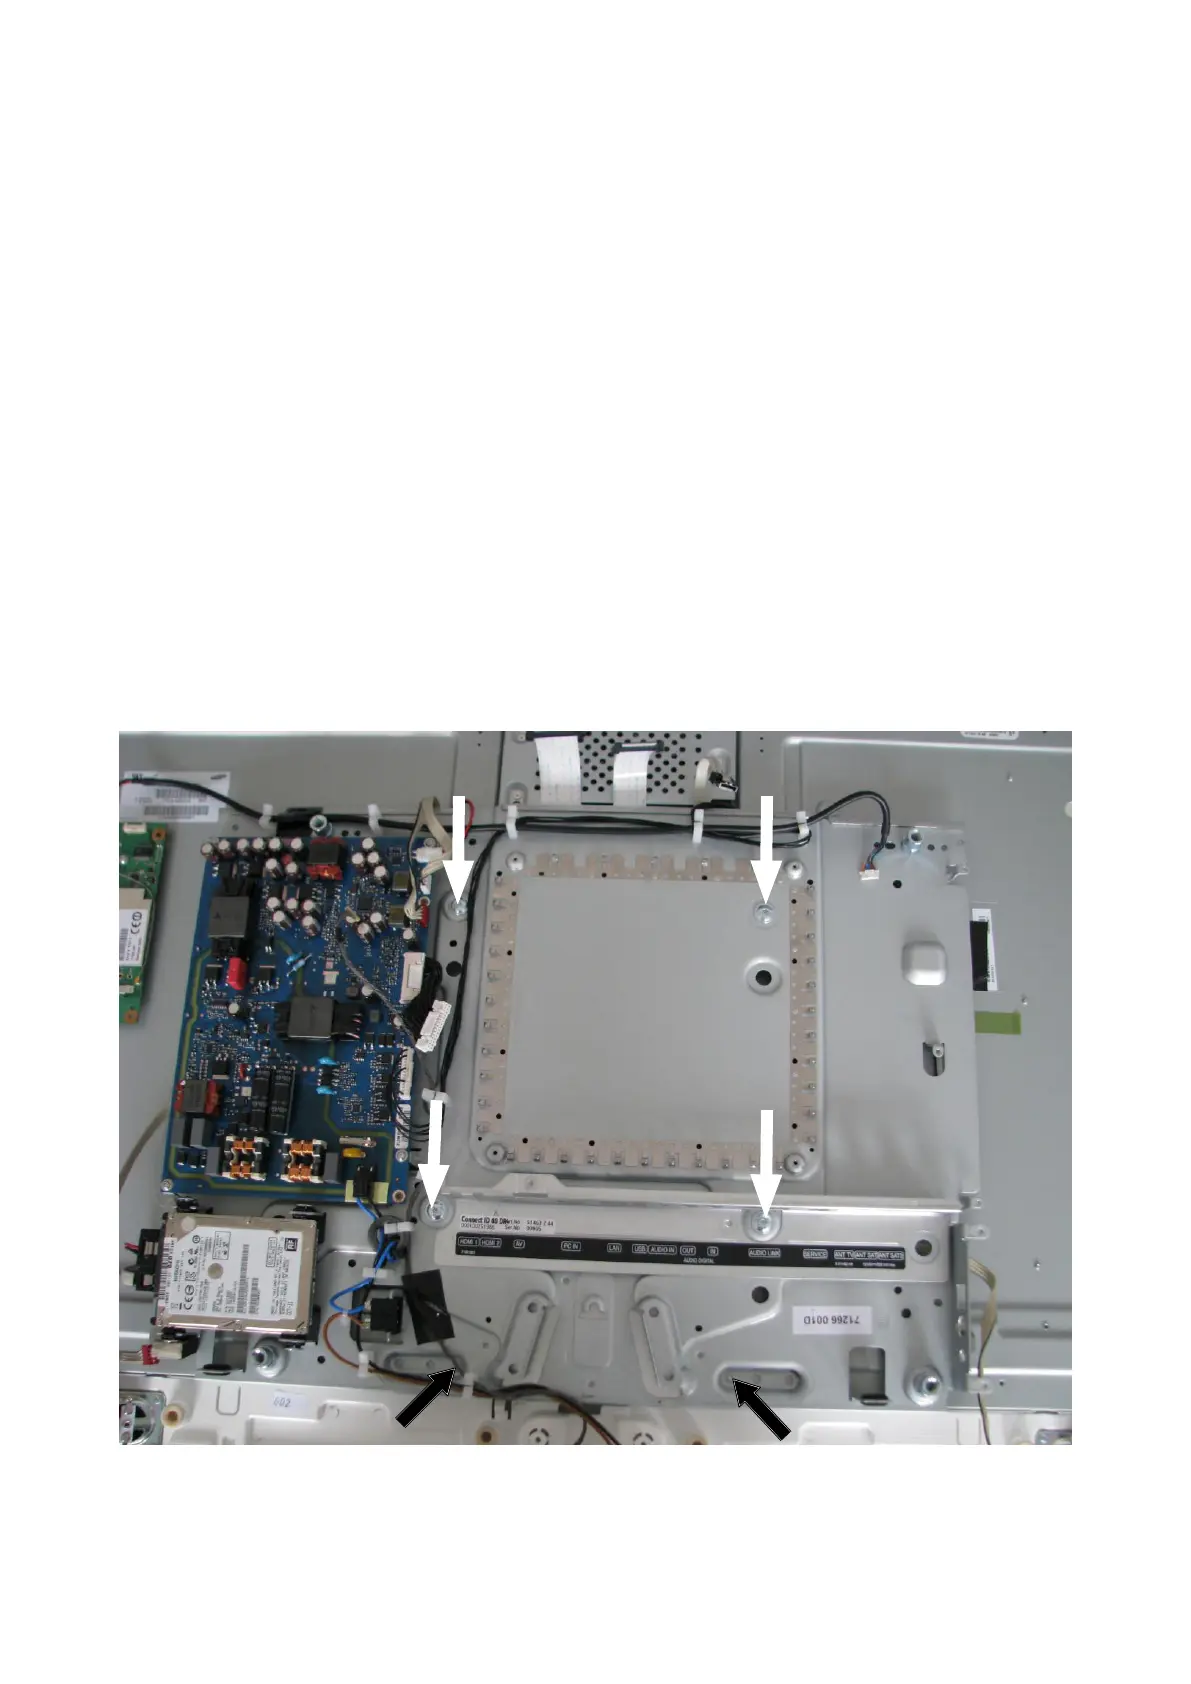
Das Trägerblech ist mit sechs Torxschrauben mit dem Display verschraubt.
In Abb. 15 sind vier Torxschrauben mit der Größe T20 mit weißen Pfeilen markiert, zwei Torxschrauben mit der
Größe T10 mit schwarzen Pfeilen.
4.2. Disassembly of display
First carry out all the steps described in point 4.1.
Then place the device with the display facing down and make sure the surface below is clean and soft, to avoid
damage to the display.
To remove the chassis support, the signal board must be disassembled rst. See point 3.2.
The supporting plate is screwed to the display with six Torx screws.
In g. 15, four T20 Torx screws are marked with white arrows and two T10 Torx screws are marked with black
arrows.
Abb. 15 / Fig. 15