9
Abb. 9 / Fig. 9
Abb. 11 / Fig. 11
4. Entfernen Frontrahmen und Ausbau Display
4.1. Ausbau Frontrahmen
Entfernen Sie das Lautsprechergitter und die Rückwand, wie in den Punkten 1 und 2 beschrieben.
Legen Sie zunächst das Gerät mit der Displayäche nach unten, achten Sie auf eine saubere und weiche Unterlage,
um Schäden am Display zu verhindern.
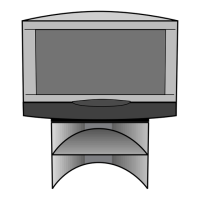
Entfernen Sie die beiden Lautsprecherboxen. Lösen Sie jeweils die beiden Kabelbäume zu den TV-Lautsprechern
und Lautsprecherboxen, siehe schwarze Pfeile Abb. 8 und Abb. 9.
Die Boxen sind im Frontrahmen eingerastet und jeweils mit einer Torxschraube in der Größe T20 mit dem Chassis-
träger befestigt, siehe weiße Pfeile in Abb. 8 und Abb. 9.
4. Removal of front frame and disassembly of display
4.1. Removal of front frame
Remove the loudspeaker grille and the rear panel as described in points 1 and 2.
Firstly, place the device with the display facing down and make sure the surface below is clean and soft to avoid
damage to the display.
Remove both loudspeaker boxes. Disconnect each of the two cable harnesses from both the TV loudspeakers and
loudspeaker boxes, see black arrows g. 8 and g. 9.
The boxes are locked into the front frame and each is xed onto the chassis support with one T20 Torx screw, see
white arrows in g. 8 and g. 9.
Abb. 8 / Fig. 8
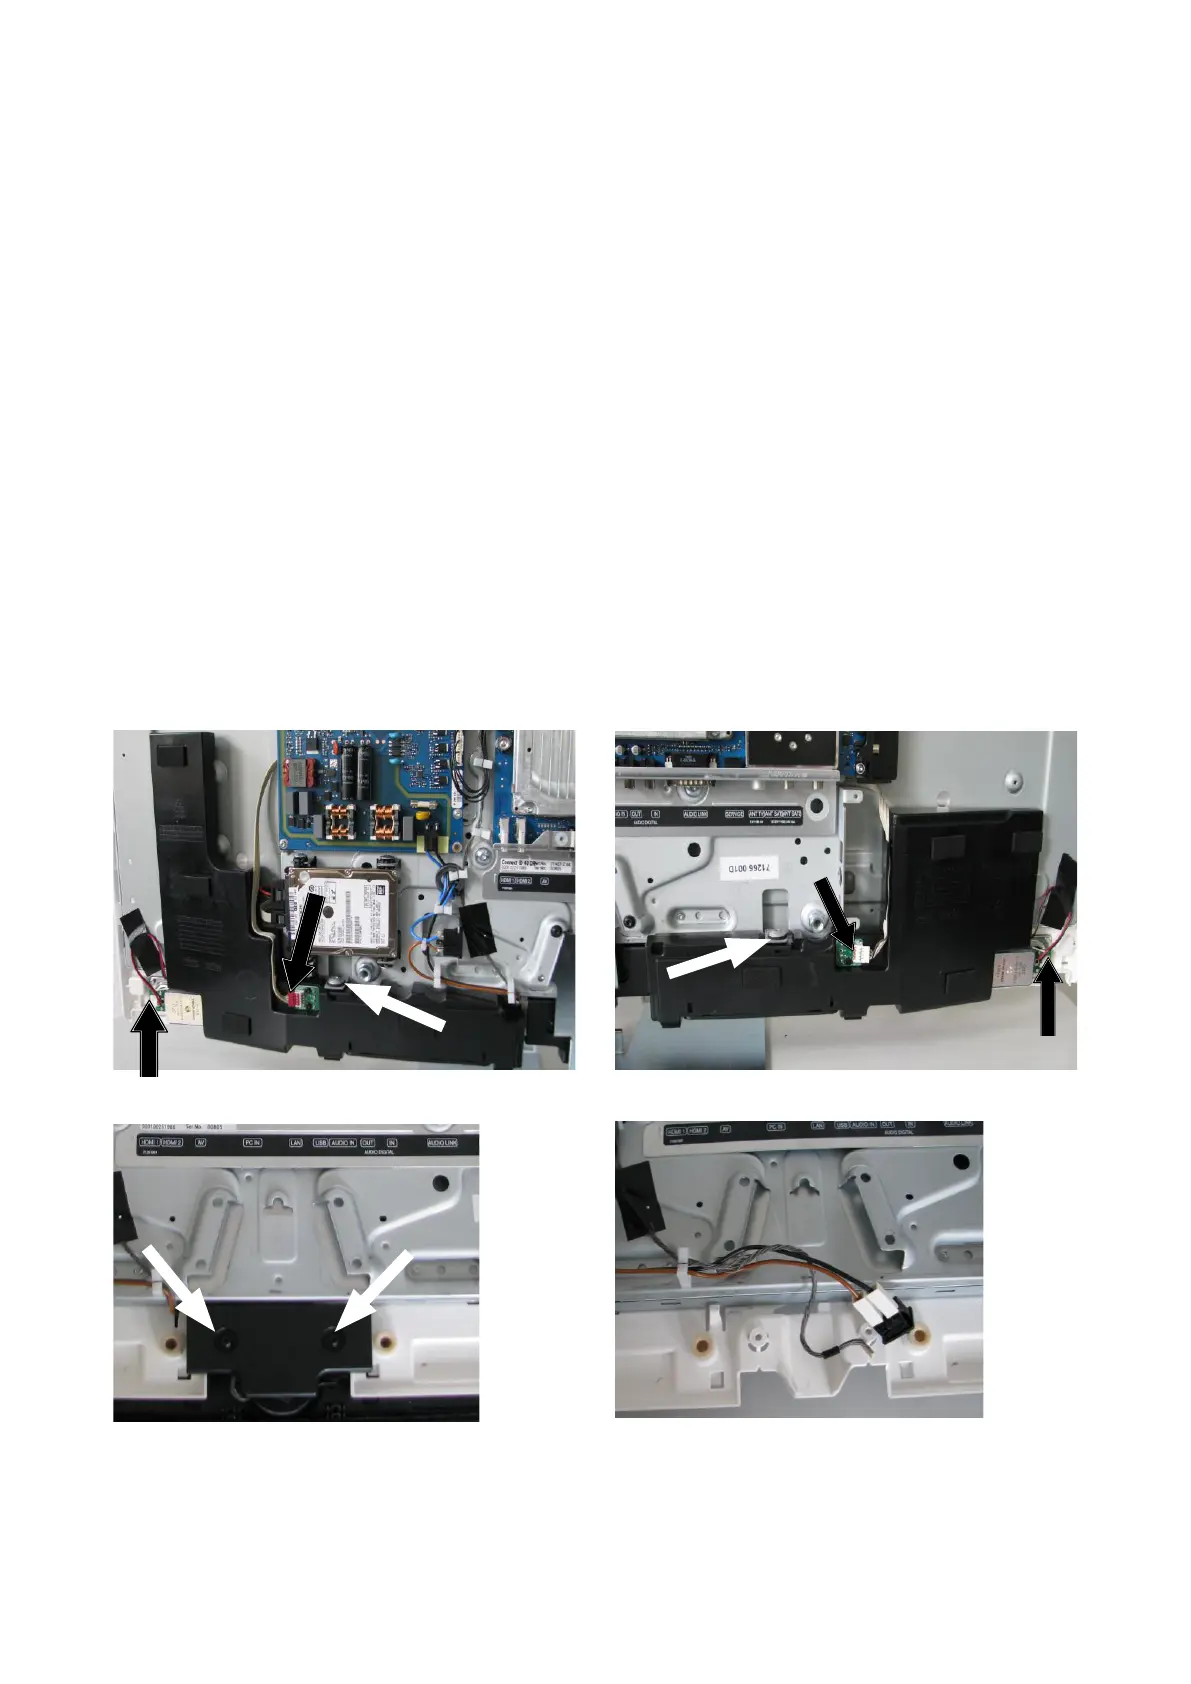
Entfernen Sie im Anschluss die Abdeckung des Netz-
schalters, die mit zwei Torxschrauben der Größe T20
befestigt ist, siehe Abb. 10.
Lösen des Netzschalters aus dem Frontrahmen, siehe
Abb. 11.
Then remove the mains switch cover, which is xed on
with two T20 Torx screws, see g. 10.
Remove the mains switch from the front frame, see
g. 11.
Abb. 10 / Fig. 10