6
Abb. 3 / Fig. 3
Abb. 4 / Fig.4
Abb.5 / Fig. 5
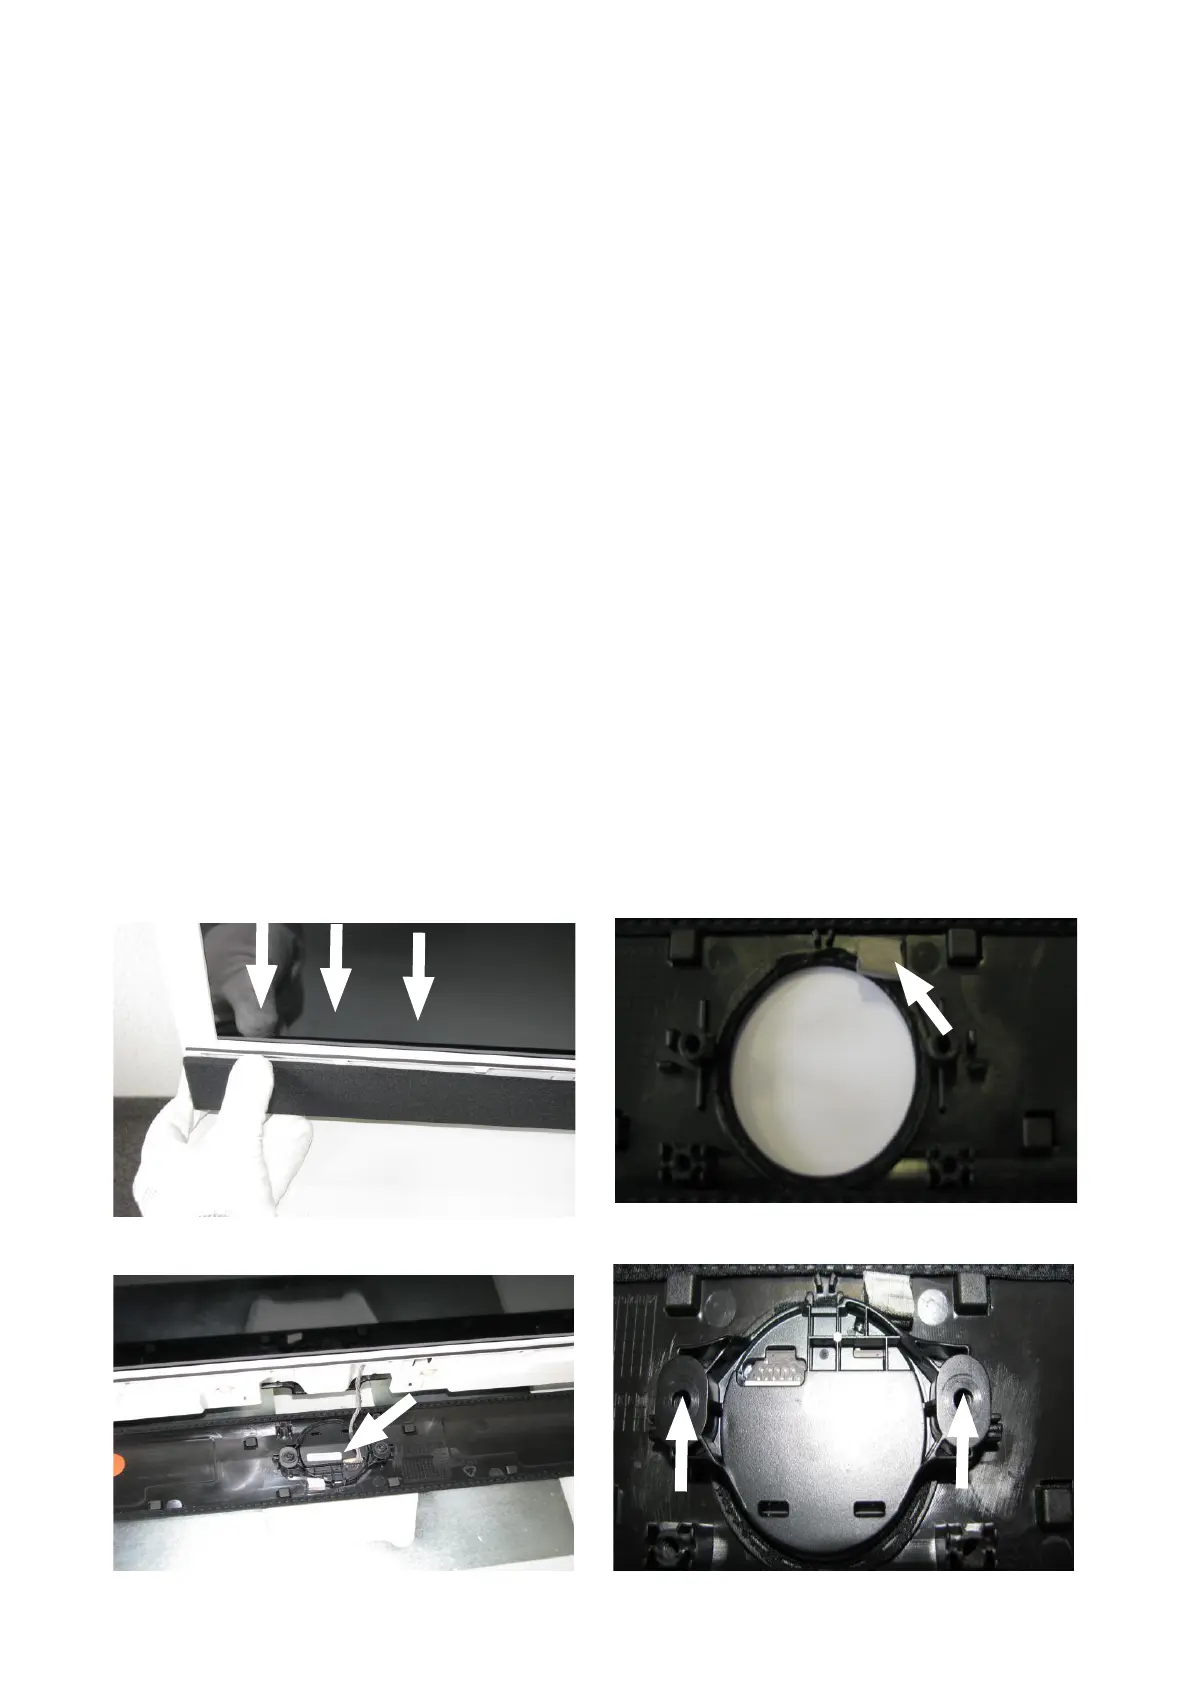
Abb. 2 / Fig.2
Schieben Sie vorsichtig das Lautsprechergitter nach unten und lösen Sie das Gitter aus den Kunststoffverankerun-
gen, siehe Pfeile in Abb. 2. Im Anschluss entfernen Sie den Kabelbaum vom Bedienteil, siehe Pfeil in Abb. 3.
Carefully slide the loudspeaker grille down and remove the grille from the plastic casing, see arrows in g. 2. Then
remove the cable harness from the control unit, see arrow in g. 3.
1.2. Montage Lautsprechergitter
Im Vorfeld muss der Kontaktschaum mit der Bestellnummer 35149.051 auf dem Lautsprechergitter aufgeklebt
werden. Siehe Position des Kontaktschaums in Abb. 4. Verschrauben Sie das Bedienteil mit zwei Torxschrauben
der Größe T20, siehe Pfeile Abb. 5. Verkabeln Sie das Bedienteil und schieben das Lautsprechergitter vorsichtig
von unten in den Frontrahmen. Achten Sie darauf, dass keine Rastnase verkantet und vorsteht.
1.2. Assembly of loudspeaker grille
Before assembly, the contact foam with the order number 35149.051 must be attached to the loudspeaker grille.
See position of the contact foam in g. 4 Screw on the control unit using two T20 Torx screws, see arrows g. 5.
Wire the control unit and carefully slide the loudspeaker grille into the front frame from below. Make sure that no
catches are twisted or protruding.
Oben
Oben
2. Entfernen und Montage der Rückwand
Die Rückwand ist mit sieben Torx-Schrauben mit der Größe T20 befestigt. Entfernen Sie die Schrauben und ziehen
die Rückwand etwas nach hinten und lösen Sie komplett vom Frontrahmen, siehe Pfeile in Abb. 1.
Die Montage erfolgt in umgekehrter Reihenfolge.
2. Disassembly and assembly of the rear panel
The rear panel is xed on with seven T20 Torx screws. Remove the screws, pull the rear panel back slightly and
remove it completely from the front frame, see arrows in g. 1.
To assemble, follow the instructions above in reverse order.