Standrohr an den Speaker montieren
d
Montage du tube support sur le
Speaker
f
Buis op de speaker monteren
l
Montaggio del tubo a colonna
sull‘altoparlante
i
Installing the stand tube onto the
speaker
g
Montaje del pie de apoyo en el
altavoz
e
l
Bescherm de gevoelige oppervlakken tegen krassen.
Schroef de buis A op de speaker.
Gebruik de schroef S en de bijgeleverde inbussleutel
T SW 4
Draai de schroeven S met geringe kracht (aanhaal-
moment ca. 2Nm) vast.
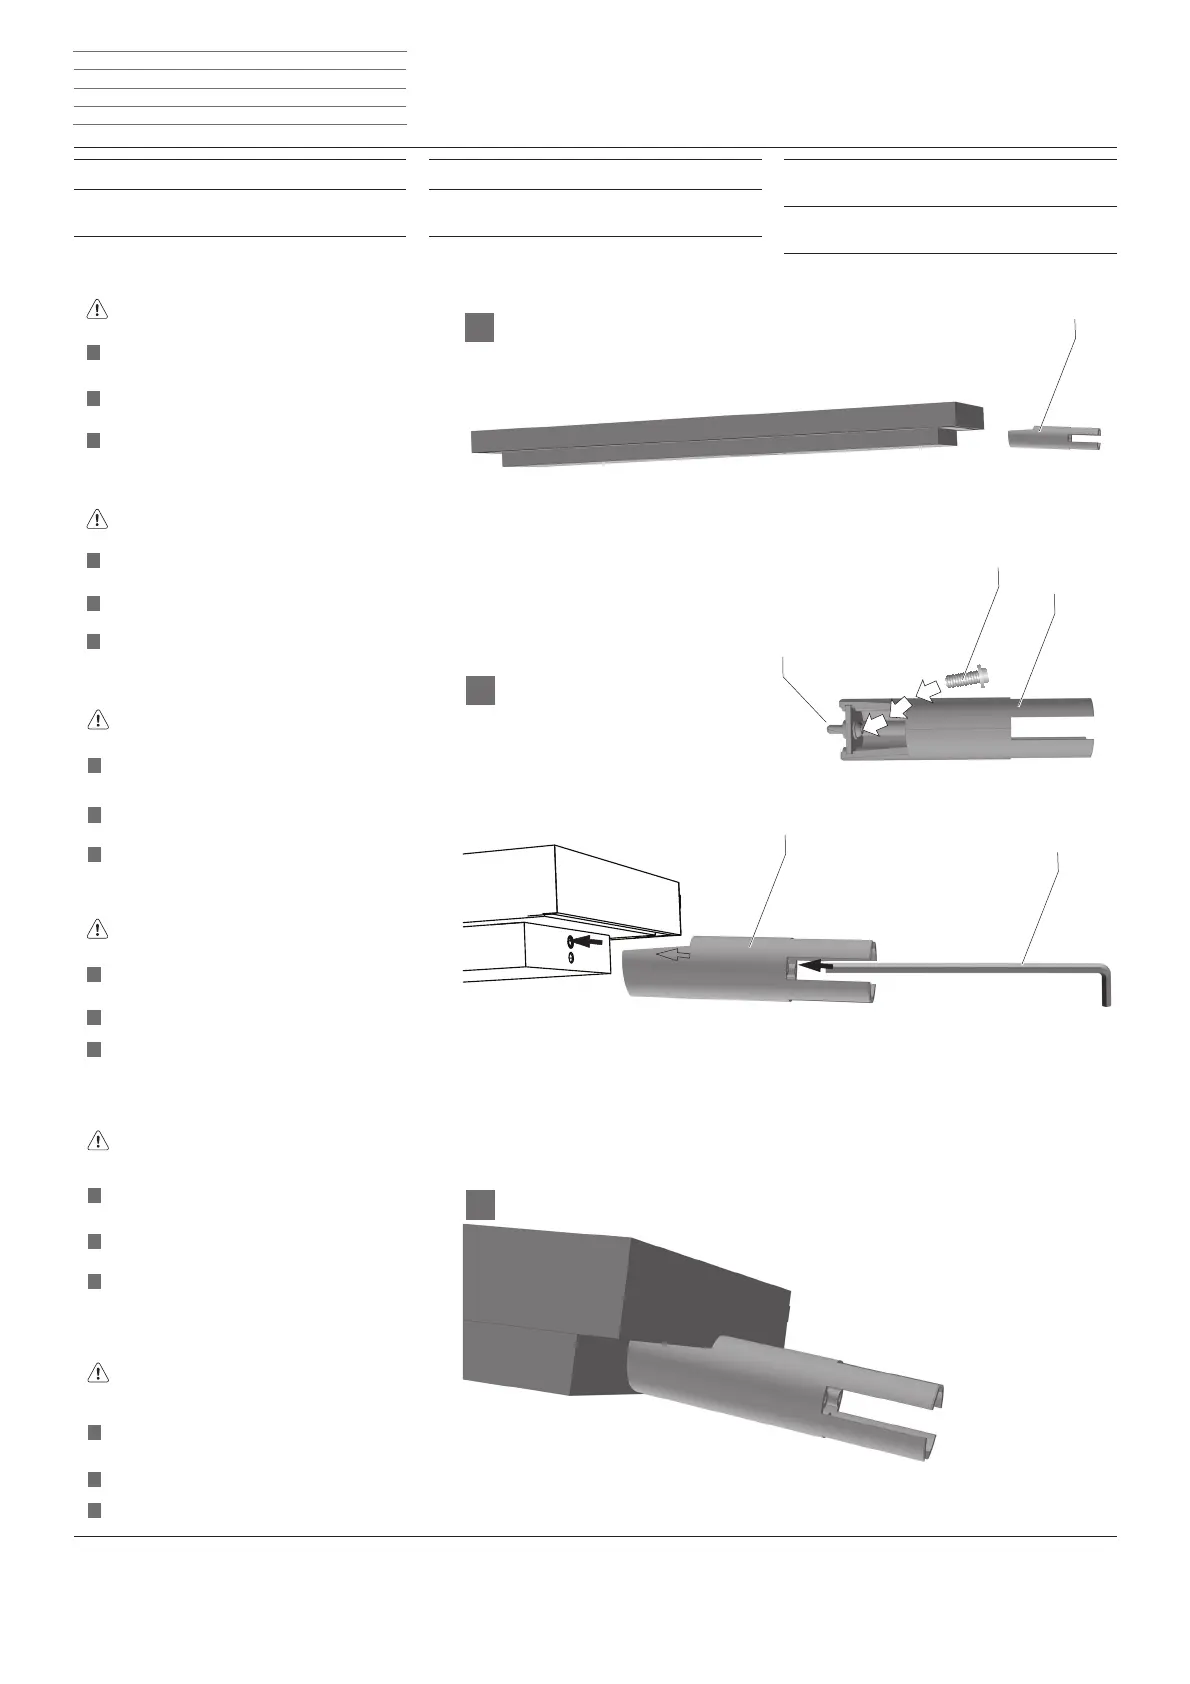
Gemonteerde buis
g
Protect the sensitive surfaces against scratches.
Screw the stand tube A onto the speaker.
Use the screw S and the T SW 4 allen key that is
included
Use a little force to tighten the screws S (approx 2
Nm torque).
Completely installed stand tube
f
Protégez les surfaces sensibles contre les rayures.
Vissez le tube support A au Speaker.
Utilisez la vis S et la clé Allen T SW 4 contenue dans
la livraison.
Serrez la vis S avec peu de force (couple de serrage
env. 2 Nm).
Le tube support est monté.
i
Proteggere le superfi ci sensibili da possibili graffi -
ature.
Fissare il tubo a colonna A sull'altoparlante.
Utilizzare la vite S e la chiave a brugola T SW 4 in
dotazione
Serrare leggermente le viti S (coppia ca. 2 Nm).
Tubo a colonna fi nito
e
Proteja las superfi cies delicadas frente a posibles
arañazos.
Atornille el tubo de apoyo A en el altavoz.
Emplee el tornillo S y la llave hexagonal T SW 4,
incluida en el volumen de suministro
Fije el tornillo S ligeramente (par aprox. 2Nm).
Tubo de apoyo montado
d
Die empfi ndlichen Oberfl ächen vor Verkratzen
schützen.
Schrauben Sie das Standrohr A an den Speaker.
Verwenden Sie die Schraube S und den im Liefer-
umfang enthaltenen Sechskantschlüssel T SW 4
Schrauben S, mit kleiner Kraft (Drehmoment ca.
2Nm) festziehen.
Fertig anmontiertes Standrohr
S
A
A
S
A
T
SW 4
Floor Stand R ID - 12 -
Montageanleitung Instructions de montage
Montage-instructies Istruzioni di montaggio
Installation instructions Instrucciones de montaje