17
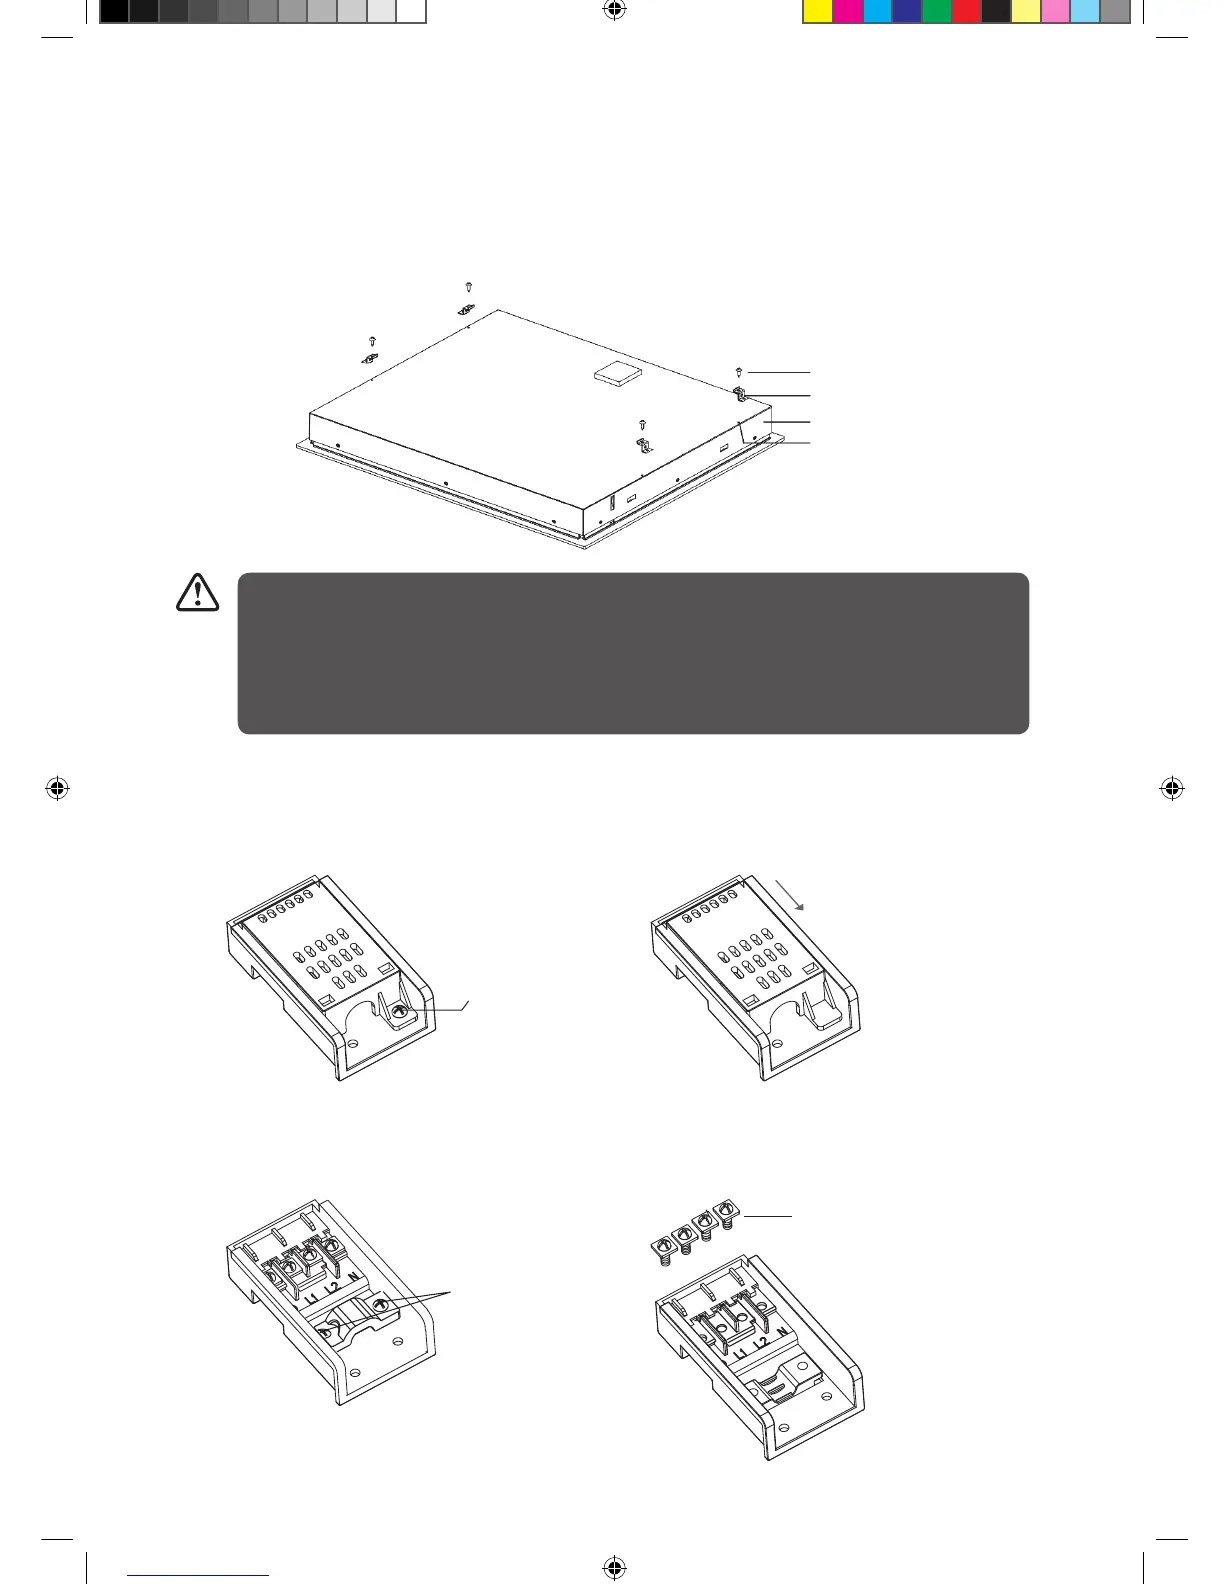
Connecting the Hob to the Mains Power Supply
1. Remove the screw A. 2. Push the top plate back and then lift it up.
3. Remove the 2 screws B. 4. Remove the 4 screws C in the terminal box and
insert the power cord at the connection.
screw
bracket
base
screw hole
screw A
screw B
screw C
Fastening the Fixing Brackets
The unit should be placed on a stable, smooth surface (use the packaging).
1. Turn the hob upside down, place it on a soft surface and fasten the brackets to the appropriate holes. DO
NOT tighten the screws at this stage.
2. Apply sealing strips around the edge of the hob.
• The hob must be installed by qualified personnel or technicians.
• The hob should not be mounted above cooling equipment, dishwashers and rotary dryers.
• All surfaces around the hob should be able to withstand the heat generated by the hob.
• Never use a steam cleaner to clean the hob.
• Do not use a silicon sealant to seal the appliance against the aperture. This will make it difficult to
remove the hob from the aperture, particularly if it needs to be serviced.
LCHOBTC10_IB_110506.indd 17 5/6/11 1:48 PM