53
Electrical Testing Illustrated continued
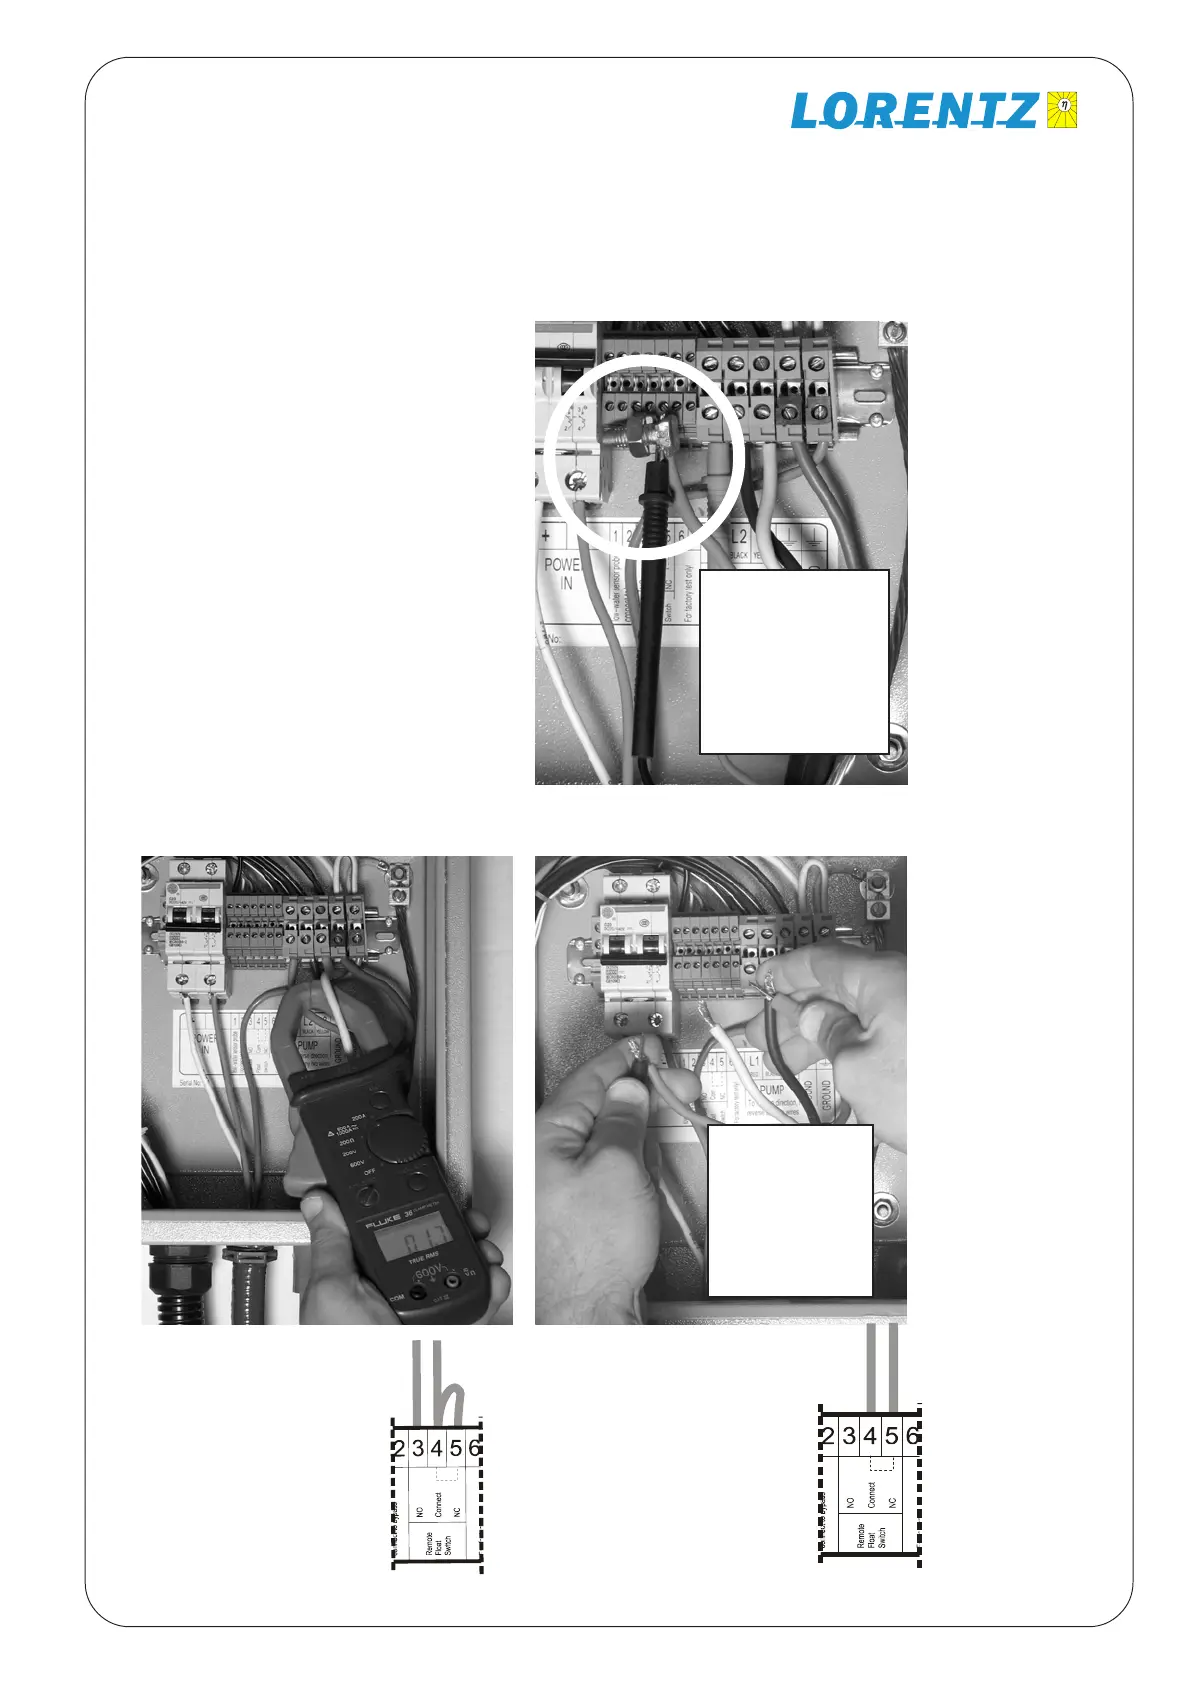
Test 5 Test 6
Test 6A Test 7
Other tests
See Section 9.2:
Check the low-
water probe and
check the full-tank
float switch
Analog (mechani-
cal) meter
requires zero-
adjustment. For
this test, you can
touch probes with
your fingers.
Remove any one
pump wire and re-
make the connection
THROUGH your
meter. Probe
connections must be
secure. A clamping
device is helpful
Test 10 Test 11
If a normally open (N.O.)
float switch is used, it is
wired this way.
To measure switch
circuit resistance,
DISCONNECT the wires
from terminals 3 & 4,
similar to Photo #7.
If a normally closed (N.C.)
float switch OR pressure
switch is used, it is wired
this way.
To measure switch circuit
resistance, DISCONNECT
the wires from terminals 4 &
5, similar to Photo #7.
Speed indication of Pump.
By counting the ammount of flashes of the
Pump ON LED
the RPM of the pump can be read off
900 RPM Pump ON LED is ON
1200 RPM Pump ON LED flashes once
1600 RPM Pump ON LED flashes twice
2000 RPM 3 X flashing
2400 RPM 4 X flashing
2800 RPM 5 X flashing