• You can use a RJ45 coupler or switch (not included) to connect male
ends of Ethernet cable together.
• To extend the cable run beyond 300ft (92m), a switch will be required
(sold separately).
Resources
Need Help?
Visit us online for up-to-date software
and complete instruction manuals
Click on the Downloads tab
4
Visit lorex.com
Search for the model
number of your product
Click on your product
in the search results
3
2
1
Copyright © 2020 Lorex Corporation
As our products are subject to continuous improvement, Lorex reserves the
right to modify product design, specications and prices, without notice and
without incurring any obligation. E&OE. All rights reserved.
E841CD_QSG_EN_R1
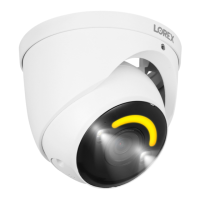
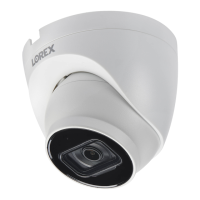
4K HD IP Dome Security Camera
• 4K HD IP Dome Security Camera
• Mounting Kit*
• Mounting Template*
• Ethernet Extension Cable with Pre-attached RJ45 Cable Gland*
• Read this guide carefully and keep it for future reference.
• Follow all instructions for safe use of the product and handle with care.
• Use the camera within given temperature, humidity and voltage levels
noted in the camera’s specications.
• Do not disassemble the camera.
• Do not point the camera directly towards the sun or a source of intense
light.
• Use only the supplied regulated power supply provided with the product.
Use of a non-regulated, non-conforming power supply can damage the
product and void the warranty.
• Periodic cleaning may be required. Use a damp cloth only. Do not use any
harsh, chemical-based cleaners.
• The supplied cable is rated for surface mounting only. Cables for in-wall
and oor-to-oor installations are sold separately (CMR type). These and
other cables are available at lorex.com.
* Per camera in multi-camera packs.
Quick Start Guide
English Version 1.0
E841CD SERIES
Package Contents
ATTENTION:
It is recommended to connect the camera to the NVR or an external PoE switch. If
using a DC power adapter (not included) with the camera, a REGULATED power supply
is REQUIRED for use with this camera. Use of a non-regulated, non-conforming power
supply can damage this product and voids the warranty.
Safety Precautions
Dimensions
lorex.com
Extend the cable run for your camera. Additional extension cables sold
separately. See table below:
Cable Extension Options
Cable Type
Max Cable Run
Distance
Max # of
Extensions
CAT5e (or higher) Ethernet cable 300ft (92m) 3
3.3” /
83mm
3.3” / 83mm
4” /
101mm
Ethernet
Extension
Cable
RJ45 Cable Gland
Using the RJ45 Cable Gland (Optional)
The RJ45 cable gland is
pre-attached to the included
Ethernet extension cable.
The RJ45 cable gland covers the camera’s Ethernet connector and the
RJ45 plug to provide weather-resistance and protection from dust, dirt and
other environmental contaminants.
To use the RJ45 cable gland:
RJ45 Cable
Gland Barrel
Camera Ethernet
Connector
NOTE: The RJ45 cable gland is weather-resistant. Seal the cap with
silicone and/or electrical tape for additional sealing if it will be exposed to
precipitation regularly.
Twist the RJ45 cable gland barrel securely onto the camera Ethernet
connector.
• For a full list of compatible recorders, visit lorex.com/compatibility.
• Not intended for submersion in water. Installation in a sheltered location
recommended.
• This camera includes an Auto Mechanical IR Cut Filter. When the camera
changes between Day/Night viewing modes, an audible clicking noise
may be heard from the camera. This clicking is normal, and indicates that
the camera lter is working.
Disclaimers