Do you have a question about the Lorex LHB927 and is the answer not in the manual?
Connect the wireless receiver, router, and power adapter for initial recorder setup.
Guide for users wishing to monitor the system using the Lorex Cirrus app or for complete control via monitor.
Steps to download the app, add your device, and configure login details for remote monitoring.
Tips for optimal placement, motion detection, and battery life, including ideal height and distance.
Step-by-step guide for mounting brackets, attaching cameras, and securing them with screws.
Guide to adjusting sensitivity, distance, and buzzer settings for accurate motion event recording.
Instructions for pairing wireless cameras to the recorder using the Lorex Cirrus app.
Instructions on connecting the power adapter to charge the camera power packs.
Addresses problems like no picture, short battery life, choppy video, and motion detection issues.
List of optional accessories available for purchase, including power packs and solar panels.
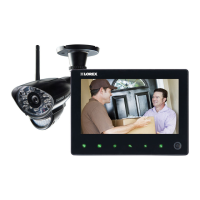
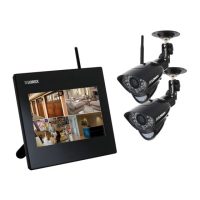
The Lorex HD Wire-Free Security System G2, comprising the LHB926/LHB927 recorder and LWB4800/LWB4900/LWB5800/LWB6800 Series cameras, is a comprehensive solution designed for home and business surveillance. This system offers users the flexibility of wire-free camera installation combined with remote monitoring capabilities via the Lorex Cirrus app.
The core function of this system is to provide high-definition video surveillance without the need for extensive wiring. The cameras capture video and transmit it wirelessly to the central recorder, which then allows users to view live footage, receive motion detection alerts, and manage their security system remotely. The wire-free design simplifies installation, making it suitable for various indoor and outdoor environments. The system is particularly geared towards users who prioritize ease of setup and mobile access to their surveillance feeds.
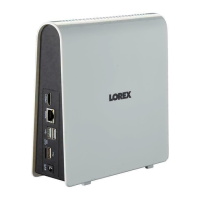
The system emphasizes a straightforward initial setup process. Users begin by preparing the wire-free cameras and their accompanying power packs. This involves attaching antennas to each camera and inserting charged power packs into the camera bases. The power packs come fully charged, eliminating the need for initial charging. The recorder is then set up by connecting the wireless receiver to its USB port, linking the recorder to a router via an Ethernet cable, and finally connecting the power adapter. The system is designed to start up within minutes.
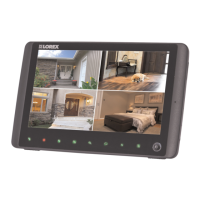
A key feature is the integration with the free Lorex Cirrus app, available for iOS and Android smartphones and tablets. This app serves as the primary interface for remote monitoring. Users download and install the app, then add their device by entering a Device ID (which can be scanned via a QR code on the recorder) and client port, along with default login credentials. Upon successful connection, users are prompted to create a new, secure 8-15 character password for enhanced security. Once connected, camera feeds appear on the app's Live screen, allowing users to stream live video, even from cameras in sleep mode. This mobile access enables users to keep an eye on their property from anywhere with an internet connection.
The system provides detailed guidance for optimal camera installation. Cameras should be placed at least 7 feet (2.1m) above the ground, angled slightly downward, and positioned to avoid busy areas like sidewalks. Obstructions such as tree branches should be avoided to ensure a clear field of view. For best motion detection, cameras should be within 20 feet (6.1m) of the monitoring area and positioned so that objects move side-to-side across the frame rather than directly towards or away from the camera. The cameras are weather-resistant (IP66 rated), making them suitable for outdoor use, though installation in a sheltered location is recommended to prolong battery life. Mounting involves securing a bracket to the desired surface, attaching the camera base to the bracket, and then securing it with a security screw. The camera angle can be adjusted post-installation for precise coverage.
To ensure accurate event recording and minimize false alarms, the system offers customizable motion detection settings via the Lorex Cirrus app. Users can adjust the sensitivity of motion detection, determining how much movement is required to trigger recording. While an area selection feature is mentioned, it is noted as "not supported" in the provided guide. A "Distance Setting" allows users to configure the detection range, with an icon changing to indicate motion detection. This helps in fine-tuning the system to detect relevant events while ignoring unwanted triggers. Additionally, a buzzer can be enabled on the recorder to sound an alarm when motion is detected. These settings can be configured independently for each camera.
Cameras are pre-paired with the recorder out of the box. However, if a camera becomes unpaired or if additional wire-free cameras (up to a maximum of 6 per system) are purchased, users can easily re-pair them using the Lorex Cirrus app. This involves selecting a free channel in the app, tapping "PAIR," and then pressing and holding the pair button on the back of the camera for 3 seconds. A "pairing successful" message confirms the process.
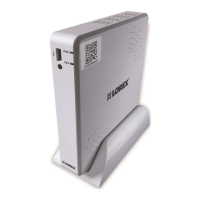
The system utilizes rechargeable power packs for wire-free operation. These power packs can be charged by connecting the included power adapter to the micro USB port on the pack. An LED indicator on the power pack shows its charging status: green for fully charged and red for currently charging. The system also includes a note about charging temperature, indicating that the power pack LED flashes red when outside the safe charging temperature range (32-113°F / 0-45°C), during which the camera remains powered up but the pack will not charge.
The manual includes a comprehensive troubleshooting section to address common issues users might encounter. This section provides solutions for problems such as:
The cameras include an Auto Mechanical IR Cut Filter. An audible clicking noise may be heard when the camera switches between Day/Night viewing modes. This is described as normal operation, indicating the camera filter is working correctly. While not explicitly a "maintenance" task, understanding this sound helps users identify normal system behavior.
Users are encouraged to visit lorex.com for up-to-date software and complete instruction manuals. This ensures access to the latest information and support resources for their security system.
The manual lists available accessories for purchase, including extra power pack power adapters, 2-cell and 3-cell accessory power packs, and solar panels. This allows users to expand or enhance their system as needed, offering flexibility in power solutions and system configuration. Compatibility details for these accessories are also provided, directing users to lorex.com/compatibility for specific information.
| Video Channels | 8 |
|---|---|
| Recording Resolution | 1080p |
| Hard Drive Capacity | 1TB |
| Hard Drive Support | Yes |
| Night Vision Range | 100ft |
| Remote Viewing | Yes |
| Video Output | HDMI, VGA |
| Operating System | Linux |
| Remote Viewing App | Lorex Home |