Resources
• You can use a RJ45 coupler or switch (not included) to connect male ends
of Ethernet cable together.
• To extend the cable run beyond 300ft (92m), a switch will be required (sold
separately).
LKB353A_QSG_EN_R1
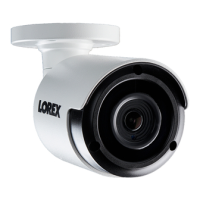
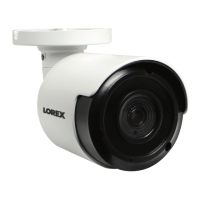
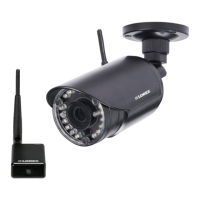
5MP HD IP Bullet Security Camera with Audio
• 5MP HD IP Bullet Security Camera with Audio
• Mounting Kit*
• Ethernet Extension Cable*
• Weatherproofing Cap*
• Allen Key*
• Read this guide carefully and keep it for future reference.
• Follow all instructions for safe use of the product and handle with care.
• Use the camera within given temperature, humidity and voltage levels noted in the
camera’s specifications.
• Do not disassemble the camera.
• Do not point the camera directly towards the sun or a source of intense light.
• Use only the supplied regulated power supply provided with the product. Use of a non-
regulated, non-conforming power supply can damage the product and void the warranty.
• Periodic cleaning may be required. Use a damp cloth only. Do not use any harsh, chemical-
based cleaners.
• The supplied cable is rated for surface mounting only. Cables for in-wall and floor-to-
floor installations are sold separately (CMR type). These and other cables are available at
lorextechnology.com
* Per camera in multi-camera packs.
Copyright © 2017 Lorex Corporation
As our products are subject to continuous improvement, Lorex reserves the right to
modify product design, specifications and prices, without notice and without
incurring any obligation. E&OE. All rights reserved.
Quick Start Guide
English Version 1.0
LKB353A SERIES
Package Contents
ATTENTION:
It is recommended to connect the camera to the NVR or an external PoE
switch. If using a DC power adapter (not included) with the camera, a
REGULATED power supply is REQUIRED for use with this camera. Use of
a non-regulated, non-conforming power supply can damage this product
and voids the warranty.
Safety Precautions
Dimensions
6.1” / 154mm
2.7” / 69mm
Need Help?
Visit us online for up-to-date software and complete instruction manuals
Click on the Downloads tab
4
Visit lorextechnology.com
Search for the model number
of your product
Click on your product in the
search results
3
2
1
www.lorextechnology.com
Extend the cable run for your camera. Additional extension cables sold
separately. See table below:
Cable Extension Options
Cable Type
Max Cable Run
Distance
Max # of
Extensions
CAT5e (or higher) Ethernet cable 300ft (92m) 3
• For a full list of compatible recorders, visit lorextechnology.com/compatibility
• Not intended for submersion in water. Installation in a sheltered location
recommended.
Disclaimers
Audio Settings
ATTENTION:
Audio recording without consent is illegal in certain jurisdictions. Lorex Corporation
assumes no liability for use of its products that does not conform with local laws.
Audio is disabled by default. If needed, you can enable audio
through a Lorex NVR.
NOTE: These instructions are based on current NVR interface. For the most up-to-
date instructions, see your NVR’s instruction manual on www.lorextechnology.com.
To enable camera audio:
1. In Live View, right-click anywhere on the screen to open the Quick Menu.
2. Click Main Menu. If prompted, enter the system user name and password.
3. Under Settings on the left-side panel, click Record, then click the Mainstream
tab.
4. Select a channel where an audio camera is connected next to Channel.
5. Check the Audio checkbox to enable audio. Click Save to apply changes.
6. Repeat steps 4 and 5 for any other audio cameras you want to enable audio for.
7. (Optional) Click the Substream tab and perform the same steps to enable audio
when viewing cameras through the computer or mobile applications.
Microphone