Do you have a question about the Lorex LNB8111 Series and is the answer not in the manual?
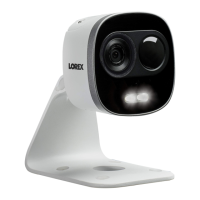
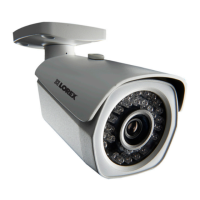
Identifies the light sensor and IR LEDs on the camera.
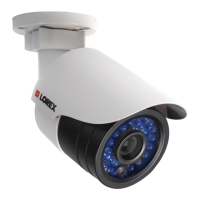
Locates the sun shield screw for adjustment.
Details the adjustment screw for positioning the camera.
Identifies the camera base component.
Explains the reset button function and how to use it.
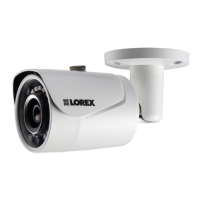
Guidance on planning cable routes before camera installation.
Step-by-step instructions for mounting and positioning the camera.
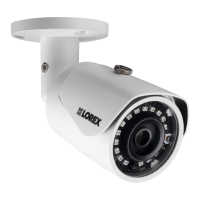
Instructions for installing the optional weather resistant cap.
Details on connecting the camera via Ethernet to NVR or network.
Illustrates network setup scenarios for camera connection.
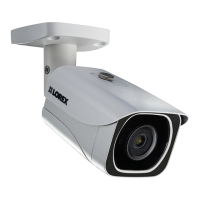
This document describes the LNB8111 Series 4K Ultra HD IR Bullet IP Camera, a surveillance device designed for both indoor and outdoor use.
The camera's primary function is to capture high-definition video footage, offering 4K Ultra HD resolution. It integrates infrared (IR) LEDs for night vision capabilities, allowing it to record in low-light or no-light conditions. A built-in light sensor automatically detects ambient light levels to activate the IR LEDs when necessary. The camera also features an Auto Mechanical IR Cut Filter, which automatically switches between Day/Night viewing modes to optimize image quality. This filter produces an audible clicking noise during mode transitions, which is a normal part of its operation.
For connectivity, the camera is designed to be powered and connected to a network via Power over Ethernet (PoE). It is recommended to connect the camera directly to a Lorex Network Video Recorder (NVR) or an external PoE switch. If a DC power adapter is used (which is optional and not included), a regulated power supply is required to prevent damage to the product and avoid voiding the warranty. The camera comes with an Ethernet extension cable for flexible installation.
The camera's physical design includes a sun shield, which can be adjusted using a sun shield screw, to protect the lens from direct sunlight and reduce glare. An adjustment screw allows for precise positioning of the camera's viewing angle. The camera base provides a stable mounting point. A reset button is located on the camera; pressing and holding it for 5 seconds will restore the camera to its default factory settings.
Installation of the camera involves several steps to ensure optimal performance and security. First, a suitable mounting location should be chosen, preferably one that is sheltered if installed outdoors, and where vandals cannot easily reach it. The camera should be pointed away from direct sunlight or intense light sources to prevent image degradation. Once the mounting surface is prepared, the camera base is attached using the provided screws and wall anchors. The camera's viewing angle can then be adjusted using the adjustment screw. Finally, the protective film on the camera lens should be removed. Secure cabling is crucial to prevent exposure or easy cutting. For in-wall or floor-to-floor installations, specific CMR type cables are available separately.
Maintenance of the camera is straightforward. Periodic cleaning may be required, using only a damp cloth. Harsh, chemical-based cleaners should be avoided. The camera is not intended for submersion in water. It is important to operate the camera within the specified temperature, humidity, and voltage levels outlined in its specifications. Disassembling the camera is not recommended and may void the warranty.
The camera is compatible with specific Lorex NVRs, and users can check the Lorex website for a full list of compatible recorders. For optimal performance, it is important to ensure that the NVR firmware is up-to-date. If connecting to a third-party NVR, users may need to adjust settings for H.265 compression or other network configurations.
In case of troubleshooting, common issues include no picture or signal, picture being too bright or too dark, night vision not working, or a cloudy picture. Solutions often involve checking cable connections, ensuring proper power supply, adjusting camera position, cleaning the lens, or updating firmware. For example, if the picture is too bright, it might be necessary to move the camera to a different location or adjust brightness and contrast settings on the NVR. If night vision is not working, checking the camera's light sensor and IR LEDs, or ensuring the camera filter is working correctly, are common remedies.
The camera is designed to be robust for outdoor use, but installation in a sheltered location is recommended to prolong its lifespan. It is crucial to use only regulated power supplies if not utilizing PoE, as unregulated power can damage the device. The provided cable is rated for surface mounting only, emphasizing the need for appropriate cabling for different installation types.
| Video Resolution | 4K (3840 x 2160) |
|---|---|
| IR Cut Filter | Yes |
| Housing Material | Metal |
| Lens | 4mm |
| Field of View | 87° horizontal |
| Operating Temperature | -22°F ~ 140°F / -30°C ~ 60°C |
| Power | PoE (802.3af) |
| Storage | NVR |
| Compatibility | Lorex |