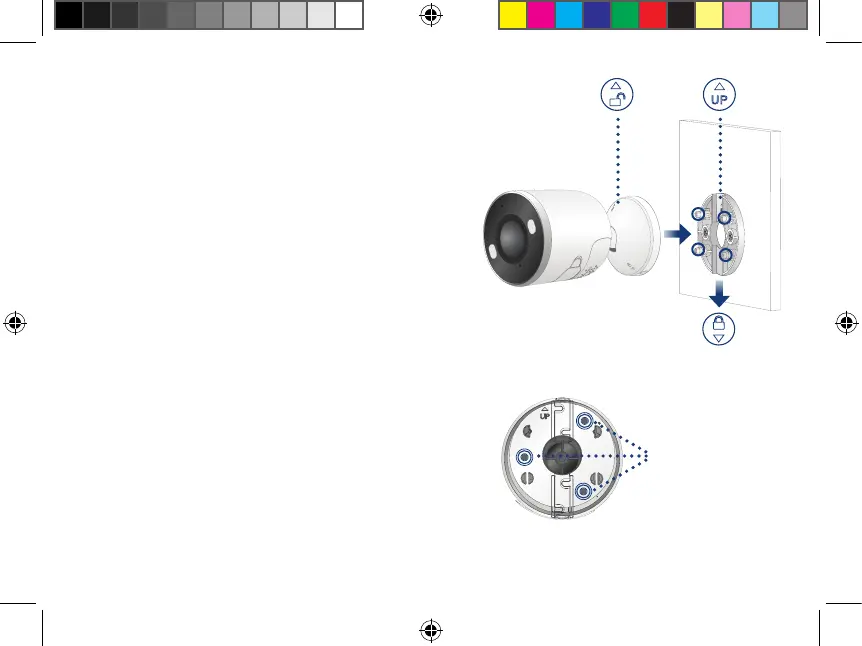
3. Align the arrows of the mounting plate and template.
Using a screwdriver and the provided screws, secure
the mounting plate to the surface.
4. Align the arrows between the wall mounting
bracket and plate. Push the bracket in to install, then
slide down to lock in place. You will hear a ‘click’
when the bracket is installed.
5. Attach the camera to the mounting bracket using the
threaded insert at the rear of the camera. Rotate the
camera clockwise until attached, then tighten into
place with the adjustable nut.
6. Adjust the camera to the desired angle.
Note: If the camera is not holding in place or
difcult to adjust, unplug the camera and slide the bracket
up to detach from the mounting plate. Tighten or loosen
the 3 screws at the back of the mounting bracket to adjust
accordingly. Repeat steps 4-6 to re-install.
Back - Wall mounting bracket
Adjustable screws
W482CAD_QSG_TRILINGUAL_R1.indd 13W482CAD_QSG_TRILINGUAL_R1.indd 13 2021-05-27 2:51:02 PM2021-05-27 2:51:02 PM
 Loading...