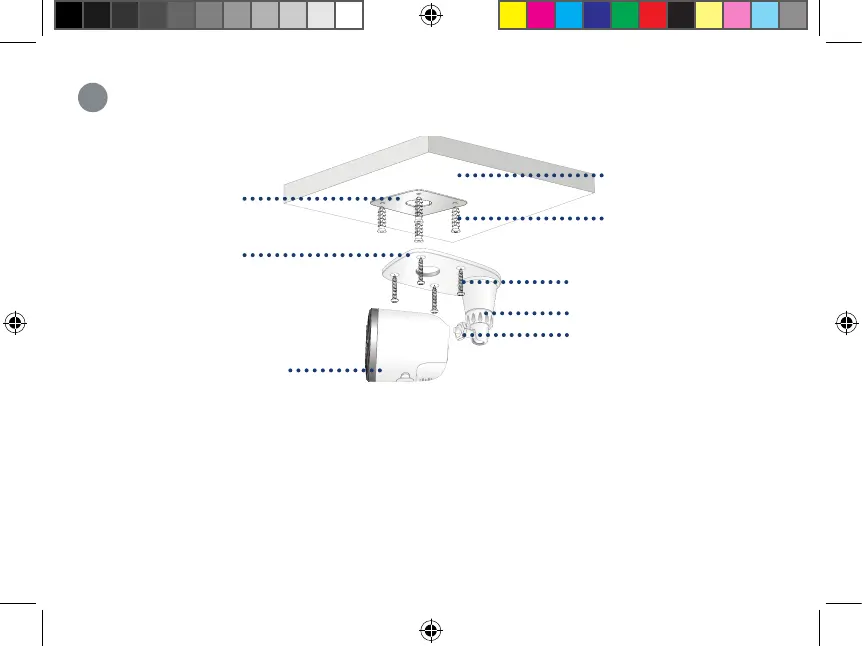
Ceiling Mounting
Screws
Anchors
(Optional)
Mounting surface
Mounting template
Adjustable nut
Adjustable ring
Camera
Ceiling/table
mounting bracket
1. Place the mounting template onto the desired location.
Note: Ensure an outlet is nearby, and keep in mind the cable lengths.
2. Using a 15/64" (6mm) drill bit, drill 4 holes over the X symbols on the template.
Optional: Drill 15/64” (6mm) holes for the anchors.
To ceiling mount the camera:
9
W482CAD_QSG_TRILINGUAL_R1.indd 14W482CAD_QSG_TRILINGUAL_R1.indd 14 2021-05-27 2:51:03 PM2021-05-27 2:51:03 PM
 Loading...