ASSEMBLY
OM 0472SB-A [12]
Figure 2
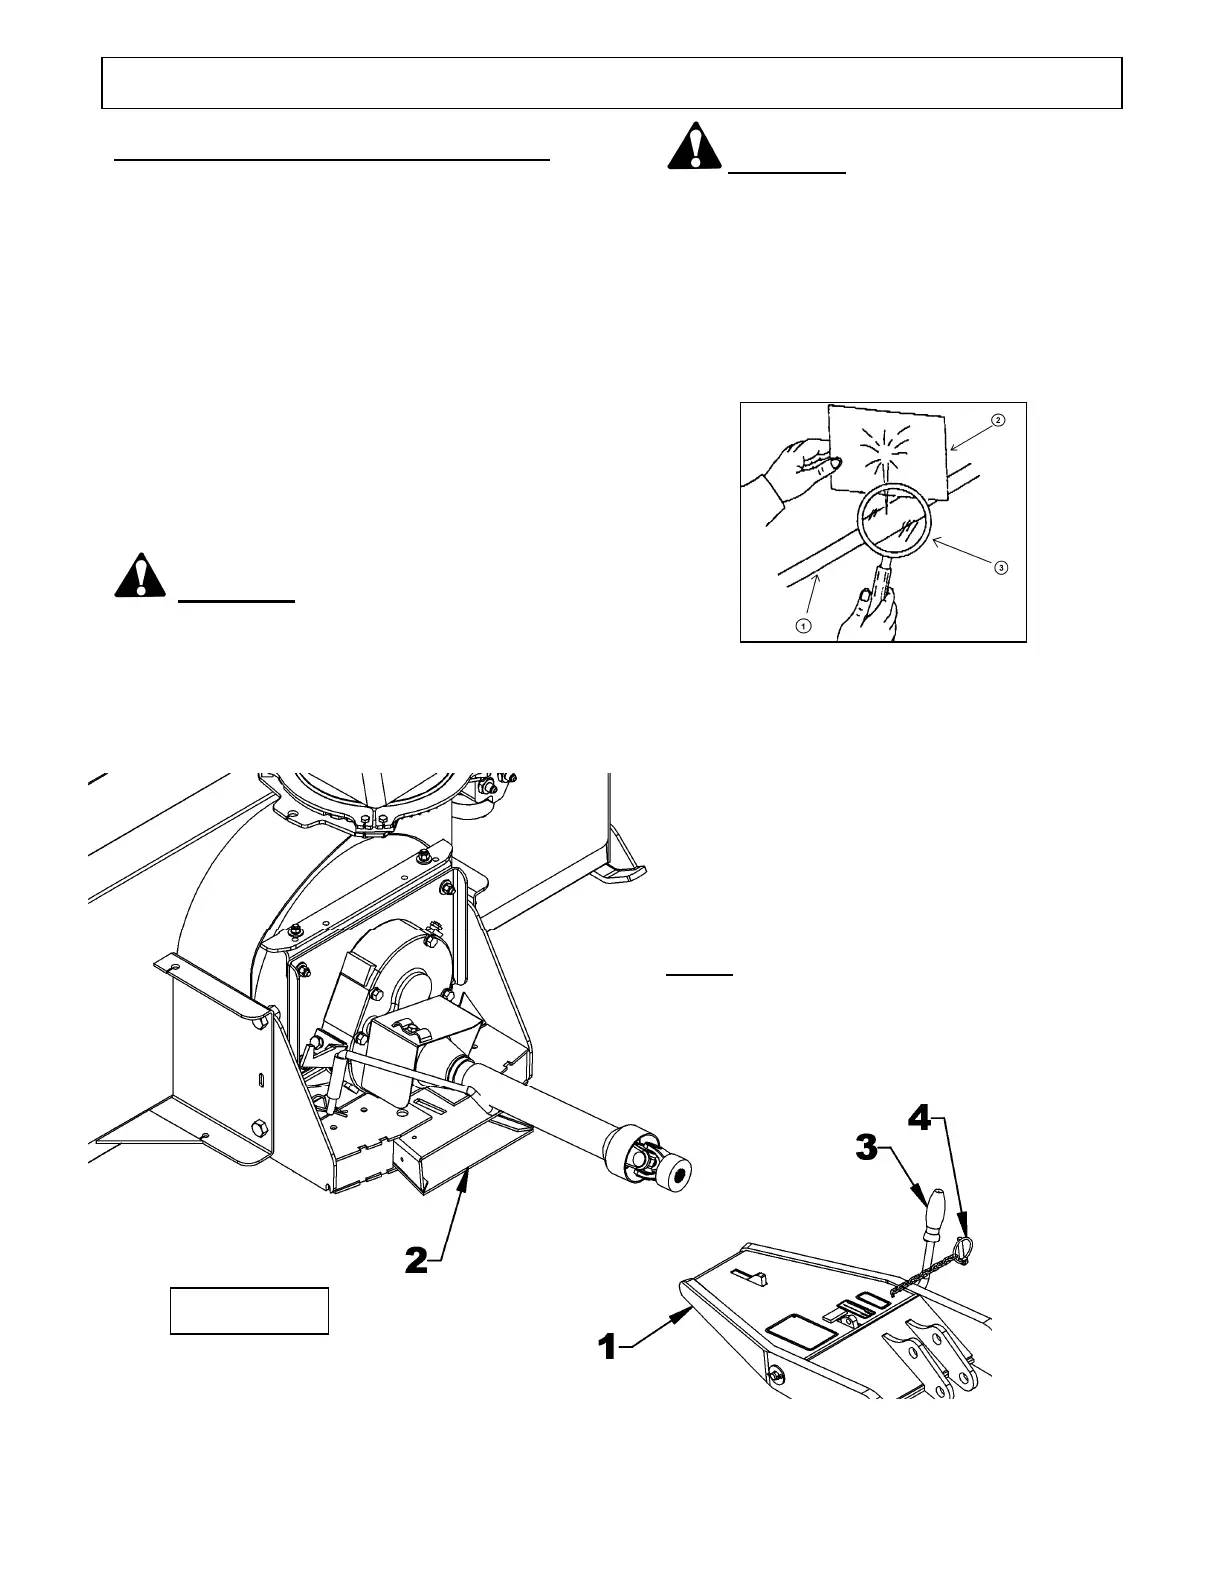
Snowblower Installation (Figures 2-3)
1. Figure 2: With the driveline placed on its
support, carefully drive in tractor inserting
male hitch (item 1) all the way into female
hitch (item 2).
2. Turn off tractor engine, set parking brake
and remove the ignition key.
3. Figure 2: Push the hitch lever (item 3)
forward to lock position and secure latch
with the linchpin (item 4).
4. Remove the driveline from its storage
support and secure it to its bracket. Attach
the driveline quick connect yoke to the
tractor PTO shaft.
WARNING: This shaft turns at very
high RPM. If the collar is not locked to the
shaft at tractor end, or if the yoke at the
blower end is not secured properly, the
driveline can fly loose with great force
capable of causing serious injury or death.
WARNING
To avoid serious personal injury:
Escaping hydraulic/diesel fluid under
pressure can penetrate the skin causing
serious injury.
• Do not use your hands to check for
leaks. Use a piece of cardboard or paper
to search for leaks.
(1) Hydraulic line
(2) Cardboard
(3) Magnifying glass
• Stop engine and relieve pressure before
connecting or disconnecting lines.
• Tighten all connections before starting
engine or pressurizing lines.
If any fluid is injected into the skin, obtain
medical attention immediately or gangrene
may result.
NOTE: If hydraulic hoses are already
identified with colored plastic rings,
connect attachment hoses to matching
color female couplers on hydraulic
control valve.
 Loading...