INSTALLATION
Safety
E 500-3000 | 21
ENGLISH
INSTALLATION
8. Safety
Only a qualified contractor should carry out installation, com-
missioning, maintenance and repair of the appliance.
8.1 General safety instructions
We guarantee trouble-free function and operational reliability
only if original accessories and spare parts intended for the
appliance are used.
CAUTION Burns
- Only mount the appliance on a vertical wall that
is temperature-resistant to at least 85°C.
- Maintain the minimum clearances to adjacent
objects.
!
Material losses
- Never install the appliance directly below a wall
socket.
- Ensure that the power cable is not in contact with
any appliance components.
8.2 Instructions, standards and regulations
Note
Observe all applicable national and regional regula-
tions and instructions.
9. Appliance description
9.1 Standard delivery
The following are delivered with the appliance:
- Wall mounting bracket (hooked into the appliance)
10. Installation
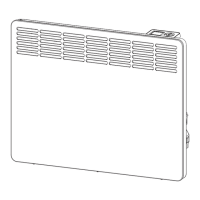
10.1 Minimum clearances
D0000068096
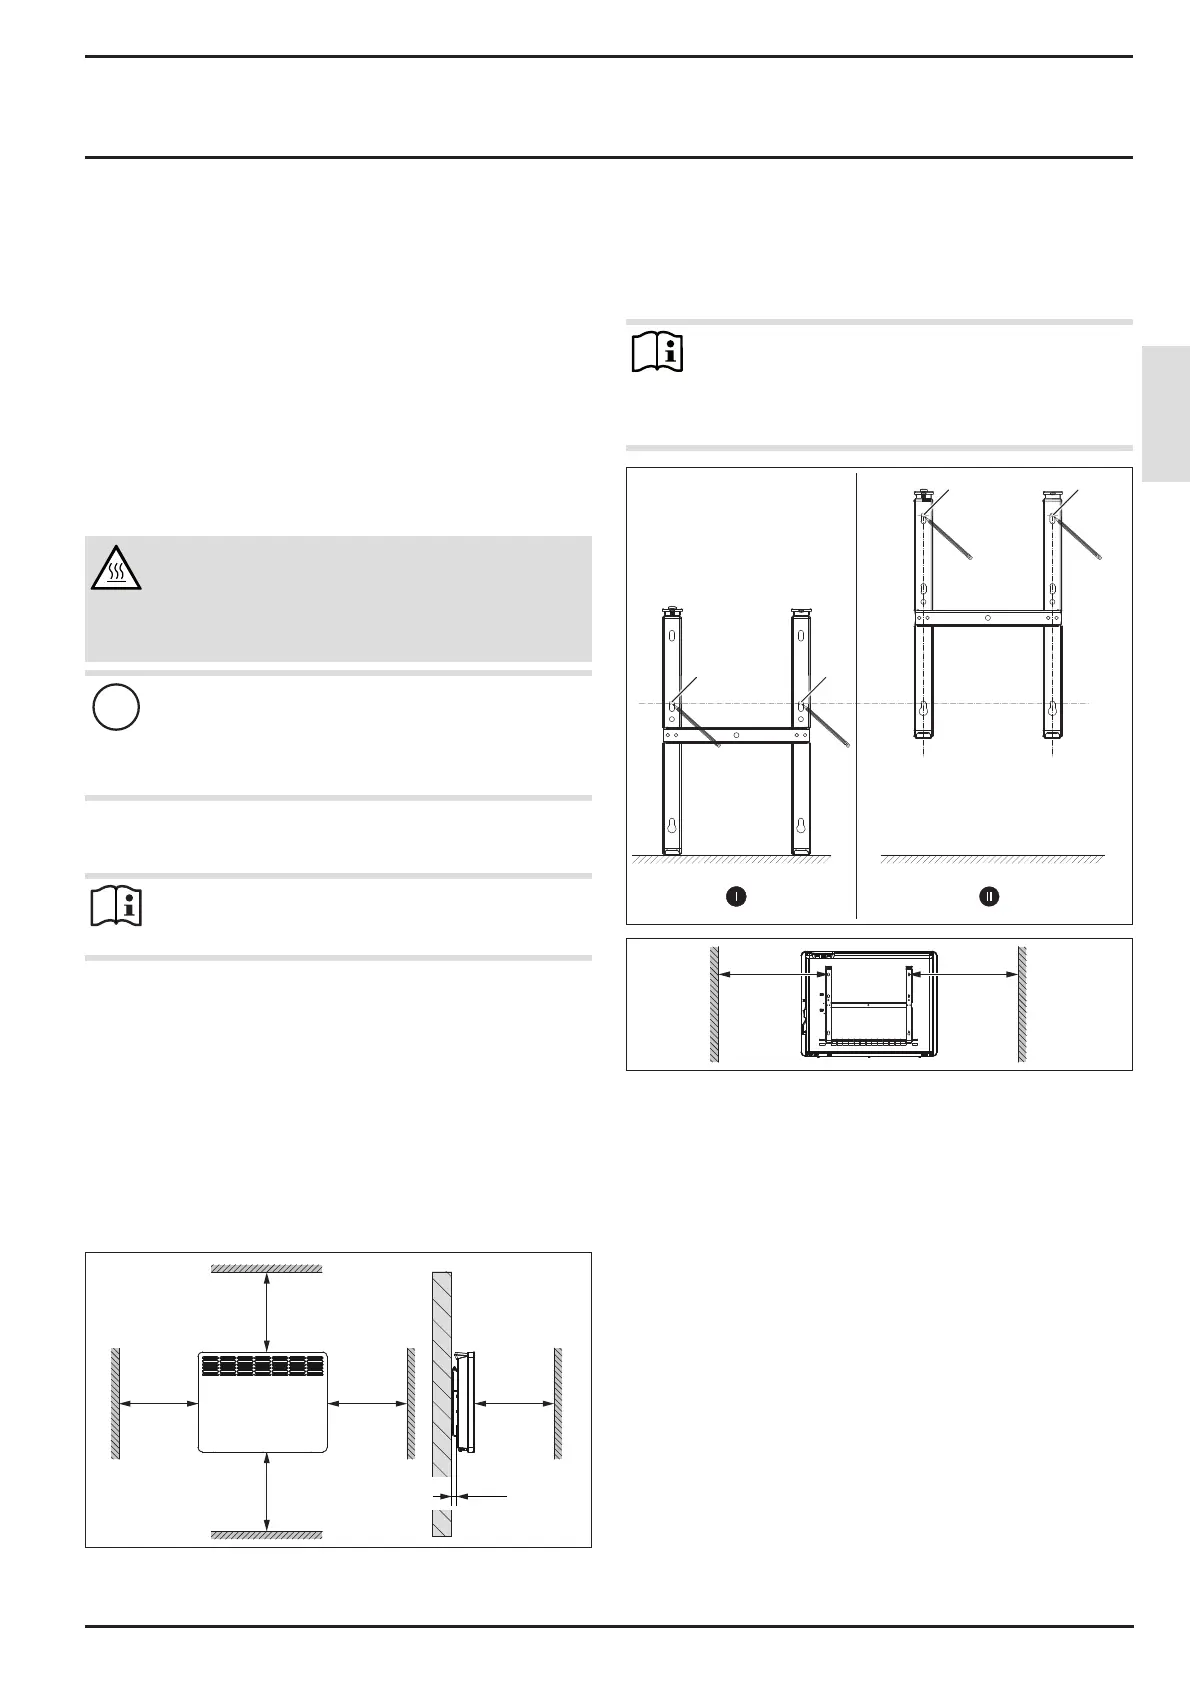
10.2 Installing the wall mounting bracket
The appliance is intended for wall mounting using the wall
mounting bracket supplied. The appliance may only be in-
stalled horizontally.
Note
- The wall mounting bracket can be used as a tem-
plate for wall mounting. This ensures sufficient
clearance from the floor.
- Use a spirit level if the floor is uneven or sloping.
aaa
D0000072159
1
3
2
4
D0000072312
f Unhook the wall mounting bracket from the appliance.
f Place the centred wall mounting bracket horizontally on
the floor. Mark holes1 and 2.
f Lift up the wall mounting bracket so that its lower holes
match up with the markings you have just made on the
installation wall.
f Mark holes3 and 4 on the installation wall.
f Drill the holes at the 4markings.
f Secure the wall mounting bracket with suitable fixing ma-
terials (screws, rawl plugs). With the vertical slots, you can
compensate for an offset fixing hole.
 Loading...