9|Page
Operation
SHERPA Remote Display
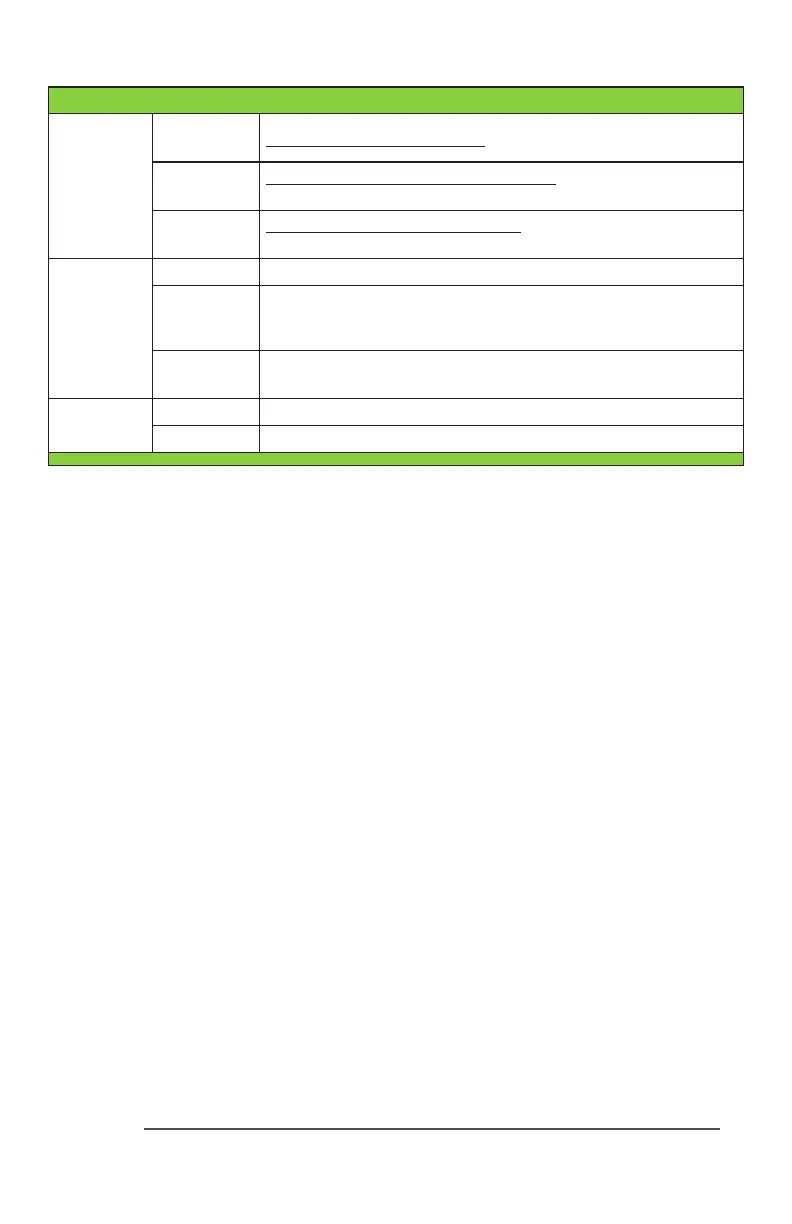
Status LED’s
Good
(Green)
Waterissafeforconsumption.NoActiveAlarms.
Caution
(Yellow)
Watermaynotbesafeforconsumption.
ActiveMinorAlarm,checksystemfordetails.
Alarm
(Red)
WaterisNOTsafeforconsumption.
ActiveMajorAlarm,checksystemfordetails.
Comm. LED
OFF Communication is working.
Flashing
CommunicationisNOTworking.
Remote Display is Out-of-Range
2
, Transmier is disconnected
OR controller is powered o.
ON
RemoteDisplayisaemptingtopairwithalocal
transmierinproximity.
Power
Switch
I RemoteDisplayPoweredON
O RemoteDisplayPoweredOFF
NOTE 1: Not Compable with MOD-RAM. The SHERPA gets detected as a “Remote Alarm” on
BLACKCOMB or BLACKCOMB-HO controllers during the start-up sequence.
NOTE 2: The Wireless Range can vary based on the installation environment; objects, walls
and metal obstacles can interfere and degrade the wireless signal. Best suited for residential
applications.
Pairing an Additional Remote Display
TopairanadditionalRemoteDisplaytoacurrentlyinstalledTransmier:
Step 1)PowerONtheAdditionalRemoteDisplaywithin5m(15)proximitytothe
transmier;bysimplypluggingtheAC/DCwalladapterintothePowerPorton
theRemoteDisplayandslidingtheswitchtotheONposition.
Step 2)TheRemoteDisplayperformsself-pairingwiththelocaltransmier.Oncepaired
theCommunicationLEDontheRemoteDisplaywillturnOFFandaStatusLED
willturnON.
Step 3)Oncepairingiscomplete,relocatetheRemoteDisplaytoanylocation
2
.