8|Page
WATER QUALITY
MONITOR MODULE
MODEL # MOD-SHERPA
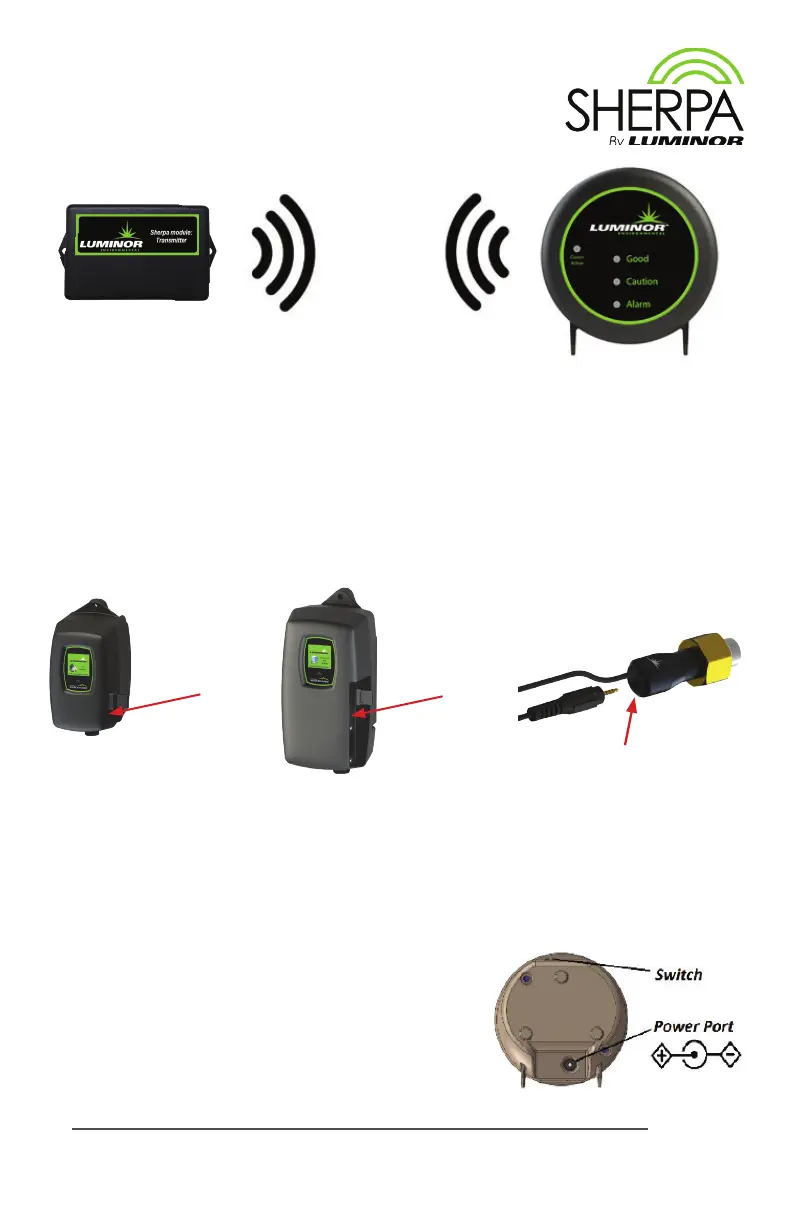
ThemodulecomeswithaSHERPATransmierandaSHERPARemoteDisplay.TheTransmier
connectstoaBLACKCOMBandBLACKCOMB-HOcontrollerandtransmitsthecontroller’sstatus
wirelesslytotheRemoteDisplay.EveryTransmierandRemoteDisplayispairedtogether
andusesencryptiontocreateareliableandsecurecommunicationlinkbetweenthetwo
devices.EveryTransmiersupportsuptoveRemoteDisplays.AdditionalRemoteDisplays
canbepurchasedandinstalledseparately.Referto‘PairinganAdditionalRemoteDisplay’for
additionalRemoteDisplayinstallation.
Sensor IEP
Installaon
IEP
connecon
BLACKCOMB
Controller
BLACKCOMB-HO
Controller
IEP
connecon
IEP
connecon
Installation
Step 1)PowerotheBLACKCOMBorBLACKCOMB-HOcontroller.
Step 2)PlugthemaleplugoftheSHERPATransmierintotheIEP(InniteExpandability
Port)onthecontroller,orintoanyotherLUMINORmodulethatcontainsanIEP
(sensor,4-20mAmodule,solenoidmodule,etc.)andthenrestartthesystem
Note1
.
Step 3)ToReceivetheBLACKCOMBor
BLACKCOMB-HOcontroller’s
status on the SHERPA Remote
Display,plugtheAC/DCwall
adapterintothePowerPorton
theSHERPARemoteDisplay(5V
Max)andslidetheswitchto
theONposion.
Back of
Remote
Display
SHERPA Transmier
SHERPA Remote Display
50m/164
(Note2)