Acuity LS Page 8
Operating Manual #OMA20200327
3. Open folder “Acuity LS Interface Installer” → ”Volume” and double-click on file “setup.exe”.
4. Select the default for all prompts. The user software installation will take several minutes to
complete.
5. Once software is installed, the user will be prompted by Windows to install the FTDI drivers for
USB driver operation. Select the defaults for all prompts.
6. Reboot the computer if prompted.
7. Software and USB driver installation is complete. The computer is now ready to interface with
Acuity LS device.
5. SOFTWARE OPERATION
This section provides instructions for connecting an Acuity LS device to a computer and operating the
user interface software.
Establishing Communication
To establish communications between the Acuity LS and the computer:
1. Remove the protective cap (Figure 1, item 4) and install the RS-485 cable (Figure 1, item 5). The
other end of the cable plugs into any USB 2.0 compliant serial port. NOTE: When finished
communicating with the device, ensure that the protective cap is reinstalled by snugging down
hand tight (no tools).
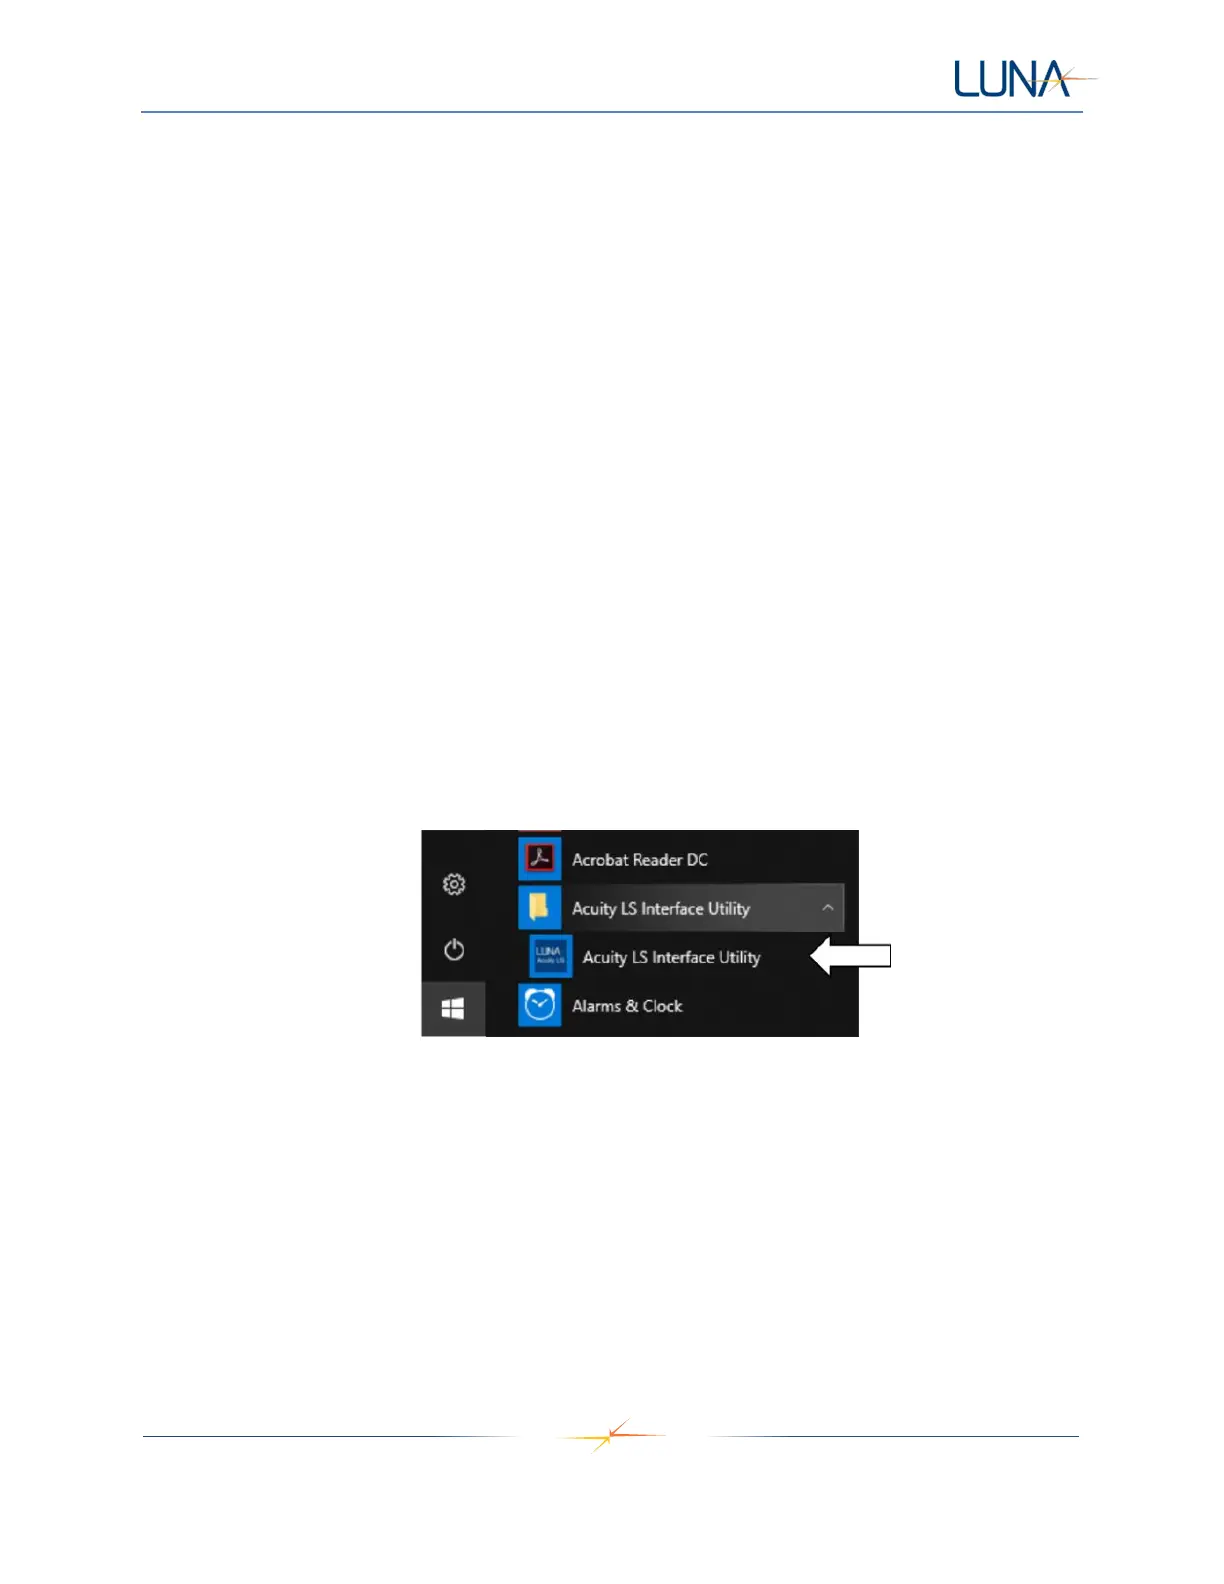
2. In the Windows start menu, locate the Acuity LS Interface folder and select the program (Figure
5).
Figure 5. Starting the Acuity LS Interface program.
3. The communications (COM) port selection window will appear first (Figure 6, left). This step is
required to tell the computer how to communicate with the Acuity LS communications cable.
4. To select the COM port, verify that the communications cable is plugged into the computer and
click the small arrow beside the “COM1” label to get the drop-down menu. This shows a list of
the available serial communications ports (Figure 6, right).
NOTE:
a. “COM1” and “COM3” are usually reserved by the system and are not associated with
Acuity LS.