Center
Workpiece
Sanding disc
Miter gauge
(accessory)
Workpiece
Center
Workpiece
(left of center)
Center
Miter gauge
(accessory)
Combination square
Drive drum
Idler
drum
Work-
piece
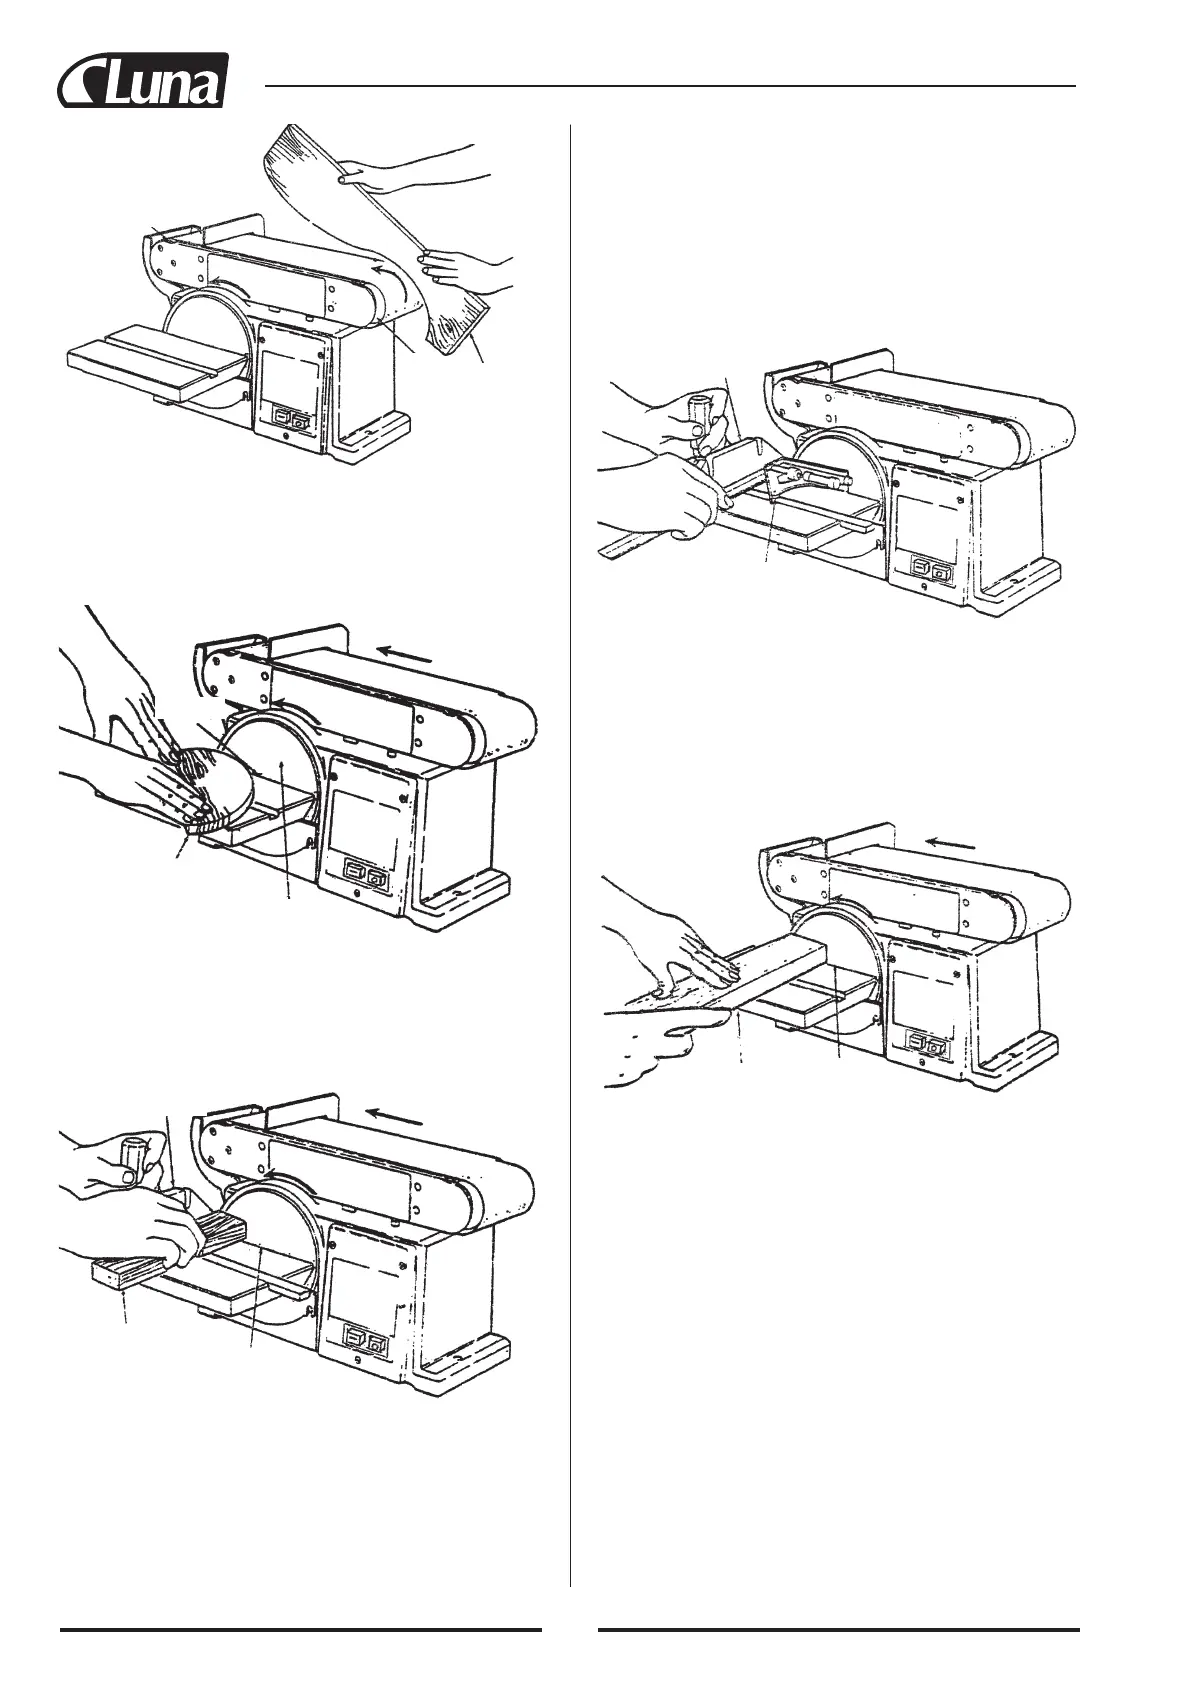
SANDING CURVED EDGES
Always sand inside curves on the idler drum as shown.
WARNING: Never attempt to sand the ends of a workpiece on the
idler drum. Applying the end of the workpiece to the idler drum
could cause the workpiece to fly up and result in an injury.
Always sand outside curves on the left side of center on the san-
ding disc as shown.
WARNING: Applying the workpiece to the right side of the disc
could cause workpiece to fly up (kickback) and result in an injury.
SANDING SMALL END SURFACES ON THE
SANDING DISC
NOTE: Use of a miter gauge (optional accessory) is recommended
for this operation. Always move the work across left side of center
on the sanding disc face as shown.
WARNING: Applying the workpiece to the right side of the disc
first could cause workpiece to fly up (kickback) and result in an
injury.
WARNING: For your own safety, turn switch “off” and remove
plug from power source outlet before adjusting your sander.
NOTE: Use a combination square to square the miter gauge to
the face of the disc (combination square must be “true” - See
“Unpacking - Tools Needed” section on page 6 for checking this
method). If it is not square, loosen the miter gauge. knob and move
the miter gauge slightly until it “is square. Without moving the
miter gauge, tighten the knob securely.
Always position the workpiece to the left of center on sanding disc
with disc rotating counterclockwise as shown. The table may be
tilted for beveled work.
38