Do you have a question about the Lust CD 1 Series and is the answer not in the manual?
Detailed performance data for amplifier modules CD_...1 and CD_...2.
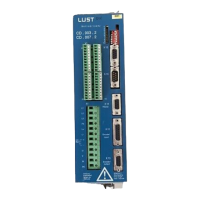
Defines the intended applications and usage for CD amplifier modules.
Explanation of safety symbols used in the manual.
Highlights sections requiring particular attention for safe operation.
General safety instructions for working with electrical units.
General regulations for electrical installation of equipment.
Guidelines for EMC-compliant installation, cable routing, and earthing.
Procedure for selecting amplifier modules and motors for a complete drive system.
Selection of conductors for power connections based on temperature and current.
Connection details for three-phase and single-phase mains supply.
DC link voltage specifications for CD_.1 modules.
DC link voltage specifications for CD_.1 modules.
DC link voltage specifications for CD_.2 modules.
Wiring diagram for connecting the motor, including phase sequence.
Details on the external 24V DC supply for the regulator and processors.
Description of analog and digital control inputs.
Configuration options for analog setpoint inputs.
Description of digital control inputs and their functions.
Regulates the drive to the prescribed current setpoint.
Enables the controller and setpoints; stops drive on disable.
Enables the electronic power switches; drive is currentless if disabled.
Procedure to acknowledge fault signals after fault elimination.
Enables the ramp generator for controlled acceleration/deceleration.
Indicates motor limit temperature exceeded; cancels readiness for operation.
Indicates ballast resistance temperature exceeded; cancels readiness for operation.
Optimization of inner control loops: current, speed, and flux regulators.
Optimizing the current regulator using Vpi and Tni parameters.
Optimizing the speed regulator using Vpn and Tnn parameters.
Step-by-step procedure for commissioning amplifier modules.
Using VecWin, BZZ, or custom programs for parameter setting.
Input parameters for current, speed, flux regulators and HLA ramps.
Disengaging module, connecting motor, and optimizing parameters.
Explanation of LED indicators for fault signals and status.
Troubleshooting procedures for common faults indicated by LEDs.
Troubleshooting computer fault: check EMC, restart, or send for service.
Troubleshooting checksum fault: parameter content change or software version mismatch.
Troubleshooting motor over-temperature: check cooling, weaken regulation.
Troubleshooting defective posistor evaluation: check setpoints, bridge connections.
Troubleshooting short-circuit/ground fault: disconnect motor, check winding, cable.
Troubleshooting output stage over-temperature: cool down, check load and ventilation.
Troubleshooting sensor fault: check cable connection to motor/amplifier.
Troubleshooting supply voltage fault: check load/short-circuit in peripherals.
Troubleshooting DC link over/undervoltage: check braking energy, voltage.
Troubleshooting ballast over-temperature: check brake energy and mains voltage.
Information required for contacting customer service and technical support.