quick-start guide
Pico Paddle Remote and
Wallplate Mounting Kit
Welcome— and thank you for purchasing a Pico paddle remote and wallplate
mounting kit.
Before you install the remote, additional information, FAQ’s, and videos can be
found at www.lutron.com/casetasupport
We hope you enjoy the convenience of Caséta Wireless!
Double your warranty
Tools you’ll need
Flat-head screwdriver
Phillips-head screwdriver Drill and drill bit
3/16 in (5 mm)
Pliers
Love Caséta Wireless switches? Have ideas for making them better?
Tell us what you think and we’ll extend your warranty by 1 year.
www.casetawireless.com/register
P/N 0302108 Rev. A
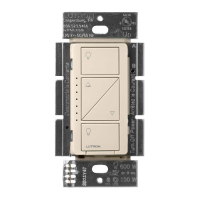
Contents supplied (PJ2W-P2B)
Claro wallplate
(CW-1)
Pico paddle remote
(PJ2-P2B)
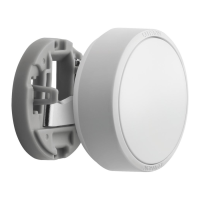
Wallbox adapter
(PICO-WBX-ADAPT)
(A) Wall anchors (x2)
(C) Black 6-20 x 1.25 in
wood screws (x2)
(B) Silver 6-32 x 7/8 in
machine screws (x2)
(D) Wire connectors (x2)
Installing your Pico paddle remote
A. Over Wallbox Installation
1 T
Turn power off at circuit
breaker!
WARNING! Shock Hazard. May result in serious injury or death.
Turn off power before installing. NOTE: If cover plate is removed,
only install over wall surface. DO NOT install over wallbox.
1. 2.
1.
2.
WARNING! Shock Hazard.
May result in serious injury or death.
Turn off the power before installing.
NOTE: If cover plate is removed,
only install over wall surface.
DO NOT install over wallbox.
replacing existing switch (3-way applications) with Pico paddle remotes
4
Connect the wires
Using the provided wire connectors, connect all wires
in the wallbox together (EXCEPT for the ground wire
and the neutral wires). Cap the ground wire and cap the
neutral wires.
6
Slide Pico paddle remote
onto wallbox adapter
7
Attach wallplate
8
Restore power
ON
OR
B. Wall Surface Installation
1
Remove cover plate
Cover Plate
Pry
2
Mark wall and drill holes
3/16 in
(5 mm)
3
Mount the wallbox adapter
2
1
4
Slide Pico paddle remote
onto wallbox adapter
6
Check mounting
Side View
2
Unscrew existing switch from wall
Remove the wallplate.
Remove the screws securing the
switch and pull it away from the wall
(do not disconnect wires).
3
Disconnect wires
5
Mount the wallbox adapter
Ground
(Green / Bare Copper)
Neutral connection
5
Attach wallplate
Adapter Plate
1.
2.
Wallplate
If wallplate removal is necessary, pull forcefully.
Adapter Plate
1.
2.
Wallplate
If wallplate removal is necessary, pull forcefully.
Tagged
Wire
Place tag to identify wire on
different color screw
Different Color Screw
Ground
(Green / Bare
Copper)
Neutral
connection
(D)
(D)
(B)
(C)
(A)
Cover plate (removable)
Adapter
Wiring Wizard
When using the wiring wizard QR code, please enter the
model number of the dimmer or switch with which the
remote is paired. For example: DVRF-6L
Correct Incorrect
Verify that Step 1
was completed
Wallplate
Pico
paddle
remote
Pico
paddle
remote
‘snap’
‘snap’