Technical Assistance Line if not resolved.
Wiring Information and Troubleshooting
This page provides general guidance for wiring your LUX 24VAC electronic thermostat.
For more detailed information please refer to the instructions that came with your
thermostat.
This page provides general guidance for wiring your Lux 24VAC digital thermostat. For
more detailed information please refer to the instructions that came with your thermostat.
Please make specific note regarding LOW VOLTAGE and LINE VOLTAGE directions. Do
not install LINE VOLTAGE wires to a LOW VOLTAGE control. Do no install a wire labeled
"C" or "TC" from the previous thermostat to any of our controls. Installation of a "C" wire
may cause damage to your system.
Do NOT wire by color of the wire, wire by the LETTER designation to which the wire was
attached on the previous control.
If there were no letter designations on your old thermostat, contact our Technical
Assistance Department for assistance.
Never connect a low voltage thermostat to line
voltage.
Two wires control a heat only
system.
Connect one wire to W and the other to RH.
Two wires control a cool only
system.
Connect one wire to RC and the other to Y.
Three wires for forced air heat
only system, where the
previous thermostat did not
have a clock or timer.
The previous RH or RC wire is the 24-volt
transformer wire. Connect it to RH. Leave jumper
connecting RH to RC. Connect the forced air heat
system to W, and the fan wire to G.
Three wires for a heat only,
forced water system that did
NOT have a clock or timer.
This system employ 3 wire zone valves. Please use
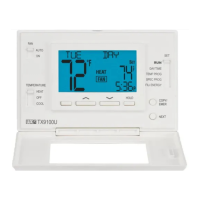
our TX500U, TX1500U, TX9100U, TX9600TS, or
TX9100E models for this heating system.
Three wires control a heat
only, forced water system that
DID have a clock or timer.
Tape off and do NOT install any clock or timer wire.
Often they are labeled C or TC. Install the
remaining two wires, one to RH and the other to W.
Four wires control a heat only
system, and two of the wires
operate clock or timer. The
other two wires operate the
heater.
Tape off and do NOT install any clock or timer wire.
Often they are labeled C or TC. Install the
remaining two wires, one to RH and the other to W.
The jumper connecting RH to RC may remain or be
removed.
Two wires control heating AND
cooling.
Currently no Lux controls are compatible with this
system.