4
With E
XIT you can go back to the previous menu, while FOCUS takes you to
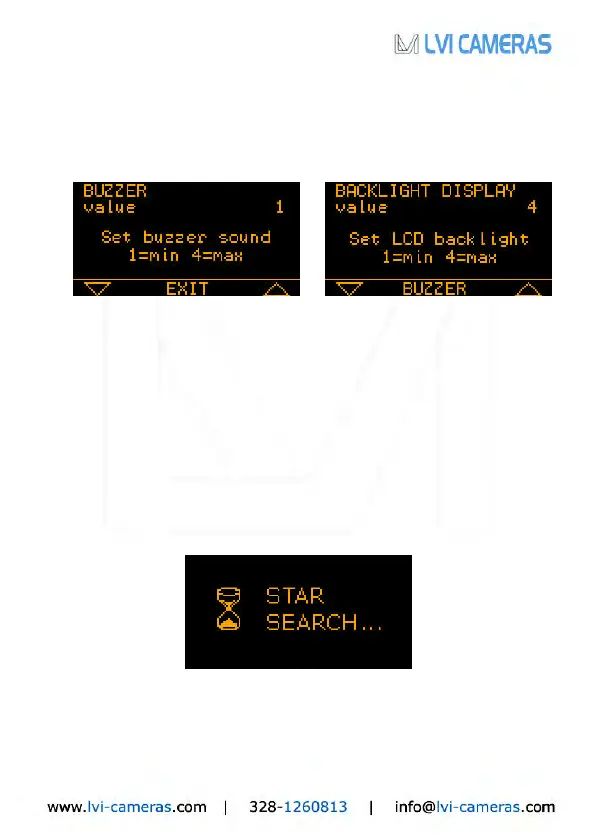
the next step (guide star focusing). OPTION enables to adjust the display and
keyboard backlight level and the buzzer volume.
The two basic settings menus are shown below: brightness (left) and buzzer
volume (right):
You can adjust both the brightness and the buzzer volume with the two
triangular keys on the control paddle: four levels are available, from 1 (minimum)
to 4 (maximum). EXIT takes you back to the basic settings screen.
Now let’s have a closer look at the focusing procedure.
Before mounting the camera onto the guide scope’s drawtube, you have first to
center the brightest star in the field of view which is closest to your imaging target
with a wide-field, low-power eyepiece; use then the special SmartEye eyepiece to
focus the guide scope and fine tune the position of the star chosen. This
eyepiece will deliver a perfectly focused and centered star in the camera’s FOV.
When you press on FOCUS, the SmartGuider scans the whole frame to look
for the previously selected guide star:
After a while (the actual duration of the search phase is not always the same),
the SmartGuider will inform you of the outcome with a simple message: “STAR
FOUND!” or “STAR NOT FOUND!”:
 Loading...