5
I
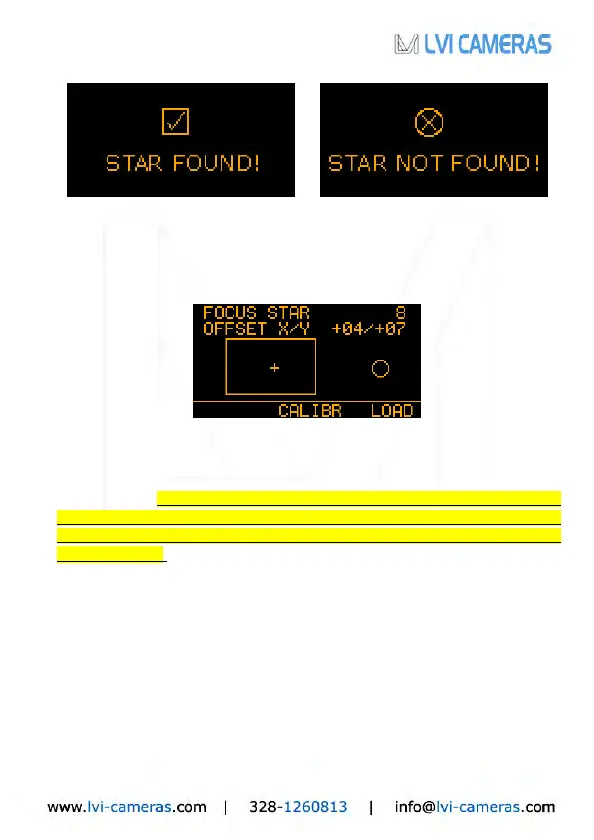
f the guide star was not found (upper right), the SmartGuider goes
automatically back to the MENU BASIC screen: in this case a brighter star has to
be chosen. If the star has been found (upper left), we can proceed to the
important focusing menu:
In this screen, the X and Y offsets (1 offset unit = 4 sensor pixels) denote the
position of the guide star relative to the detector center, and the small cross in the
rectangular box (see above) indicates the star’s approximate location in a
graphical form. I
f the star happens to be lying too close to the sensor’s edges
(Bounds: X OFFSET ±82, Y OFFSET ±46), you can try to cen
ter it by
CAREFULLY nudging the mount along the four directions
with the drive keypad
at guiding speed. If the star is thrown off the active area, it will be l
ost (STAR
LOST! message pops up) and you will have to start over with focusing.
Two focusing aids are available: the FOCUS STAR index and the circle on the
right-hand side of the screen: they both show the diameter of the star (in pixels)
on the detector in numerical and graphical form respectively. Therefore, the lower
the number, the better the focus: a properly focused star should be 3 to 8 pixels
wide according to the brightness and air turbulence.
Once the guide star has been correctly centered and focused, we can select
CALIBR to get to the calibration screen: press OK to start calibrating the mount.
 Loading...