23
Lighting the Side Burner or LPSGE
WA R N I N G
Never attempt to light
burner if odor of gas
is present. Lid must be
open/o when lighting.
Keep face and body as
far from unit as possible
when lighting. Always
wait at least 5 minutes
before attempting to re-
light a hot burner.
Before proceeding, make sure
you have completed a leak test.
This check should be performed
before each use of the side burn-
er or grill extender.
Follow these steps to light the
burners:
1) Open or remove lid complete-
ly. Do not attempt to light burn-
ers with the lid closed.
2) Check to ensure that all burn-
er control knobs are set to OFF.
Push control knob in and ensure
that the ignition is glowing. If
ignition is not glowing, proceed
with troubleshooting or match-
light the burner.
3) Turn on main gas supply.
Purge if needed (see page 9).
4) Push in and turn burner con-
trol knob to LITE. Hold knob in
for 5 seconds.
5) If burner does not light, turn
knob to OFF, wait 5 minutes to
allow gas to dissipate, and re-
peat step 4 above.
PREHEATING THE LPSGE
Before cooking, always preheat
the ProSear burner for best re-
sults. To preheat, light the burn-
er, set to HIGH and allow to pre-
heat until the burner glows red,
usually about 2-3 minutes.
DO NOT LEAVE THE UNIT
UNATTENDED DURING
THE PREHEAT CYCLE OR AT
ANY TIME WHILE IN USE.
DO NOT ALLOW UNIT TO
PREHEAT FOR PROLONGED
PERIODS OF TIME. OVER-
HEATING THE UNIT CAN
CAUSE DAMAGE TO THE
UNIT AND TO PERSONAL
PROPERTY.
MATCH LIGHTING
If burners will not light after sev-
eral attempts, the burners can be
match lit. If you’ve just attempt-
ed to light the burner with the
igniter, allow 5 minutes for any
accumulated gas to dissipate.
Make sure all knobs are in the
OFF position. Keep your face as
far away from the unit as pos-
sible. With the lid removed, pass
the alternate lighting rod with a
lit paper match installed to the
ports of the burner. Push and
turn the corresponding control
knob of the burner to LITE. If the
burner does not light in 4 sec-
onds, turn the knob o and wait
5 minutes before attempting
again.
LOW HEAT ADJUSTMENT
NOTE: ADJUSTMENT IS
FOR SIDE BURNERS ONLY.
PROSEAR BURNERS ARE
PRESET AT THE FACTORY
AND SHOULD NOT BE AD-
JUSTED.
The valves on the side burner
feature an adjustable low set-
ting. Due to uctuations in gas
pressure, heating value or gas
conversion, you may feel it nec-
essary to adjust gas ow in the
low position.
1) Light the burner.
2) Turn the control knob to the
lowest setting (all the way coun-
ter-clockwise).
3) Remove the knob.
4) While holding the valve shaft
with pliers, insert a thin at
tipped screwdriver into the shaft
and while viewing the burner,
adjust to a minimum stable
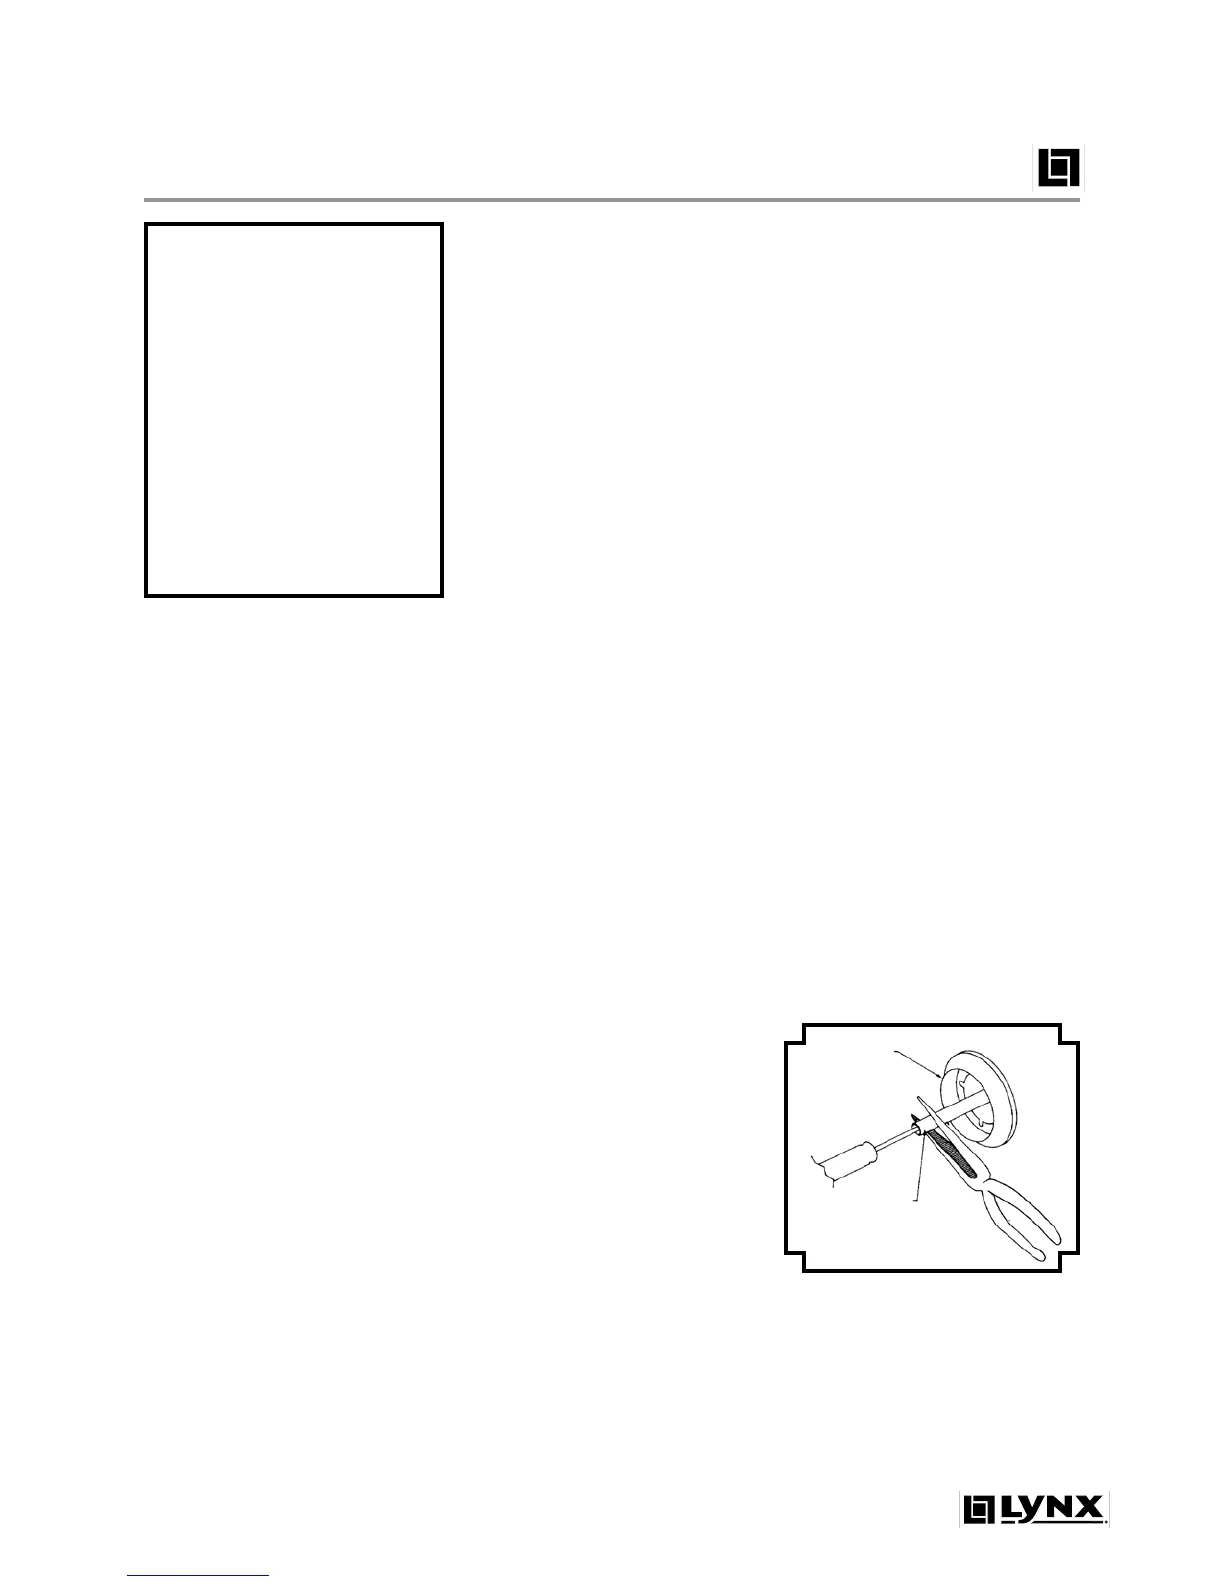
ame (see gure 23-1).
Figure 23-1
- Adjusting
side burner low heat setting.
knob
removed
valve
stem