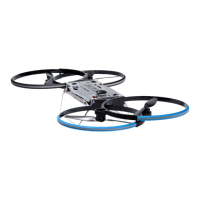
11
Install the Mission Planner software on your computer
and connect the Pixhawk via the USB cable. The Mission
Planner software can be found on the 3DR website or
via the following link:
http://ardupilot.com/downloads/?did=82
Mission Planner allows you to congure and tune the
ight controller and to program GPS waypoints of which
your Hoverbike Drone can then y. You can also down-
load and analyze logged data.
When you rst connect the Pixhawk to your computer,
your computer should install the drivers required. Once
the drivers are installed and the Pixhawk is initialized, it
should light up and the buzzer should tune.
To connect to your Hoverbike
Drone, go to the top left of
your screen, and with AUTO
selected in the drop down,
click ‘connect’ to connect
your Hoverbike Drone to the
computer.
Click the Initial Setup tab at
the top of the Mission Planner
page.
Select the Mandatory
Hardware tab down the
left hand side where you
should see Radio Calibra-
tion.
Calibrating your transmitter in Mission Planner
It is required that you calibrate your radio transmitter with the Pixhawk ight control-
ler so that the Pixhawk ight controller can learn all your radio’s control endpoints by
moving all stick and switches to their extreme positions. Also, refer to the Pixhawk manual
available at:
http://3drobotics.com/wp-content/uploads/2014/03/pixhawk-manual-rev7.pdf
Pixhawk:
Contents
System overview 4
In the box 5
Caring for Drone 6
You + Drone 7
Safety rst 8
First time setup 9
Batteries 12
Controls 12
Warning signals 14
First ight 15
Every ight 17
Flying modes 19
About Drone 20