9
FIRST TIME SETUP
In order to y your Hoverbike Drone for the rst time you will need to link and cali-
brate your radio transmitter to the drone. To do this you will need:
• Your chosen radio transmitter (Spektrum, Hitec, Futaba, etc.)
• A computer (laptop/pc) that can run the Mission Planner software (download from
the web at http://ardupilot.com/downloads/?did=82)
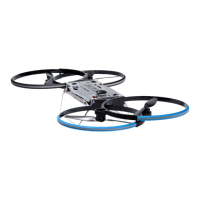
• Your Hoverbike drone of course!
You will also need to ensure your batteries are charged. If you are new to RC (radio
control) drones then you will probably need to purchase a battery charger. Please see
page 12 (‘Charging batteries’) in this document for more information.
Binding is the process in which your radio transmitter is paired with a corresponding
vehicle receiver so that a control link is made between the two. This needs to be done
before you are able to control your Hoverbike Drone. The Hoverbike Drone will be
shipped with an Orange RX receiver, ready to bind to your Spektrum radio transmitter.
If you don’t have a Spektrum radio transmitter, you will need to replace the Orange RX
receiver with the one that corresponds to your radio transmitter.
Connect the Pixhawk via
the USB cable to your
PC (this will power the
receiver). The receiver
should be blinking rapidly
showing that it is ready to
bind.
Binding your radio transmitter to Pixhawk with Orange
RX SBUS receiver
ALL INSTRUCTIONS HERE RELATE TO MODE 2 RADIO TRANSMITTER
Plug the bind plug in to the receiver’s bind/SBus channel
and the signal cable to one of the other channels (to
provide power to the the Orange RX receiver).
Receiver:
Binding your radio transmitter
Contents
System overview 4
In the box 5
Caring for Drone 6
You + Drone 7
Safety rst 8
First time setup 9
Batteries 12
Controls 12
Warning signals 14
First ight 15
Every ight 17
Flying modes 19
About Drone 20