EasyManua.ls Logo

MAAX Radia Round 137446 Series User Manual

MAAX Radia Round 137446 Series
20 pages
To Next Page IconTo Next Page
Page #1 background imageLoading...
Page #1 background image
INSTALLATION INSTRUCTIONS
GUIDE D’INSTALLATION
GUÍA DE INSTALACIÓN
FOR CORNER DOORS INSTALLATION
POUR INSTALLATION DES PORTES EN COIN
PARA LA INSTALACIÓN DE PUERTAS EN ESQUINA
SAVE THIS GUIDE FOR FUTURE REFERENCE.
CONSERVER POUR UN USAGE ULTÉRIEUR.
CONSERVE ESTE MANUAL COMO REFERENCIA.
Read all instructions carefully before proceeding.
Lire toutes les instructions attentivement avant de commencer
l’installation.
Leer detenidamente todas las instrucciones antes de comenzar
la instalación.
Serial number Numéro de série Número de Serie
IMPORTANT Record the serial number
IMPORTANT Noter le numéro de série
IMPORTANTE Registre el número de serie
137446
MODEL • MODÈLE • MODELO
Did you know you can buy MAAX replacement parts online for your product? Visit parts.maax.com for more information.
Saviez-vous que vous pouvez acheter en ligne des pièces de rechange MAAX pour votre produit? Visitez le parts.maax.com pour plus d’information.
¿Sabía que puede comprar en línea piezas de repuesto MAAX para su producto? Visite parts.maax.com para obtener más información.
Question and Answer IconNeed help?

Do you have a question about the MAAX Radia Round 137446 Series and is the answer not in the manual?

MAAX Radia Round 137446 Series Specifications

General IconGeneral
ShapeRound
SeriesRadia
Model Number137446
MaterialAcrylic
ColorWhite
Drain PlacementCenter
Weight110 lbs

Summary

Before You Begin Installation

Verify Measurements

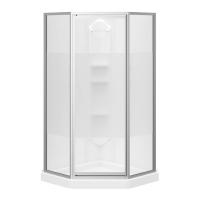
Check dimensions against the provided tables for accurate fit.

Step 1: Frame Assembly

Assemble Fixed Panels to Rails

Assemble fixed panels to top and bottom rails using screws.

Temporarily Insert Wall Profiles

Insert wall profiles onto frame sides without screwing them.

Step 2: Position Frame

Place Frame on Threshold

Place frame on shower base threshold, against walls, leveling and squaring.

Mark Wall Jamb Positions

Mark the position of wall jambs on the shower walls.

Remove Frame

Remove the frame from the shower for further adjustments.

Step 3: Secure Wall Jambs

Mark Wall Jamb Fastening Holes

Mark wall jamb fastening hole positions on shower walls after leveling.

Drill Holes and Apply Silicone

Drill holes at marked positions and apply silicone inside wall jambs.

Fasten Wall Jambs

Place wall jambs, fill holes with silicone, and fasten with screws.

Step 4: Install Frame

Insert Frame into Wall Jamb

Insert frame into one wall jamb, slightly bending to fit the other.

Step 5: Install Rollers

Install Top and Bottom Rollers

Install top and bottom rollers on the door, verifying opening first.

Verify Handle Orientation

Check handle orientation while installing rollers on the door.

Step 6: Hang Door

Clean Rails and Hang Door

Clean rails, lift and engage door on top rail.

Engage Bottom Sliders

Push bottom sliders to engage them in the bottom rail.

Step 7: Install Gaskets and Handles

Install Sealing Gaskets

Install sealing gaskets on fixed panel and door edges as shown.

Install Door Handles

Install the handles on the doors as indicated in the diagram.

Step 8: Adjust Doors

Verify Complete Door Closure

Open and close doors, verify complete closure without gaps.

Adjust Bumpers if Needed

Adjust door bumpers by loosening the screw if necessary.

Step 9: Final Fastening

Adjust Frame Position

Adjust frame position, ensure leveling and proper door operation.

Drill and Fasten Frame

Drill through frame using pre-drilled holes and fasten with screws.

Install Screw Covers

Install screw covers over screws on the wall jambs.

Step 10: Install Covers and Seal

Install Wall Jamb Covers

Install wall jamb covers on each side of the shower as shown.

Apply Silicone Sealant

Apply silicone sealant around the frame, bottom rail, and fixed panels.
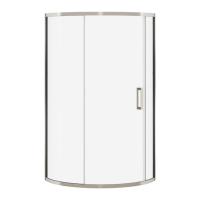
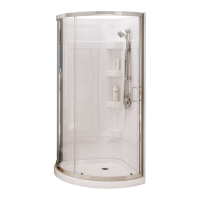
Limited Warranty - United States

Limited Warranty - Canada

Related product manuals