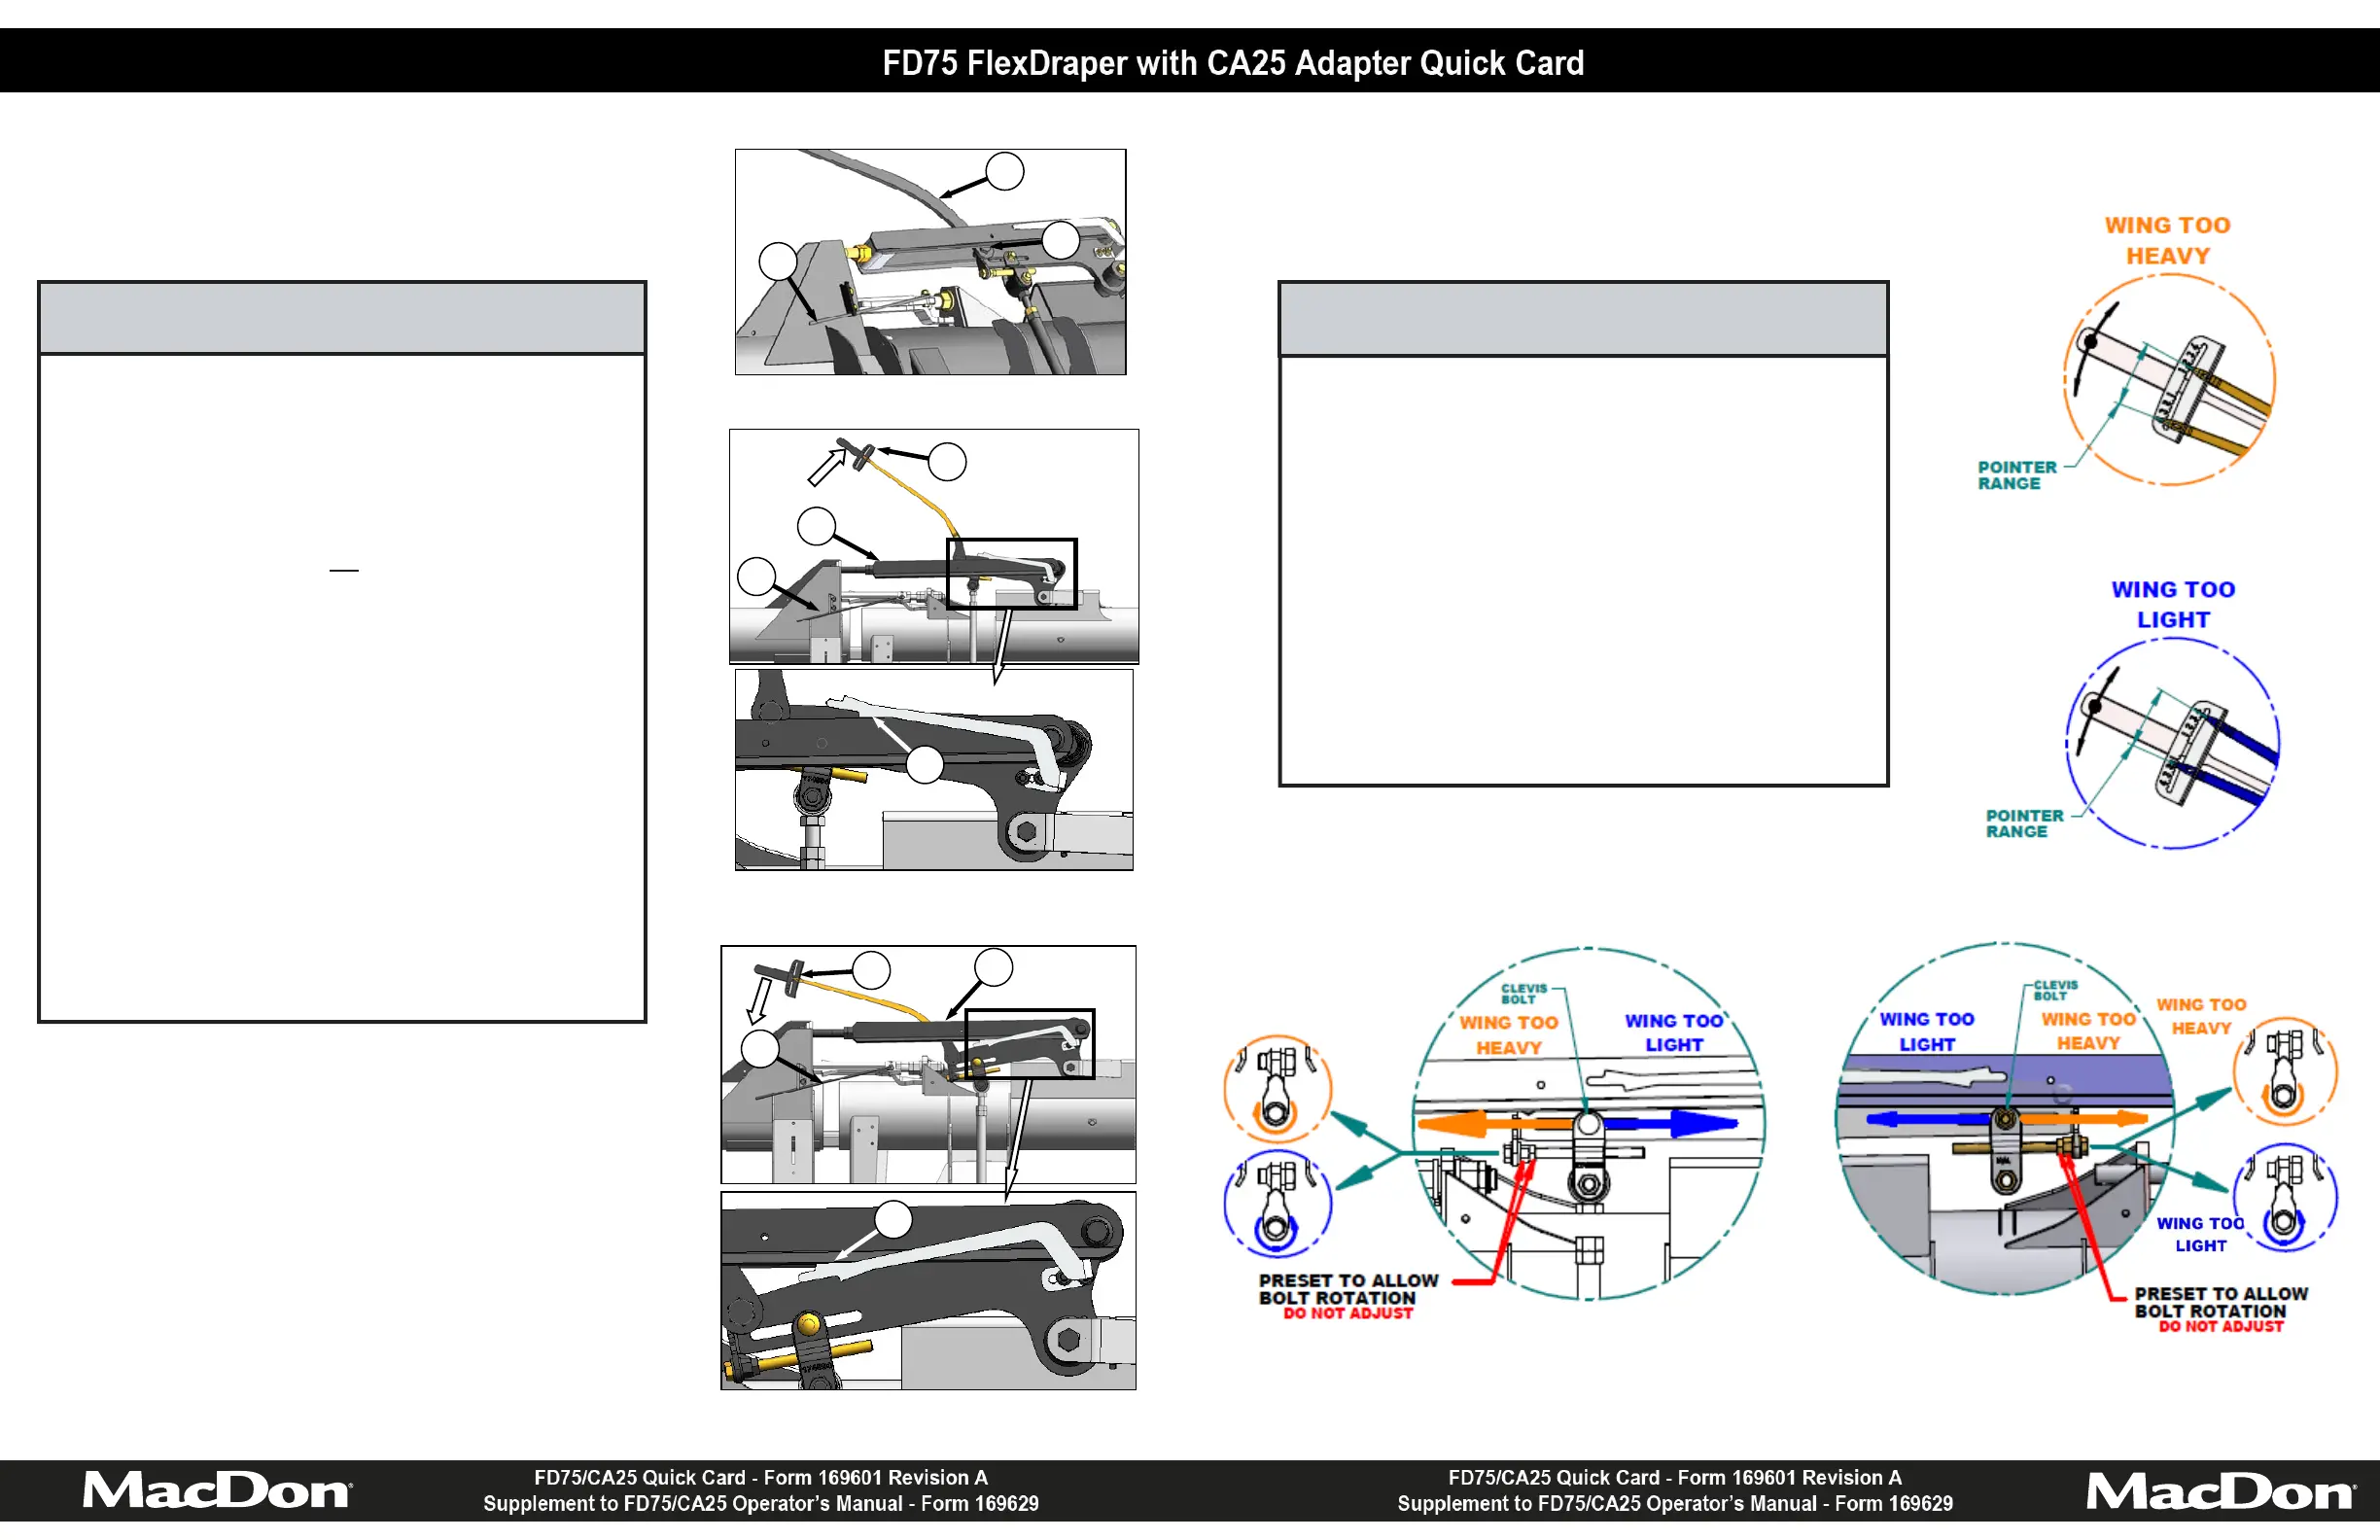
1. Use the readings taken in STEP 3, and the images on
this page to determine if the wing is too heavy or too
light.
2. Loosen the clevis bolt for the wing requiring adjustment.
3. Balance the wing according to the Wing Balance
Adjustment Detail image below.
4. Tighten the clevis bolt.
5. Repeat STEPS 3 and 4 (if necessary) for the opposite
wing.
6. Re-install poly linkage covers.
STEP 4: ADJUST WING BALANCE
Left Side Wing Balance Adjustment Detail
Right Side Wing Balance Adjustment Detail
1. Remove poly linkage covers.
2. Place torque wrench (A) on bolt (G).
3. Move spring handle (H) to lower position so that lock
link drops into lower slot.
NOTE
If lock link does not
engage lower slot,
move with torque wrench (A) until lock
link moves into slot.
4. Move wing upward with torque wrench (A) until pointer
lower alignment tab (J) lines up with upper edge of top
link (K). Note indicator reading (L) on wrench.
5. Move wing downward with torque wrench (A) until
pointer upper alignment tab (M) lines up with the lower
edge of the top link (K). Note indicator reading (L) on
the wrench.
6. If the difference between the readings is 1 or less, the
wing is balanced and no further adjustment is required.
7. If the difference between the readings is more than 1,
the wing is imbalanced. Record the readings and
proceed to STEP 4.
STEP 3: CHECK WING BALANCE
WING UP
J
L
K
H
M
WING DOWN
L
K
H
H
A
G