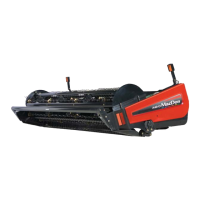
Do you have a question about the MacDon FlexDraper FD75 and is the answer not in the manual?
Provides essential information on the FD75 FlexDraper® Header and CA25 Combine Adapter, and how to use the manual.
Details MacDon's warranty policy, including conditions that will void the warranty and customer responsibilities.
Explains how to use the manual, including the Table of Contents, Index, and where to find additional information.
Explains the meaning and importance of the safety alert symbol used in the manual and on the machine.
Defines signal words (DANGER, WARNING, CAUTION, IMPORTANT, NOTE) used to convey hazard information.
Covers general safety precautions, including personal protective equipment (PPE) and shop practices.
Outlines crucial safety procedures to follow when performing maintenance or servicing on the machine.
Details safety precautions for inspecting and servicing hydraulic systems and handling high-pressure fluid.
Explains the purpose, placement, and maintenance of safety signs and decals on the machine.
Provides step-by-step instructions for correctly applying safety decals to the machine.
Illustrates the locations of various safety decals installed on the header components.
Explains the meaning and importance of specific safety sign decals related to machine operation.
Defines terms, abbreviations, and acronyms used throughout the manual for clarity.
Details technical specifications for the FD75 FlexDraper® Header and CA25 Combine Adapter.
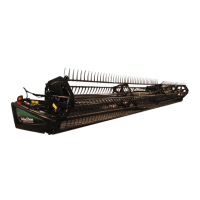
Identifies and labels the main components of the FD75 FlexDraper® Header.
Identifies and labels the key components of the CA25 Combine Adapter.
Outlines the operator's responsibilities for safe and proper operation of the header.
Details essential safety precautions to follow during header operation.
Explains the function and importance of header safety props for preventing unexpected lowering.
Describes how to engage and disengage reel safety props for safe work around the raised reel.
Provides instructions for safely disengaging reel safety props after completing work.
Covers procedures for opening, closing, removing, and installing header endshields.
Step-by-step guide to open header endshields for access to internal components.
Instructions for correctly closing header endshields to protect components from debris.
Details the process of removing an endshield for specific servicing tasks.
Guides on how to reinstall an endshield after servicing for safe operation.
Explains how to adjust endshields to compensate for temperature changes and ensure proper fit.
Describes how to remove and install plastic covers protecting the header wing balance mechanism.
Instructions for removing plastic linkage covers from the header frame.
Instructions for installing plastic linkage covers onto the header frame.
Lists essential tasks to perform each day before starting the machine for safe operation.
Advises attentiveness during the initial use of the header for proper break-in.
Details the correct procedures for shutting down the header to prevent injuries and damage.
Identifies the primary header functions controlled from inside the combine cab.
Provides information on adjustments, attachments, and optimizing the header for various conditions.
Mentions available attachments from MacDon Dealer to optimize header performance.
Refers to a table for recommended settings and optimizing header performance.
Covers adjustments to optimize header performance for different crops and conditions.
Explains how to adjust cutting height for different conditions, including off-ground and on-ground cutting.
Details how to adjust stabilizer wheels for proper header balance between float springs and wheels.
Details the procedure for adjusting stabilizer wheels for proper header balance.
Explains how the header float system reduces ground pressure and follows contours.
Explains how to lock and unlock the header float system for transport and detachment.
Describes operating the header in flex mode (unlocked wings) or rigid mode (locked wings).
Explains how to unlock the wings for independent movement to follow ground contours.
Explains how to lock the wings for operation as a rigid cutterbar.
Details how to check and adjust wing balance for proper ground contour following.
Explains how to adjust wing balance to ensure equal pressure for proper ground following.
Explains how header angle is adjusted to accommodate different crop conditions and soil types.
Guides on adjusting header angle from the combine cab using switches and indicators.
Discusses the impact of reel speed on crop movement and potential issues.
Details optional reel drive sprockets for special crop conditions and ordering information.
Explains how ground speed affects crop cutting and material distribution.
Details the importance of correct draper speed for efficient crop flow.
Explains how to adjust side draper speed to suit crops and conditions.
Provides information on knife speed and recommended settings for optimal cutting.
Outlines the procedure for comparing measured rpm with the knife speed chart.
Explains how crop type and condition determine the operating height of the reel.
Discusses the critical factor of reel fore-aft position for achieving best results in adverse conditions.
Explains how to reposition fore-aft cylinders on reel arms to move the reel farther aft.
Explains how reel tine pitch affects crop delivery and reel operation.
Explains the function of crop dividers and how to remove/install them.
Instructions for correctly removing crop dividers with the latch option.
Instructions for correctly removing crop dividers without the latch option.
Instructions for correctly installing crop dividers with the latch option.
Instructions for correctly installing crop dividers without the latch option.
Describes recommended use and installation/removal procedures for crop divider rods.
Instructions for removing crop divider rods and placing them in storage.
Instructions for installing crop divider rods.
Explains how to level the header and check its levelness.
Provides steps to clear a plugged cutterbar, including safety precautions.
Details the procedure for unplugging the adapter.
Describes the function and components of the optional upper cross auger.
Explains how to remove beater bars from the upper cross auger.
Explains how to install beater bars onto the upper cross auger.
Covers procedures for safely transporting the header on the combine or when towing.
Provides safety precautions and steps for transporting the header on the combine.
Describes header towing procedures and refers to the towing vehicle's manual.
Explains how to convert the header from transport to field position.
Details the process of removing the transport tow-bar.
Explains how to properly store the tow-bar on the header.
Provides steps to move front wheels to the field position for operation.
Details the process of moving rear wheels to the field position.
Explains how to convert the header from field to transport position for towing.
Steps to move front wheels to the transport position.
Details the process of moving rear wheels to the transport position.
Explains how to connect the tow-bar sections for proper attachment.
Provides a general overview of the AHHC system and its components.
Describes how the AHHC sensors function as variable resistors to send height signals.
Provides step-by-step instructions for replacing the AHHC sensor.
Lists required voltage ranges for AHHC sensors for different combine models.
Details how to manually check the AHHC sensor's output voltage range from the combine cab.
Explains how to set voltage limits to establish the AHHC sensor's operating range.
Instructions for making the AHHC system compatible with specific Case IH combine models.
Guides on how to engage the AHHC system on Case IH 2300 combines.
Details the ground calibration process for the AHHC system.
Explains how sensitivity adjustment controls the AHHC system's reaction to ground height changes.
Instructions for making AHHC system compatible with Case IH Midrange series combines.
Guides on setting initial configuration options for the AHHC system.
Details how to verify output voltage from AHHC sensors for compatibility.
Explains the calibration procedure for the AHHC system.
Guides on configuring up to two AHHC header height presets.
Instructions for AHHC compatibility with Case IH 7, 8, or 9 series combines.
Details how to verify output voltage from AHHC sensors for Case IH 8010 combine.
Explains how to set header controls on Case IH 8010 combines.
Calibration procedure for AHHC system with software versions below 28.00.
Calibration procedure for AHHC system with software versions above 28.00.
Guides on configuring up to two AHHC header height presets.
Instructions for AHHC compatibility with Challenger® 6 and 7 Series combines.
Verifies output voltage from AHHC sensors for Challenger® combines.
Guides on setting initial configuration options for AHHC on Challenger® 6 Series.
Details the calibration procedure for the AHHC system.
Explains how to adjust header height using the control console.
Describes how to adjust the speed at which the header rises or falls.
Explains how sensitivity adjustment affects AHHC system's reaction speed.
Instructions for AHHC compatibility with CLAAS 500 Series combines.
Details the calibration procedure for the AHHC system on CLAAS 500 Series.
Explains how to set cutting heights for the AHHC system.
Guides on configuring preset cutting heights for the AHHC system.
Explains how to manually set cutting height using the AHHC system.
Describes how sensitivity adjustment affects AHHC system's reaction speed.
Explains how to set reel speed manually or automatically.
Instructions for AHHC compatibility with CLAAS 600 and 700 Series combines.
Details the calibration procedure for the AHHC system.
Explains how to program cutting heights for the AHHC system.
Describes how sensitivity adjustment affects AHHC system's reaction speed.
Explains how to set reel speed manually or automatically.
Instructions for AHHC compatibility with Gleaner® R62/R72 combines.
Lists required system components for the AHHC system.
Details the calibration procedure for the AHHC system.
Describes how sensitivity adjustment affects AHHC system's reaction speed.
Instructions for AHHC compatibility with Gleaner® R65/R66/R75/R76 and non-S9 S Series combines.
Verifies output voltage from AHHC sensors for Gleaner® combines.
Guides on setting initial configuration options for AHHC.
Details the calibration procedure for the AHHC system.
Explains how turning off the accumulator improves AHHC performance.
Describes how to adjust the speed at which the header rises or falls.
Explains how ground pressure settings determine header height.
Describes how sensitivity adjustment affects AHHC system's reaction speed.
Explains how errors appear on the combine's EIP.
Instructions for AHHC compatibility with Gleaner® S9 Series combines.
Guides on configuring initial options for the AHHC system.
Explains how to configure the header's reel speed settings.
Explains how to engage and adjust the auto header height control (AHHC) system.
Provides guidance on fine-tuning AHHC settings for optimal performance in the field.
Instructions for AHHC compatibility with John Deere 50 Series combines.
Verifies output voltage from AHHC sensors for John Deere 50 Series combines.
Details the calibration procedure for the auto header height sensor.
Explains how sensitivity adjustment affects AHHC system's reaction speed.
Explains how to adjust the restrictor valve opening for lift cylinder flow.
Provides steps to engage and adjust the auto header height control (AHHC) system.
Instructions for AHHC compatibility with John Deere 60 Series combines.
Verifies output voltage from AHHC sensors for John Deere 60 Series combines.
Details the calibration procedure for the AHHC system.
Explains how turning off the accumulator improves AHHC performance.
Guides on setting preset header heights for the AHHC system.
Explains how sensitivity adjustment affects AHHC system's reaction speed.
Explains how to adjust the restrictor valve opening for lift cylinder flow.
Instructions for AHHC compatibility with John Deere S7 Series combines.
Guides on setting initial configuration options for the AHHC system.
Verifies output voltage from AHHC sensors for John Deere S7 Series combines.
Details feeder house calibration, which must be done before header calibration.
Details the calibration procedure for the AHHC system.
Explains how sensitivity adjustment affects AHHC system's reaction speed.
Describes how to adjust the speed at which the header rises or falls.
Guides on configuring preset cutting heights for the AHHC system.
Instructions for AHHC compatibility with New Holland CR/CX Series combines (2014 and earlier).
Verifies output voltage from AHHC sensors for New Holland CX/CR Series combines.
Guides on setting initial configuration options for AHHC on New Holland CR Series.
Details the calibration procedure for the AHHC system.
Explains how to configure both preset cutting heights for the AHHC system.
Explains how to set the maximum work height for the AHHC system.
Details configuration of reel fore-aft, header tilt, and header type for AHHC system.
Instructions for AHHC compatibility with New Holland CR Series combines (2015 and later).
Guides on setting initial configuration options for AHHC on New Holland CR Series.
Verifies output voltage from AHHC sensors for New Holland CR Series combines.
Outlines recommended adapter setup guidelines for specific combine models and crop types.
Explains how flighting extensions improve feeding in certain crops and installation procedures.
Describes stripper bar kits for improving feeding in certain crops like rice.
Explains how auger speed is determined and available optional sprockets.
Provides instructions for attaching a header to Case IH combines.
Step-by-step guide for attaching the header to the Case IH combine.
Details the procedure for safely detaching the header from the Case IH combine.
Provides instructions for attaching a header to Challenger®, Gleaner®, or Massey Ferguson® combines.
Step-by-step guide for attaching the header to Challenger®, Gleaner®, or Massey Ferguson® combines.
Details the procedure for safely detaching the header from these combine models.
Provides instructions for attaching a header to John Deere combines.
Step-by-step guide for attaching the header to the John Deere combine.
Details the procedure for safely detaching the header from the John Deere combine.
Provides instructions for attaching a header to CLAAS combines.
Step-by-step guide for attaching the header to the CLAAS combine.
Details the procedure for safely detaching the header from the CLAAS combine.
Provides instructions for attaching a header to New Holland CR/CX combines.
Step-by-step guide for attaching the header to the New Holland CR/CX combine.
Details the procedure for safely detaching the header from the New Holland CR/CX combine.
Observes all safety precautions before beginning service on the machine.
Provides specifications for typical maintenance tasks.
Details the installation procedure for all typical sealed bearings.
Highlights the importance of regular maintenance for machine longevity and performance.
Organizes maintenance requirements by service intervals and provides a record log.
Procedures to inspect and service the header at the beginning of each operating season.
Steps to ensure the header is ready for the next harvest by preventing corrosion and wear.
Provides guidance on checking hydraulic hoses and lines for leaks and damage.
Details periodic lubrication requirements for header components.
Lists lubrication service intervals based on operating hours.
Lubrication requirements for components every 10 hours or daily.
Lubrication requirements for components every 25 hours.
Lubrication requirements for components every 50 hours.
Lubrication requirements for components every 100 hours.
Covers maintenance for auger drive components, including chain tension and sprocket alignment.
Explains how to adjust auger to pan clearance for optimal crop feeding.
Details how to inspect auger drive chain tension.
Provides steps to adjust the auger drive chain tension.
Instructions for removing the auger drive chain.
Information on the cutterbar, including knife and guard maintenance.
Instructions for replacing worn or damaged knife sections.
Details the procedure for removing the cutterbar knife for replacement.
Information on inspecting and replacing knifehead bearings, seals, and greasing intervals.
Instructions for removing the knifehead bearing.
Instructions for installing a new knifehead bearing.
Explains how to replace a worn or damaged cutterbar knife.
Covers daily inspections and adjustments for knife guards alignment.
Provides instructions on how to straighten bent knife guards.
Recommends replacement procedures for pointed guards.
Instructions for replacing center guards, noting differences for double-knife headers.
Describes stub guards for cutting tough crops and their installation.
Instructions for replacing stub guards.
Procedure to measure clearance between hold-downs and knife sections on stub guards.
Instructions for adjusting hold-downs on stub guards.
Explains the function of knifehead shields and their installation.
Guides on how to install the knifehead shield.
Information on the knife drive system, including the drive box and belts.
Details the function of the knife drive box and checks for mounting bolts.
Check the torque on the knife drive box mounting bolts.
Recommended procedure for removing the knife drive box for repair.
Recommended procedure for removing the knife drive box pulley.
Recommended installation procedure for the knife drive box pulley.
Guides on how to install the knife drive box.
Covers procedures for removing and installing untimed knife drive belts.
Instructions for removing untimed knife drive belts.
Instructions for installing untimed knife drive belts.
Provides instructions on how to tension the knife drive belt.
Covers maintenance for auger components, including clearance and chain tension.
Explains how to adjust auger to pan clearance for optimal crop feeding.
Details how to inspect auger drive chain tension.
Provides steps to adjust the auger drive chain tension.
Instructions for removing the auger drive chain.
Covers maintenance for the adapter feed draper, including replacement and tensioning.
Instructions for replacing a torn, cracked, or missing slat draper.
Explains how to check and adjust feed draper tension.
Covers maintenance for the adapter feed draper drive roller bearing.
Instructions for removing the adapter feed draper drive roller bearing.
Guides on how to install a new bearing assembly into the drive roller.
Details how to install a drive roller on the deck.
Covers removing and installing the side draper drive roller.
Instructions for removing the side draper drive roller.
Guides on how to replace the bearing on a drive roller.
Details how to install a drive roller on the deck.
Covers maintenance for draper rollers, including bearing inspection.
Check for damaged draper roller bearings using an infrared thermometer.
Covers removing and replacing the feed draper idler roller.
Instructions for removing the feed draper idler roller.
Guides on how to replace the idler roller bearing.
Details how to install the idler roller after repair or replacement.
Explains how to adjust deck height to set the draper seal.
Provides instructions on how to adjust side draper tension.
Explains how to adjust side draper tracking by aligning drive and idler rollers.
Covers reel maintenance, including clearance, frown, centering, and tine replacement.
Explains how to measure and adjust reel clearance to the cutterbar.
Provides methods to measure reel clearance to the cutterbar.
Details how to adjust reel clearance to prevent finger contact with the cutterbar.
Explains the factory-set frown shape of the reel and how to adjust it.
Explains how to adjust reel frown by repositioning reel tine tubes.
Provides steps to center the reel on the header to avoid contact with endsheets.
Explains how reel tine pitch affects crop delivery.
Covers removing and installing steel and plastic reel tines.
Instructions for removing steel tines from the reel.
Guides on installing new steel tines onto the reel tube.
Instructions for removing plastic reel fingers.
Guides on installing new plastic reel fingers.
Covers removing and installing tine tube bushings for reel repair.
Instructions for removing bushing halves from reel discs.
Instructions for removing cam end bushings from the reel.
Guides on installing new bushings for reel repair.
Instructions for installing cam end bushings.
Covers checking and replacing reel endshields and supports.
Instructions for replacing reel endshields.
Explains how to replace damaged reel endshield supports.
Covers maintenance for the reel drive system, including cover and chain.
Instructions for removing and installing the reel drive cover.
Explains how to loosen and tighten the reel drive chain.
Instructions for loosening the reel drive chain to access components.
Provides instructions on how to tighten the reel drive chain.
Explains how to replace the reel drive sprocket.
Instructions for removing the reel drive sprocket.
Guides on how to install the reel drive sprocket.
Explains how to replace the drive chain on double-reel headers.
Instructions for replacing the reel speed sensor.
Instructions for replacing AGCO reel speed sensors.
Instructions for replacing John Deere reel speed sensors.
Instructions for replacing CLAAS 400 Series reel speed sensors.
Instructions for replacing CLAAS 500/700 Series reel speed sensors.
Covers checks and maintenance for the transport system.
Details how to check and torque transport wheel bolts.
Explains how to check and tighten axle bolts for safe operation.
Ensures proper tire performance and wear by checking tire pressure.
Information on available adapter options.
Allows operation on steep hillsides by overfilling the hydraulic reservoir.
Details available reel options and conversion kits.
Decreases time to change fore-aft cylinder position for better crop disturbance.
Steel fingers attach to tine tubes to clear material in heavy crops.
Allows conversion from a six-bat reel to a nine-bat reel.
Steel shields attach to reel ends to clear material in heavy crops.
Provides shorter braces for moving reel farther back for specific crop applications.
Kits for five- and six-bat reels designed to support high reel loads.
Information on cutterbar components like wearplates and knifehead shields.
Wearplates recommended for cutting on the ground in adhering soil conditions.
Shields attach to endsheets to reduce knifehead opening and prevent crop accumulation.
Stub guards for cutting tough crops, including top guides and adjuster shoes.
Allows installation of vertically oriented knives onto header ends.
Information on header options and attachments.
Kits that attach to endsheets for quick removal and storage of divider cones.
Helps stabilize the header in field conditions to prevent bouncing and uneven cutting.
System to convert header into transport mode for slow-speed towing.
Details kits for repairing auger dents and improving feed.
Kit to repair dents near the finger/guide area of the feed auger.
Flighting extension kit to improve feeding in certain crops like rice.
Metal deflectors attach to endsheets to prevent material falling through gaps.
Wide metal deflectors attach to endsheets to prevent material falling through gaps.
Offer additional wear protection for draper cleats in dry or hot conditions.
Encloses transition area and includes rubber flaps to close off areas between adapter and header.
Attach to crop dividers to divide tall and tangled rice crops.
Improve feeding in certain crops like rice; not recommended for cereal crops.
Attaches to backtube to improve crop feeding into the header center.
Diagnoses and provides solutions for crop loss issues at the cutterbar.
Addresses problems related to cutting action and knife components.
Diagnoses and provides solutions for issues with reel material delivery.
Troubleshoots problems related to header lift, draper speed, and material flow.
Provides torque values for various bolts, cap screws, and hydraulic fittings.
Details torque values for SAE Grade 5 and Grade 5 Free Spinning Nut bolts.
Provides torque values for metric bolts, including those in cast aluminum.
Lists standard torque values for flare-type hydraulic fittings.
Provides standard torque values for adjustable O-ring boss hydraulic fittings.
Lists standard torque values for non-adjustable O-ring boss hydraulic fittings.
Provides standard torque values for O-ring face seal hydraulic fittings.
Lists standard torque values for tapered pipe thread fittings.
Provides a chart for converting between SI (metric) and US customary units.
Refers to specific instructions for unloading, assembly, and setup procedures.
| Model | FD75 |
|---|---|
| Header Type | FlexDraper |
| Header Drive | Hydraulic |
| Knife Drive | Dual knife drive |
| Reel Diameter | 42" |
| Compatibility | Compatible with most combine brands |
| Reel Type | Pickup Reel |
| Crop Type | Various crops including soybeans, wheat, canola, and specialty crops |
| Flexibility | Yes, flexible cutterbar |
