214323 396 Revision B
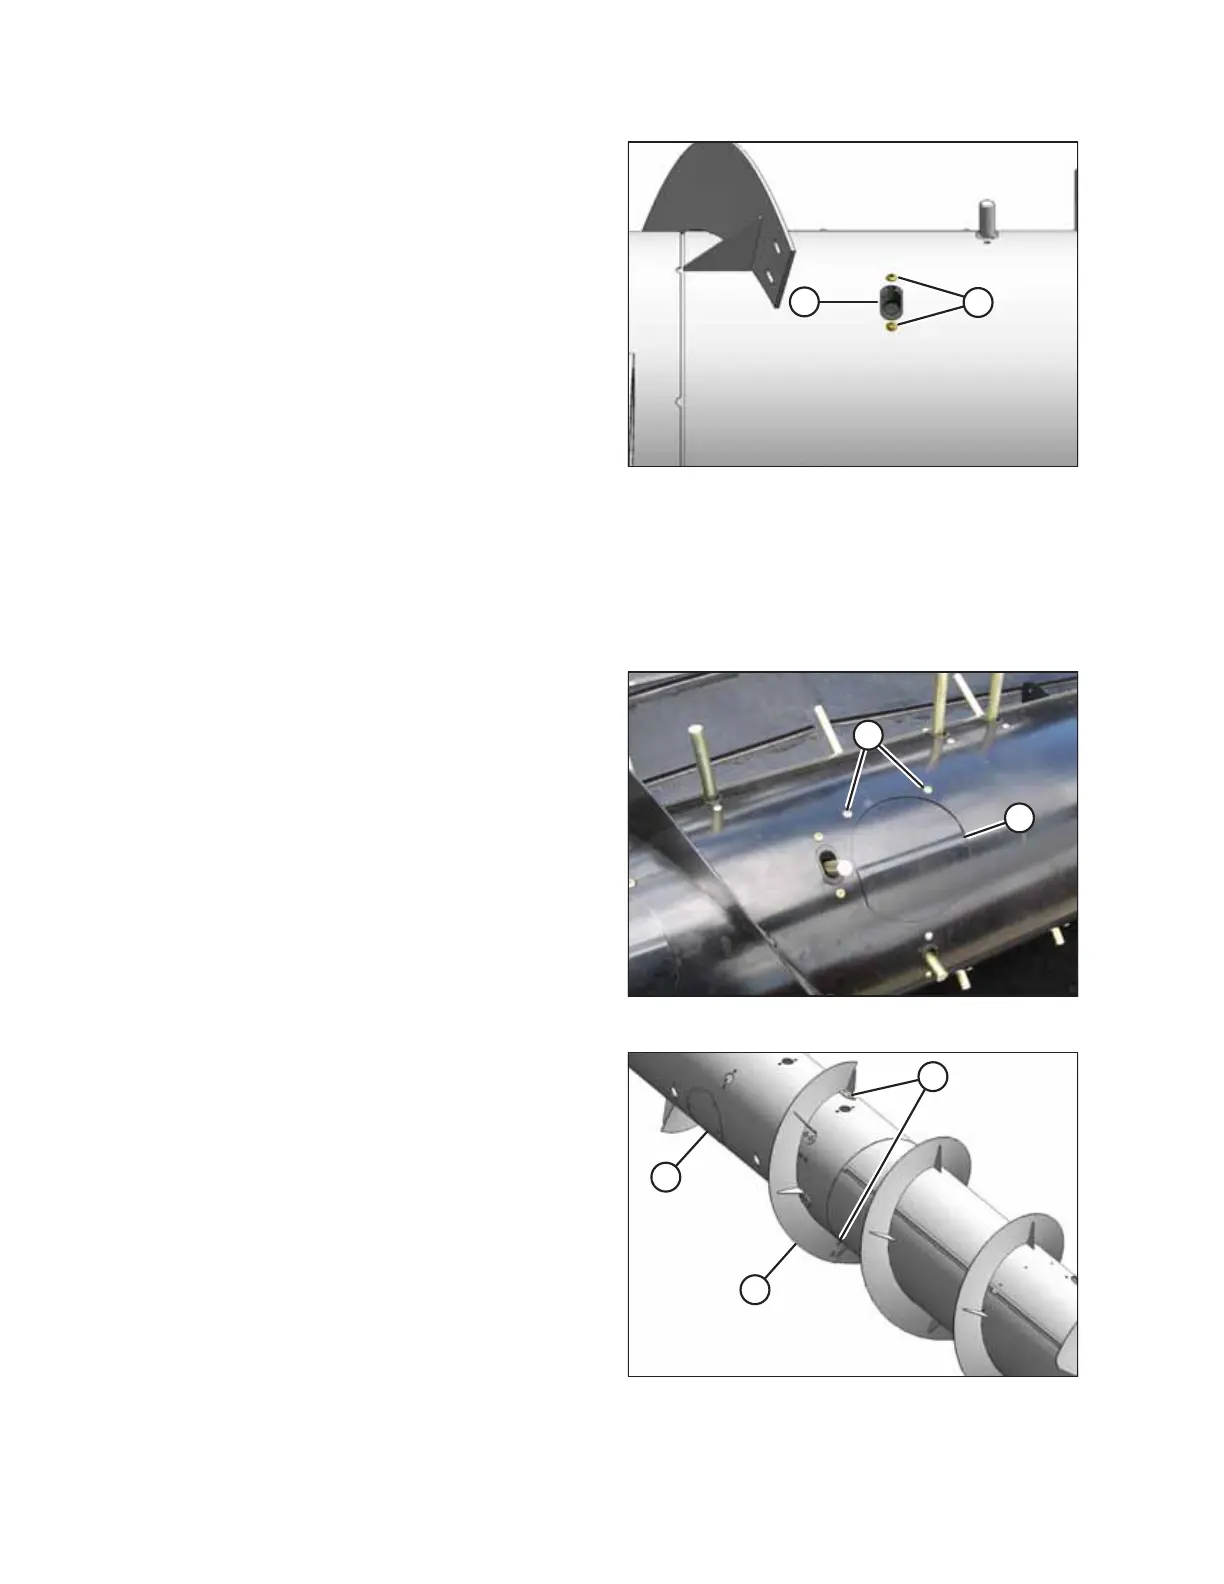
Figure 6.92: Auger
2. Position plastic guide (B) from inside the auger and secure
with screws (A). Coat screws with Loctite
®
#243 (or
equivalent) and torque to 8.5 Nm (75 lbf·in).
3. Install the replacement tine. Refer to Installing Feed Auger
Tines, page 394.
6.7.7 Flighting Extensions
Flighting extensions may allow better feeding of crop in green/wet straw conditions.
Removing Flighting Extensions
Figure 6.93: Auger
1. Remove screws (A) and remove access cover (B).
Figure 6.94: Auger Flighting Extensions
2. Remove five bolts (B), washers, and nuts securing flighting
extension (C) to the auger.
3. Remove flighting extension (C).
4. Repeat for opposite flighting extension.
MAINTENANCE AND SERVICING