214323 193 Revision B
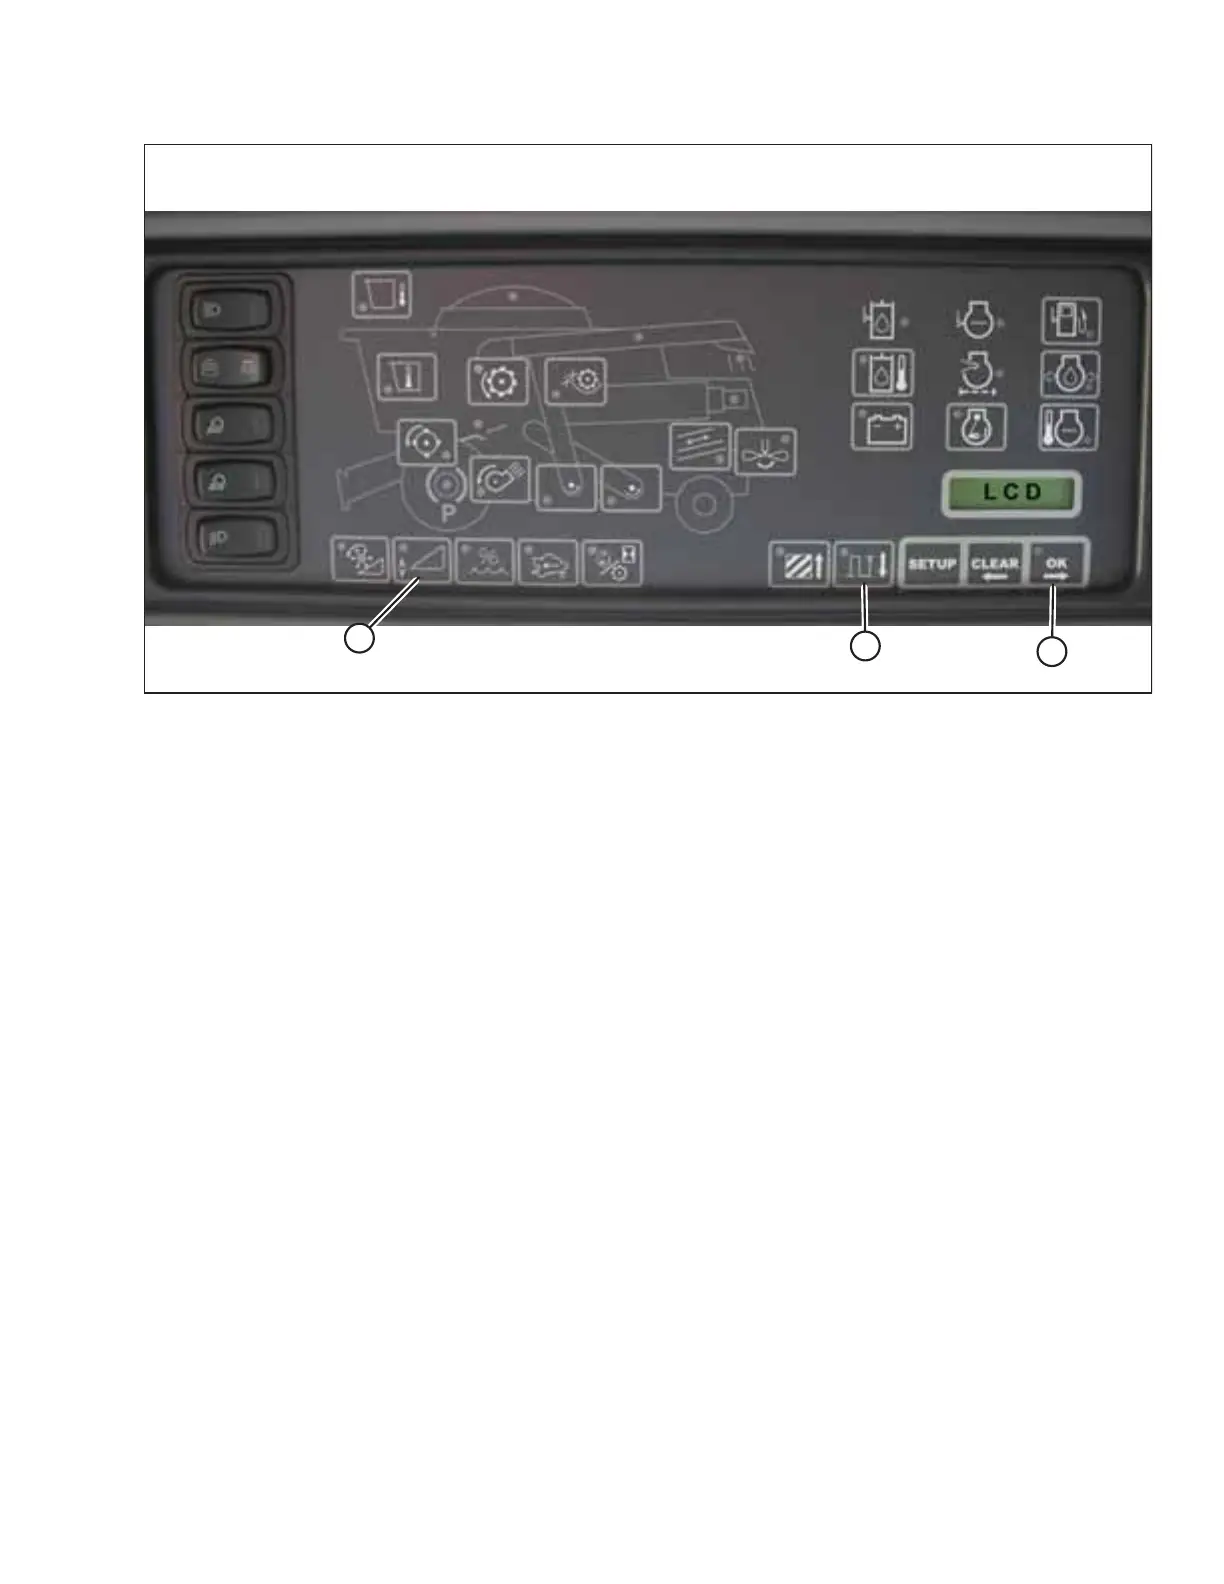
Figure 4.131: Combine Heads-Up Display
4. Ensure that the header float is unlocked.
5. Press and hold button (A) on the heads-up display for 3 seconds to enter diagnostic mode.
6. Scroll down using button (B) until LEFT is displayed on the LCD screen.
7. Press OK button (C). The number indicated on the LCD screen is the voltage reading from the AHHC sensor. Fully raise
and then fully lower the header to see the full range of voltage readings.
8. If the sensor voltage is not within the low and high limits, or if the range between the low and high limits is insufficient
(refer to Table 4.1, page 134), then adjust the voltage limits. Refer to 4.4.2 Adjusting Voltage Limits, page 137 for
instructions.
4.12.2 Engaging Auto Header Height Control – Gleaner
®
R65/R66/R75/R76 and
S Series
Set these initial configuration options on your Gleaner
®
R65/R66/R75/R76 or non-S9 S Series combine when setting up the
auto header height control (AHHC) system.
NOTE:
Refer to 4.13 Gleaner
®
S9 Series Combines, page 202 for information specific to Gleaner
®
S9 Series combines.
NOTE:
Changes may have been made to the combine controls or the display since this document was published. Refer to the
combine operator’s manual for the most up-to-date information.
AUTO HEADER HEIGHT CONTROL