Owner’s Manual
5
Owner’s Manual
MP-20TWS Features
First Things First
Before diving right in, let’s take a quick look
at three VERY IMPORTANT things to address.
First and foremost: there is a plastic tab located
between the earbuds and charging case. Remove
the tab and throw it away. It is no longer needed.
The MP-20TWS wireless earbuds were designed
with sound and comfort in mind. That said,
for the best results, there are L/R markings
on the inside of the earbuds to determine each side.
Warning: The earbuds can be loud
and could cause permanent hearing
damage. Even intermediate levels
may be painfully loud. BE CAREFUL!
Always turn the volume all the way down before
putting on the earbuds. Then turn it up slowly
as you listen carefully.
Thanks for listening... now back to our regularly
scheduled programming!
. USB-C Power Connection
The earbuds are charged via the included case.
The earbuds may either be tucked away inside the case
or elsewhere. Your earholes, perhaps?! Then the case
is charged regardless of the location of the earbuds.
Here’s how: connect the USB-C side
of the detachable power cord (included
in the packaging) to the case and plug the other end
of the power cord into a standard USB-A connector.
A fully charged set of MP-20TWS earbuds
can last for up to 3+ hours of continuous usage...
and it takes only -2 hours for a completely dead
set to become fully charged once again! Furthermore,
the case adds an additional 40+ hours of playtime...
and who doesn’t like more playtime?!
Please note that the earbuds should not
be used while charging. If that seems
implausible, one could argue that one
earbud could be charging while the other
is used for listening. Again, please do not do this.
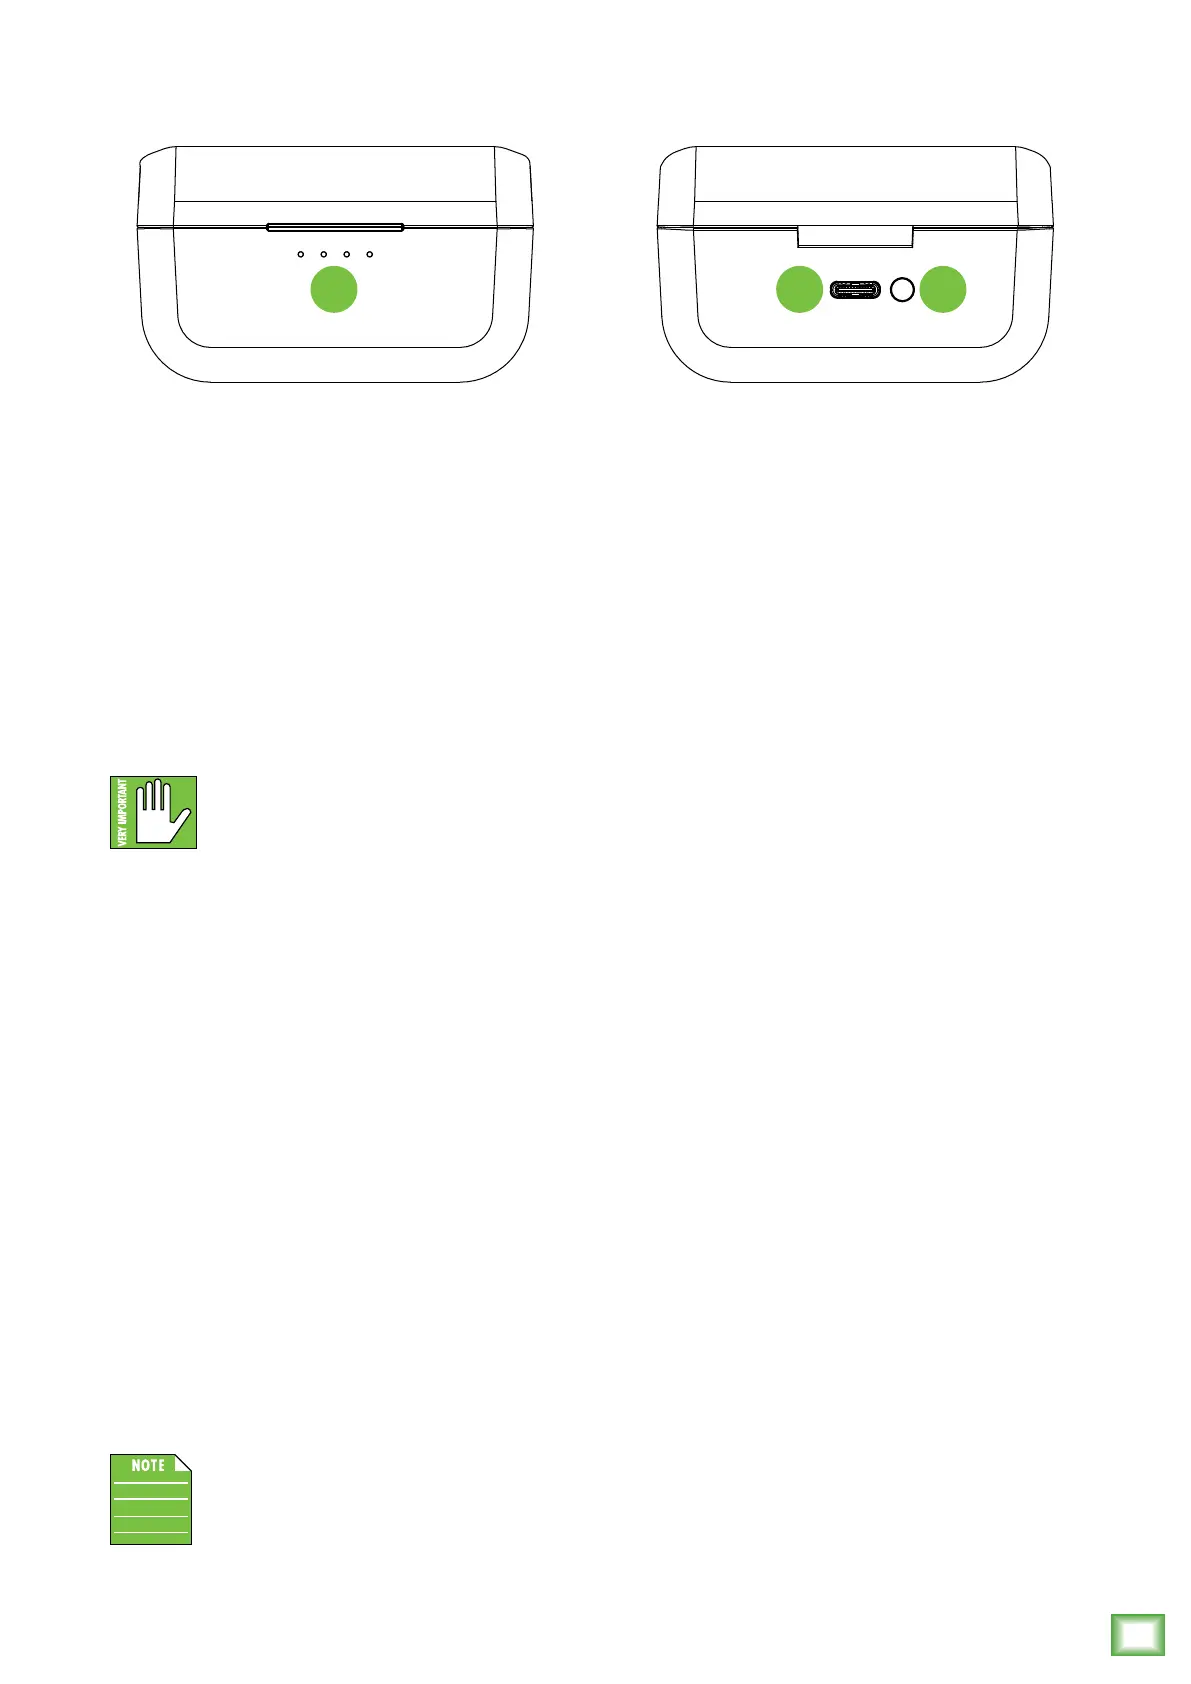
2. Case Switch and 3. Status LEDs
The momentary case switch is pushed in order
to view battery level, place the earbuds into pairing
mode and reset the earbuds back to factory default.
The LEDs indicate the status of the earbuds, including
power, battery level and more.
• Battery Status: Pushing the case switch will
display the status of the batteries:
1 Push – Displays the earbuds battery status.
The earbuds’ battery levels are displayed
by the LEDs:
LED slowly flashing – Lef earbud is charging.
LED solid green – Lef earbud is fully charged.
LED 4 slowly flashing – Right earbud is charging.
LED 4 solid green – Right earbud is fully charged.
The earbuds inside the case will illuminate solid
red to indicate that they are being charged...
for crimes they did not commit! They’re also
having their batteries (re)charged.
2 Pushes – Displays the case battery status. The
case’s battery level is displayed by the four LEDs:
LED – 0-25% charge
2 LEDs – 26-50% charge
3 LEDs – 5-75% charge
4 LEDs – 76-00% charge
If the case is at, say, 40% charged, then two
of the case LEDs will illuminate green and the
other two will flash green to indicate charging.
When fully charged, all four LEDs will illuminate
green.
3 Pushes – Turns the LEDs o. They will also turn
o automatically afer three seconds of inactivity.
• Bluetooth Pairing Mode: With the case open,
press and hold the case button down for three
seconds (with the earbuds in the case). All four
LEDs will flash quickly, then the earbuds will enter
pairing mode.
CASE FRONT CASE REAR
1 23