Accessing the Navigation Screen
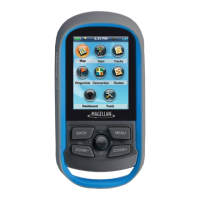
1. Press and hold the DO
WN button until the
popup menu is displayed.
2.
Use the DO
WN button to highlight
“Navigation”.
3.
Press ENTER.
Changing the Map Scale
1. While viewing the Navigation screen use
the U
P (zoom out) and DO
WN (zoom in)
buttons to change the map scale.
Navigation Mode
Starting Navigation
1. Press and hold the DO
WN button until the
popup menu is displayed.
2.
Highlight “Settings” and press ENTER.
3. Highlight “GPS Settings” and press
ENTER.
4. Highlight “Navigation” and press ENTER.
5. Highlight “Begin Navigation” and press
ENTER.
6. Select the destination. “Activity Start”
(if a current activity is recording) or “Last
Location” (the last location marked).
Stopping Navigation
1. Press and hold the DO
WN button until the
popup menu is displayed.
2.
Highlight “Settings” and press ENTER.
3.
Highlight “GPS Settings” and press
ENTER.
4. Highlight “Navigation” and press ENTER.
5.
Highlight “End Navigation” and press
ENTER.
6. You can select “Begin Navigation” or
press and hold the DO
WN button to select
viewing the Activity or Navigation screen.
Marking Location
Whenever the Switch has GPS satellite signal
it can capture your current location. This
location can be “marked” and stored in Switch
until it is turned off.
Marked locations will be denoted on the
Navigation screen by a numbered flag. The
first location marked will be denoted with the
number 1, the next 2 and so on.
There are two ways of marking your location.
Mark
ing Location using the BACK button
1. Press and hold the BA
CK button.
2.
A popup will be displayed indicating
that the location has been saved and the
latitude and longitude of the location.
Mark
ing Location using Settings
1. Press and hold the DO
WN button until the
popup menu is displayed.
2.
Highlight “Settings” and press ENTER.
3. Highlight “GPS Settings” and press
ENTER.
4. Highlight “Save Location” and press
ENTER.
5.
A popup will be displayed indicating
that the location has been saved and the
latitude and longitude of the location.

 Loading...

