EasyManua.ls Logo

Magic Chef 3510KRA - User Manual

Magic Chef 3510KRA
15 pages
Print Icon
To Next Page IconTo Next Page
Loading...
GL]'Se
Instructions for your Electric Range
IIII
CONTENTS
SAFETY INSTRUCTIONS ................... I-3
FEATURES ............................... 4-5
Clock and timer ............................ 4
Continuous cleaning oven .................... 5
USING YOUR COOKTOP ................... 6-7
Surface elements .......................... 6
Drip bowls ................................ 6
Control knobs ............................. 6
Signal fights............................... 6
Cooking tips .............................. 6
Cookware ................................ 7
Heat settings .............................. 7
USING YOUR OVEN ...................... 8-10
Oven characteristics ........................ 8
Oven controls ............................. 8
Oven indicator light ......................... 8
Oven racks ............................... 8
Preheating ................................ 8
Hew to bake or roast ........................ 9
Common baking problem chart ................ 9
How to broil .............................. 10
MAINTENANCE ............................ 11
Oven light ............................... 11
Storage drawer ........................... 11
Oven door ............................... 11
Leveling legs ............................. ! 1
Fuses (Canada only) ....................... 11
CARE AND CLEANING CHART ............... 12
SERVICE .................................. 13
Troubleshooting ........................... I3
WARRANTY ............................... 14
Question and Answer IconNeed help?

Do you have a question about the Magic Chef 3510KRA and is the answer not in the manual?

Summary

Safety Instructions

Proper Installation

Ensures the appliance is correctly installed and grounded by a qualified technician.

Storage Above Range

Guidelines for storing items above the range to prevent hazards.

User Servicing

Advises against self-servicing and recommends referring to a qualified technician.

Storage In, On or Near Appliance

Prohibits storing flammable materials near the appliance.

Do Not Use Water on Grease Fires

Instructions on how to extinguish grease fires safely.

Surface Cooking Units: Use Proper Pan Size

Importance of using appropriately sized cookware for surface elements.

Never Leave Surface Units Unattended at High Heat Settings

Warning against leaving surface units unattended on high heat.

Make Sure Drip Bowls Are in Place

Emphasizes the importance of drip bowls to protect internal components.

Utensil Handles Should Be Turned Inward

Safety advice on positioning utensil handles to prevent burns and fires.

Do Not Soak Removable Heating Elements

Warning against immersing heating elements in water to prevent damage.

Ovens: Use Care When Opening Door

Advice to allow hot air/steam to escape before opening the oven door.

Keep Oven Vent Ducts Unobstructed

Importance of keeping oven vents clear for proper air circulation.

Anti-Tip Bracket

Instructions on securing the appliance with an anti-tip device.

Circuit Breaker or Fuse

Guidance on locating, marking, and replacing fuses or breakers.

Self-Cleaning Oven

Precautions for using the self-cleaning oven, including not cleaning the gasket.

Smoothtop Cooktop

Safety precautions for cleaning the cooktop and warnings about broken cooktops.

Do Not Leave Children Alone

Warnings about leaving children unattended near the appliance.

In Case of Fire

Step-by-step instructions for handling fires involving the appliance.

Features

Electronic Time-of-Day Clock and Timer

Instructions for setting the clock and timer for Design 1 and Design 2.

Continuous Cleaning Oven (if equipped)

Explains what a continuous cleaning oven is and how it works.

Factors Affecting Length of Cleaning Time

Details factors influencing the cleaning duration in a continuous cleaning oven.

Manually Cleaning Heavy Spillovers

Instructions for manually cleaning heavy spillovers in a continuous cleaning oven.

Do Not Use Any Type of Oven Cleaner

Prohibits the use of specific cleaning agents on the continuous cleaning oven finish.

Using Your Cooktop

Cooktop

Describes the two types of cooktops (upswept and flat) and how to lift them.

Surface Elements

Information on removing, replacing, and caring for surface elements.

Drip Bowls

Guidance on cleaning and maintaining drip bowls.

Control Knobs

Explanation of how to use the cooktop control knobs.

Signal Lights

Describes the function of signal lights indicating surface element usage.

Cooking Tips

General tips for efficient cooking on the cooktop.

Cookware

Advice on selecting appropriate cookware for optimal cooking performance.

Canning

Guidelines for using the appliance for canning.

Suggested Heat Settings

A chart providing recommended heat settings for various cooking tasks.

Using Your Oven

Oven Characteristics

Notes that cooking times and temperatures may differ from previous ranges.

Oven Controls

Explanation of the thermostat and selector knobs for oven operation.

Oven Indicator Light

Describes the function of the oven indicator light.

Oven Racks

Instructions on removing, replacing, and positioning oven racks.

Preheating

Guidance on when and how to preheat the oven for baking and broiling.

How to Bake or Roast

Step-by-step instructions for baking and roasting food in the oven.

Common Baking Problems and Why They Happen

A troubleshooting guide for common baking issues and their causes.

How to Broil

Detailed instructions on how to use the broil function.

Broiling Chart

A chart providing rack positions, doneness, and total times for broiling various foods.

Maintenance

Light Replacement

Instructions for safely replacing the oven light bulb.

Storage Drawer

Guidance on removing and replacing the storage drawer.

Oven Door

Warnings and instructions related to the oven door, including removal.

Leveling Legs

Information on adjusting leveling legs to ensure the range is stable.

Fuses (Canadian Ranges Only)

Instructions for checking and replacing fuses, specific to Canadian models.

Care and Cleaning

Broiler Pan & Insert

Instructions for cleaning the broiler pan and insert.

Baked Enamel Parts

Cleaning instructions for baked enamel parts like side panels and oven door.

Control Knobs

How to clean control knobs, including their removal.

Glass Components

Cleaning instructions for glass components like the oven window.

Metal Finishes

Cleaning guidelines for metal finishes on the appliance.

Oven Racks

Instructions for cleaning oven racks.

Plastic Finishes

Cleaning advice for plastic parts on the appliance.

Porcelain Enamel Surfaces

Specific cleaning instructions for porcelain enamel surfaces like the cooktop and oven interior.

Silicone Rubber Door Gasket

How to clean the silicone rubber door gasket.

Surface & Oven Elements

Information on cleaning surface and oven elements.

Service

Part or All of Your Range Does Not Operate

Troubleshooting steps for when the range or parts of it do not operate.

Surface Elements Fail to Turn On or Heat Food Properly

Steps to diagnose and resolve issues with surface elements not heating.

Food Not Baking Satisfactorily

Troubleshooting tips for common baking problems and unsatisfactory results.

Oven Does Not Operate

Checks to perform if the oven is not operating.

Oven Light Does Not Work

Troubleshooting steps for a non-functional oven light.

How to Obtain Service

Guidance on contacting dealers or Maycor for service and parts.

Warranty Information

Full One-Year Warranty

Details of the one-year warranty coverage for parts and labor.

Limited 5 Year Warranty

Specific warranty for electric heating elements and smoothtop surfaces.

How to Obtain Service

Instructions on how to get repair or replacement service under warranty.

What Is Not Covered by These Warranties

Lists conditions and damages excluded from warranty coverage.

Additional Help

Information on contacting Maycor Customer Relations for further assistance.

Overview

This document is a user manual for an electric range, providing comprehensive instructions for its operation, maintenance, and troubleshooting.

Function Description:

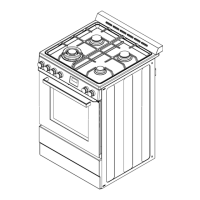
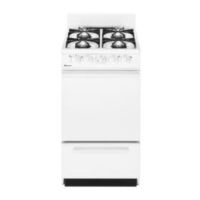
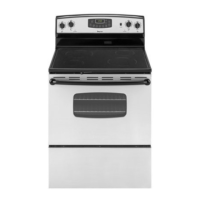
The electric range is a cooking appliance designed for both cooktop and oven use. It features surface elements for stovetop cooking and an oven for baking, roasting, and broiling. Some models may include a continuous cleaning oven feature. The appliance is equipped with an electronic time-of-day clock and timer, which can be either Design 1 or Design 2, offering timekeeping and countdown functions. The cooktop can be either "upswept" or "flat" and can be lifted for access to the area underneath. The oven has multiple rack positions to accommodate various cooking needs.

Important Technical Specifications:

  • Power Supply: The range operates on electric power. Users are advised to check if the range plug is disconnected, if house fuses are blown, or if circuit breakers are tripped in case of non-operation.
  • Oven Light: Uses a 40-watt appliance bulb.
  • Fuses (Canadian Ranges Only): Equipped with seven (7) type "P" fuses, located on the back wall of the range, accessible by removing the storage drawer.
  • Voltage: Broil times may need to be increased if the range is installed on a 208-volt circuit.
  • Cooktop Elements: Coil-type surface elements, self-cleaning, and should not be immersed in water.
  • Oven Temperature: The thermostat knob allows selection and maintenance of oven temperature. An indent at 350°F may be present on some models.
  • Oven Rack Positions: Five rack positions are available, with specific recommendations for different cooking tasks (e.g., Rack 1 for broiling thin foods, Rack 3 for one-rack baking/roasting, Rack 5 for roasting turkey).
  • Anti-Tip Bracket: The appliance must be secured by a properly installed anti-tip device to prevent tipping. One of the rear leveling legs should be engaged in the bracket slot.

Usage Features:

  • Cooktop Operation:
    • Surface Elements: Control knobs provide an infinite choice of heat settings from LOW to HIGH. Push in and turn the knob to the desired setting. Signal lights indicate when a surface element is on.
    • Cookware: Flat-bottomed cookware is recommended for efficient heating. Utensils should cover the surface element and not extend more than 2 inches from it. Oversized cookware or woks with round metal rings are not recommended as they can trap heat and damage the cooktop.
    • Cooking Tips: Use proper pan size. Reduce heat setting once food begins cooking to avoid excessive spattering or burning. Never leave food unattended. Place pan on the element before turning it on. Never let a pan boil dry.
    • Canning: Use HIGH setting until water boils or pressure is reached, then reduce to the lowest heat setting that maintains the boil or pressure. Avoid prolonged HIGH setting or incorrect canning utensils to prevent damage.
  • Oven Operation:
    • Setting the Oven: Turn the thermostat knob to the desired temperature and the selector knob to BAKE or BROIL.
    • Preheating: Necessary for baking (10-15 minutes). Not necessary for roasting. For broiling, preheat the broil element for 3-5 minutes if darker browning is desired or for thin steaks.
    • Rack Placement: Position racks when the oven is cool. For two-rack baking, stagger pans (e.g., rack positions 2 and 4, or 2 and 5). Allow 2 inches between utensil edge and oven sides. Never place pans directly on the oven bottom.
    • Broiling: Use the broiler pan and insert, ensuring grease can drain freely. Do not cover the insert with aluminum foil. Keep the oven door opened to the broil "STOP" position (about 4 inches). Turn meat once halfway through cooking.
    • Oven Door: Use care when opening to let hot air or steam escape. Do not place excessive weight on an open oven door.
  • Electronic Clock and Timer:
    • Design 1: Set clock by sliding switch to CLOCK, then pressing and holding HOUR and MIN buttons. Set minute timer by sliding switch to TIMER, then pressing MIN or HOUR buttons. Cancel by sliding switch to CLOCK.
    • Design 2: Set clock by pressing and holding CLOCK SET button while turning MINUTE TIMER knob. Set minute timer by turning MINUTE TIMER knob to the right. Cancel by turning MINUTE TIMER knob to the left until 00:00 appears.

Maintenance Features:

  • General Cleaning:
    • Cooktop: Clean drip bowls after each use with soap and water. Remove stubborn stains with baking soda paste and plastic scouring pad. Do not use abrasive cleaning agents or aluminum foil.
    • Baked Enamel (Side panels, Backguard, Oven door, Storage drawer): Wipe spills immediately with a dry paper towel or cloth. When cool, wash with soap and water. Do not use abrasive or harsh cleaning liquids/powders or oven cleaners.
    • Control Knobs: Remove gently, wash with mild detergent and water. Do not use abrasive cleaning agents.
    • Glass (Backguard, Oven window): Wash with soap and water. Remove stubborn soil with baking soda paste. Do not use abrasive materials.
    • Metal Finishes (Aluminum, Chrome, Stainless Steel): Wash with soap and water. Remove stubborn soil with baking soda paste. Do not use oven cleaners, abrasive, or caustic agents.
    • Oven Racks: Clean with soapy water, cleansing powder, or soap-filled scouring pad.
    • Plastic Finishes (Door handle, Trim, Knobs, End caps): Wipe up fat, grease, or acid immediately. When cool, clean with soap and water. Do not use oven cleaner, powder/liquid cleansers, abrasive, or caustic cleaning agents.
    • Porcelain Enamel (Cooktop, Oven interior): Clean with soap and water when cool. Wipe up acid/sugar spillovers immediately. Never wipe a warm/hot enamel surface with a damp cloth. Do not use abrasive or caustic cleaning agents on exterior finish. Use commercial oven cleaner on porcelain-lined oven ONLY.
    • Silicone Rubber Door Gasket: Wash with soap. Do not remove.
    • Surface & Oven Elements: Self-cleaning. Do not spray oven cleaner on elements.
  • Continuous Cleaning Oven (if equipped):
    • The oven has a dark gray, stippled, porous texture that absorbs spatters. Cleaning occurs automatically when the oven is "on."
    • Manually clean heavy spillovers with a nylon brush or plastic pad and clear water. Do not use paper towels, cloths, sponges, oven cleaner, powdered cleansers, soap, detergent, paste, abrasive materials, steel wool, sharp instruments, or scrapers.
    • Brittle crusts can be loosened by gently tapping with a wooden or plastic utensil.
  • Oven Light Replacement: Disconnect power to the range. Ensure the bulb is cool. Remove with a dry potholder and replace with a 40-watt appliance bulb.
  • Storage Drawer: Located at the bottom of the range for storing metal and glass cookware. Do not store plastic, paperware, food, or flammable material. Remove by pulling to first stop, lifting front, pulling to second stop, grasping sides, and lifting out. Replace by fitting glides onto rails and pushing in.
  • Oven Door Removal/Replacement: Open door to the "stop" position (about 4 inches), grasp with both hands, and lift evenly until it clears hinge arms. To replace, align slots with hinge arms and slide down until seated. Hinge arms are spring-mounted; avoid placing hands/fingers between hinges and the front oven frame.
  • Leveling Legs: Located at each corner of the base. Turn legs to level the range for proper baking.
  • Fuses (Canadian Ranges Only): Check for blown fuses (indicated by a gap in the fuse strip or a darkened window) and replace with the same type and amperage "P" fuse.

Magic Chef 3510KRA Specifications

General IconGeneral
BrandMagic Chef
Model3510KRA
CategoryRanges
LanguageEnglish

Related product manuals